One of the places that I love the most in this world is my grandparents lakehouse. Situated dead center of the middle of nowhere, it is a place that is quiet and peaceful, where the stars shine brighter than anywhere else and life is more simple. There is no TV, little to no cell reception and no heat or AC other than what nature provides. (our one nod to modern technology is high speed internet, which makes it more possible for my cousins and I to come out there and keep our jobs.) Our major activities at the lake are skiing, sailing, swimming. But in between all of these ‘lake’ activities, we play tons of board games, a few games of baseball and washers.
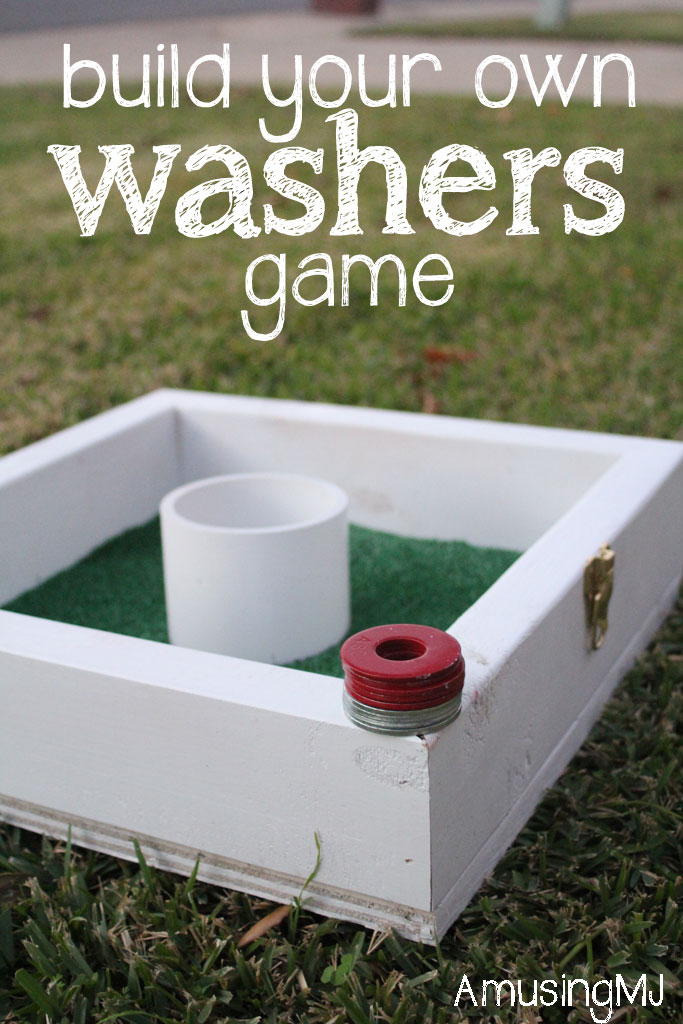
If you haven’t played washers, it is a game played with two boxes and a PVC pipe in the center. They are set 21′ apart and the rules are simple (a full set can be found here): toss the washer into the other box. You get 3 points for each one in the PVC cup and one for each one in the box. You play against another person or team and at the end of each round (both teams throw 4 washers) only one team gets points. If both teams score equally, they cancel each other out.
It is a great backyard game or tailgating game and is VERY simple to make. Here’s what you need:
- 1- 2″x4″ at 12′ long (or 2 @ 6′)
- 2- 17″x17″ squares of plywood
- finishing nails
- woodglue
- 2 latches
- 4″ round PVC pipe (in the plumbing section at your hardware store)
- grass carpeting (optional)
- rope for the handle
- glue–I used E6000
To make this project you are essentially making two halves of a box that will fit together to make one full box. Your finished project will look a lot like this:
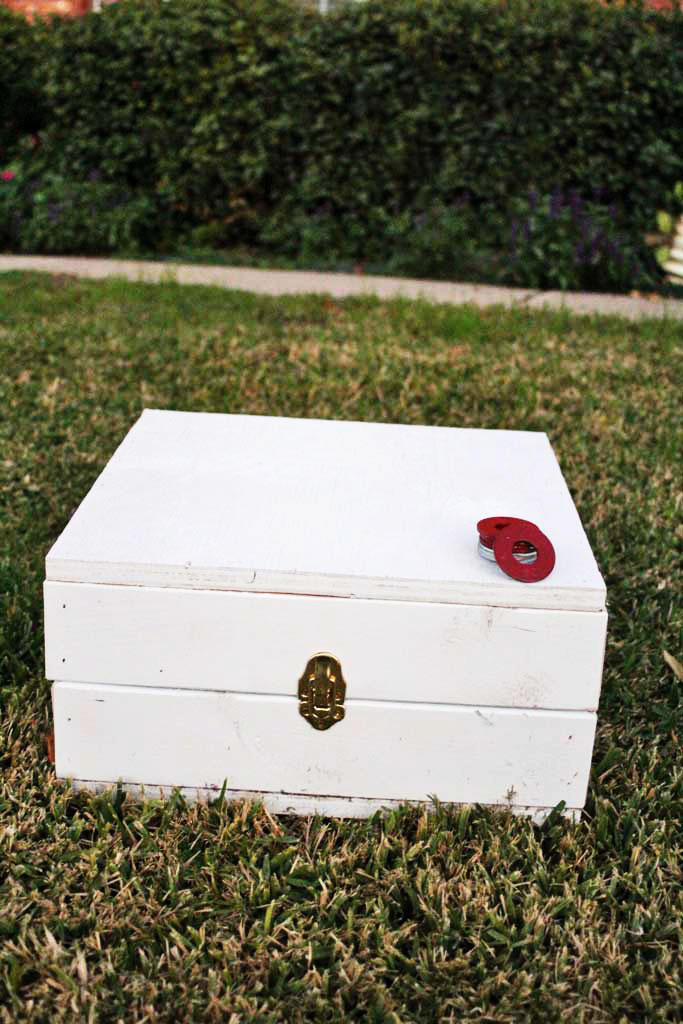

Sidenote: I realized I forgot to add the rope handles to this box to make it easier to carry, so I’ll be going back later to add those… but you guys are smart cookies I think you can just pretend they are there.
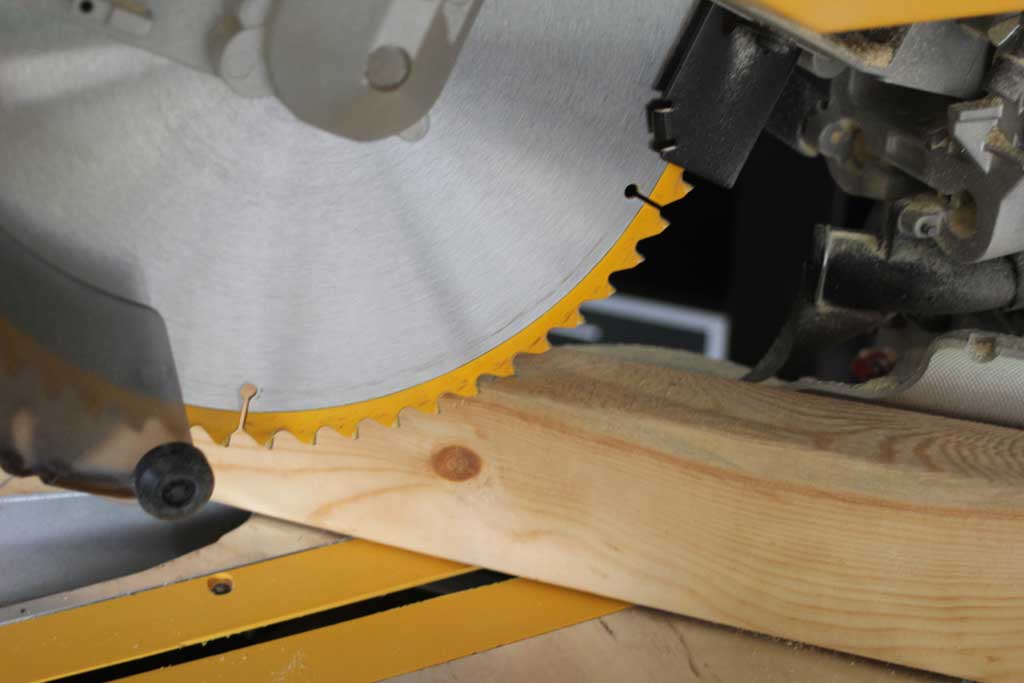
Okay now on to the building process: first step, take your 2″x4″ and measure 17 inches.


Take your miter saw (or the same can be done with a hand saw and miter box) and cut the piece at a 45° angle. There are two tricky things about this: the angle should be on the 2″ side of your board. And your angled cuts should be towards each other, sometimes woodworking directions will call this not parallel. The long side of your piece should still be 17″ when you are done. You will have to do this 8 times… these will be the sides of your box: 4 for each box.

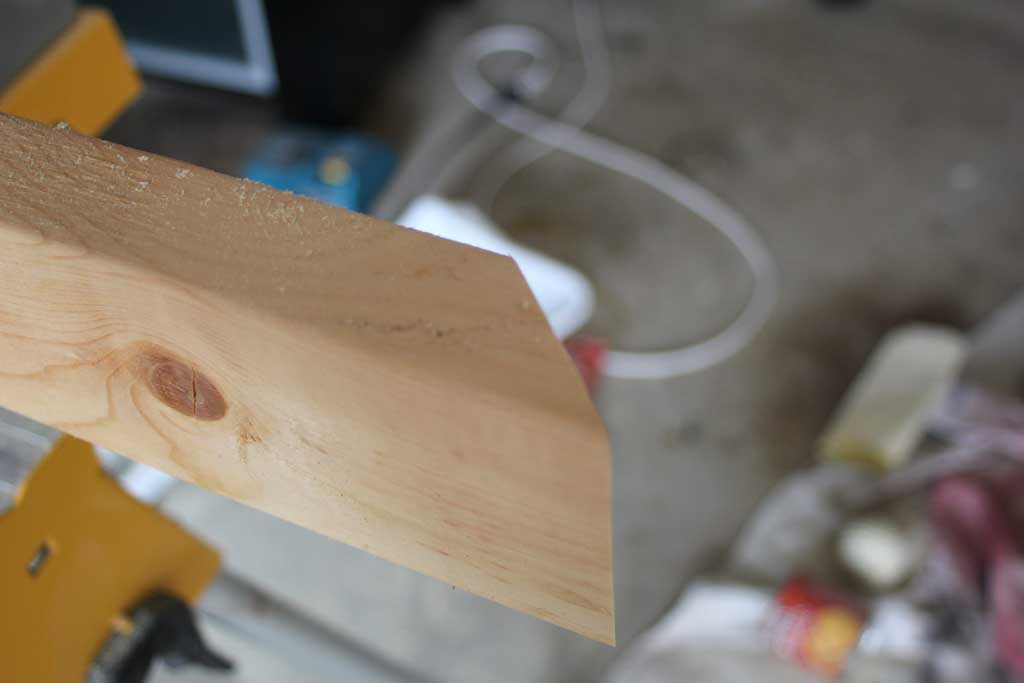

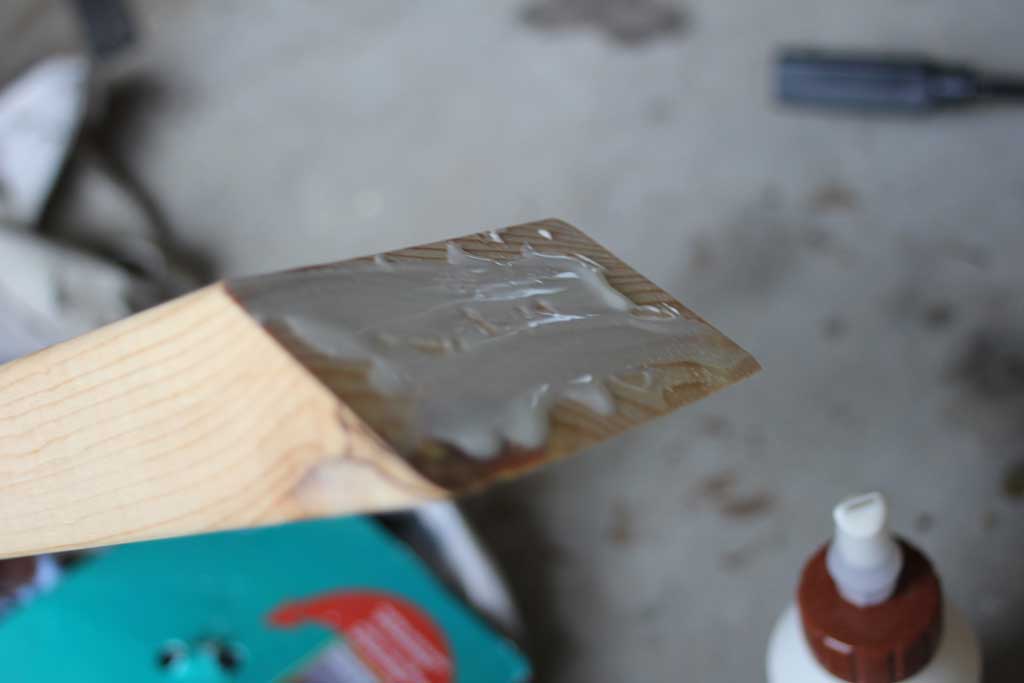
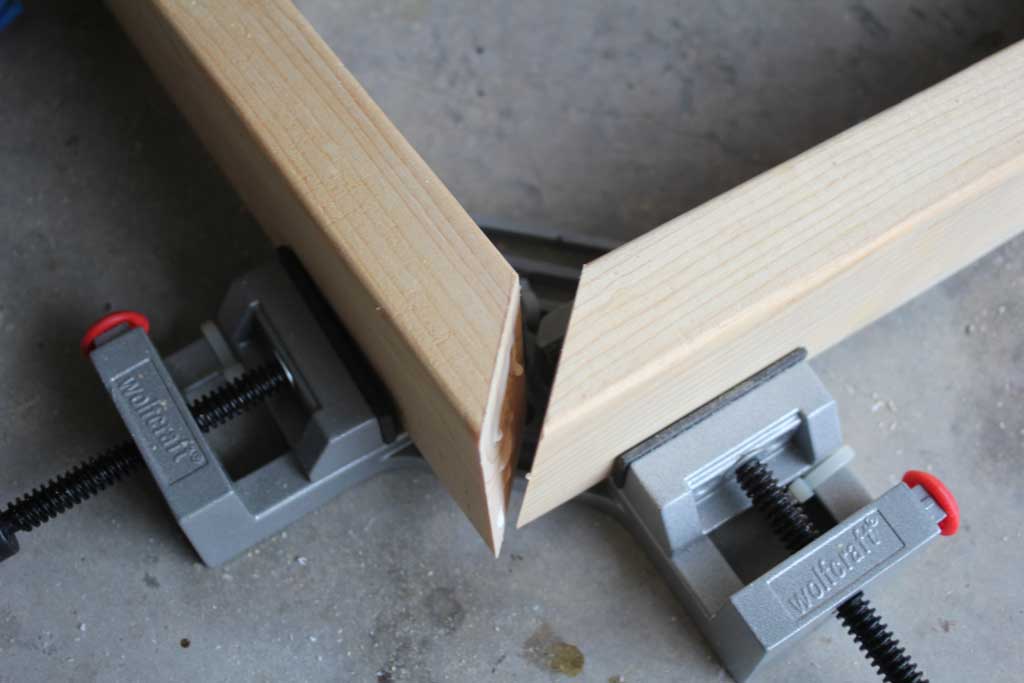
When you have all 8 pieces cut, you will need to join them into a box. Each 45° angle should match up to another one so that you will form a 4″ (or technically 3.5″ since 2x4s aren’t really 2×4) tall box. To do this, I used wood glue first (ps the picture below is a little overkill on glue… you want enough to join but not so much that it squeezes out)

Then put the two pieces together and secure it with a couple of nails. I used my air compressor and nail gun, but this could just as easily be done with a regular old hammer and nails or a screwdriver and screws. I have a couple of 90 degree clamps that I used, but again… they just make this easier, they aren’t required. Just make sure when you are securing it that you make sure they are square so that the box is a true square not a parallelogram. (My geometry teacher would be so proud of me for remembering what that is)

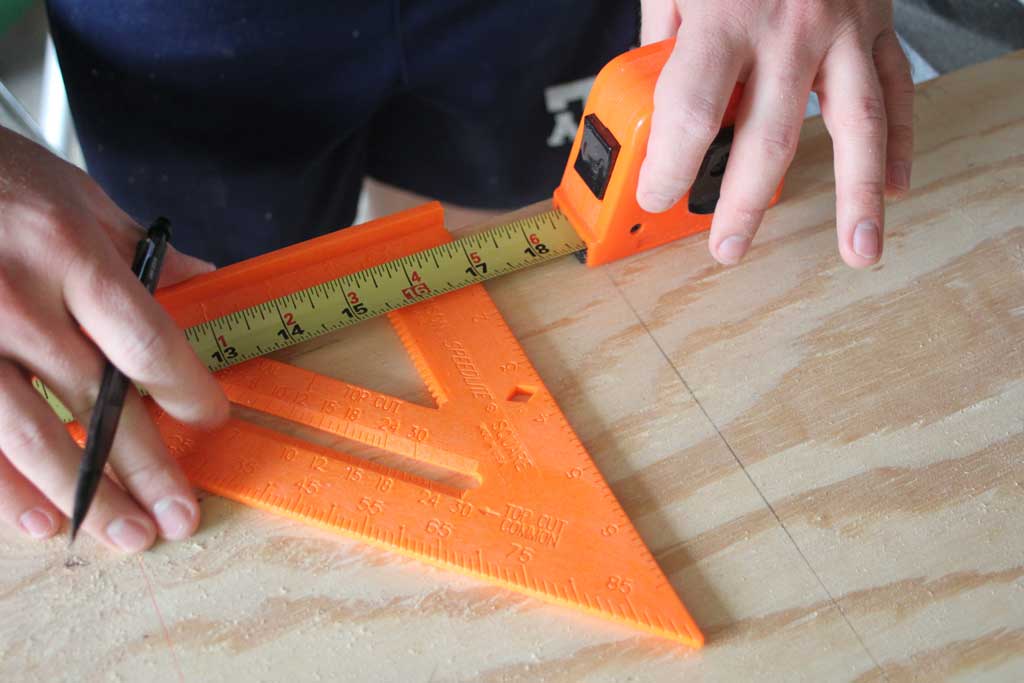
While that glue is drying, its time to cut your plywood into squares. I used the normal 1/2 inch plywood, the cheapest they sold. Then we cut it into 17 inch squares using a circular saw. Here is my lovely husband hand modeling for you:

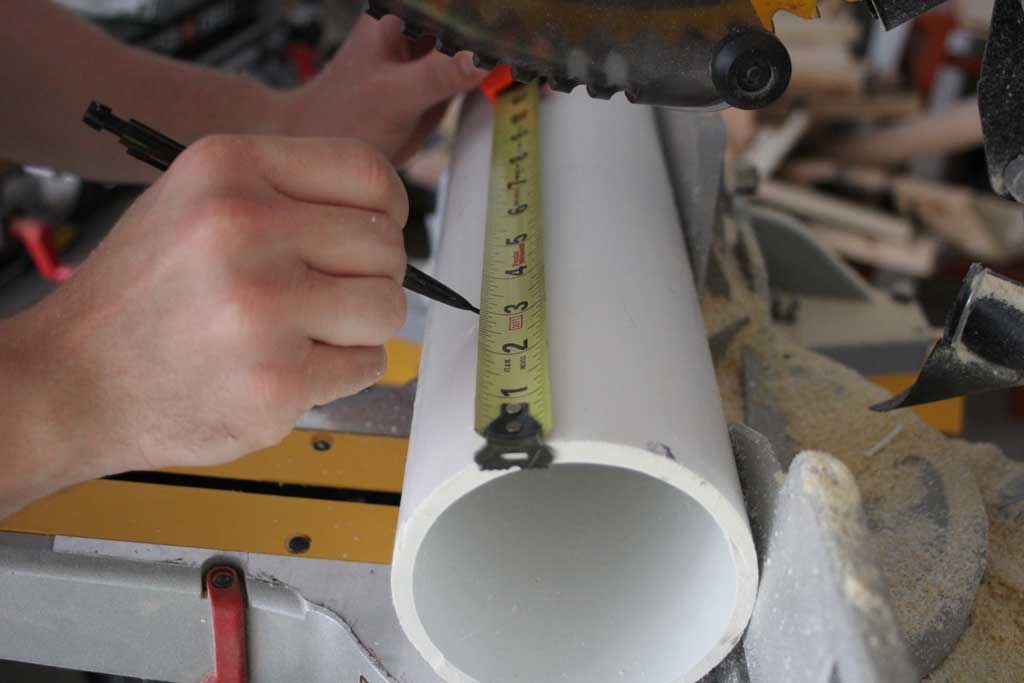
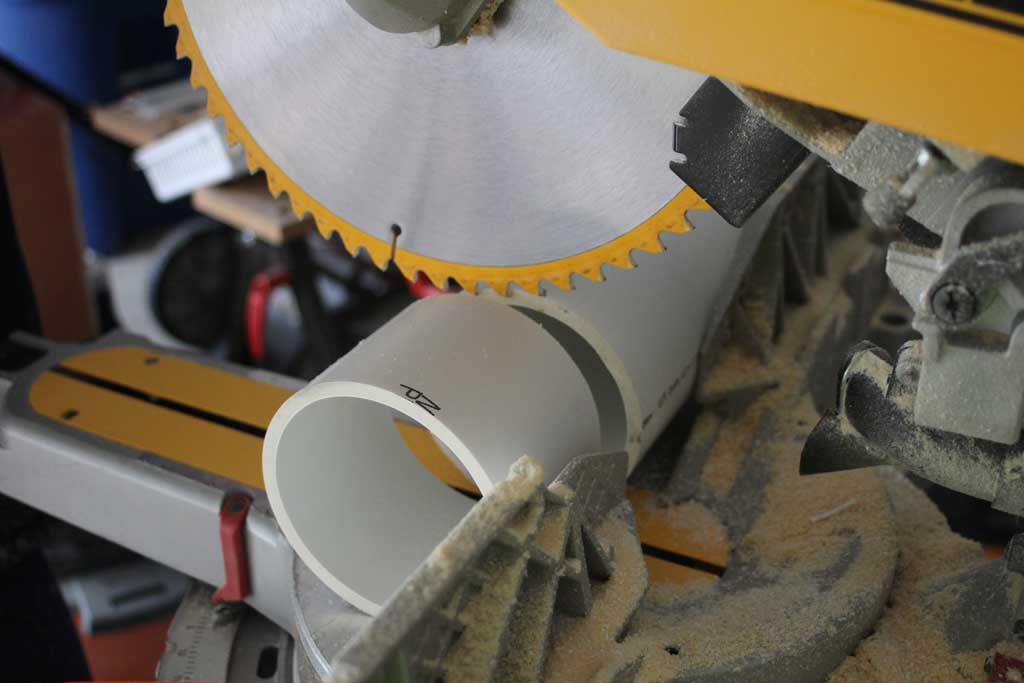
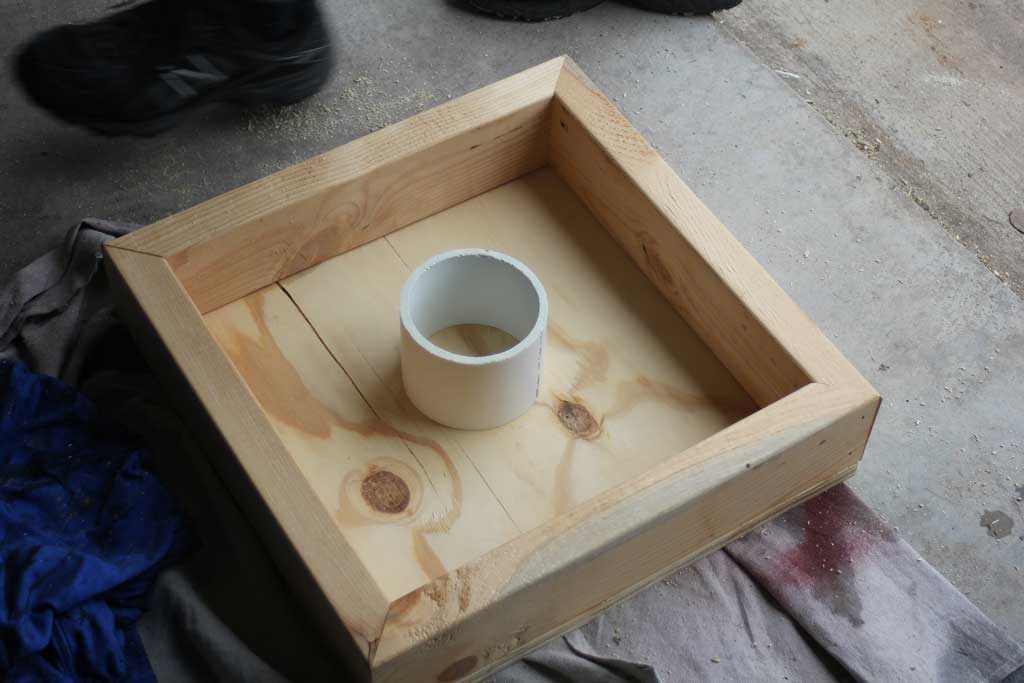
Once you have those cut, you can cut down your PVC pipe. We cut it down to 3″ just using the miter saw. Its technically a wood blade, but I don’t have another one and it had no problem slicing through the thin PVC… but with every time you use a saw… WEAR SAFETY GOGGLES… you don’t want a piece of that baby to fly into your eye.


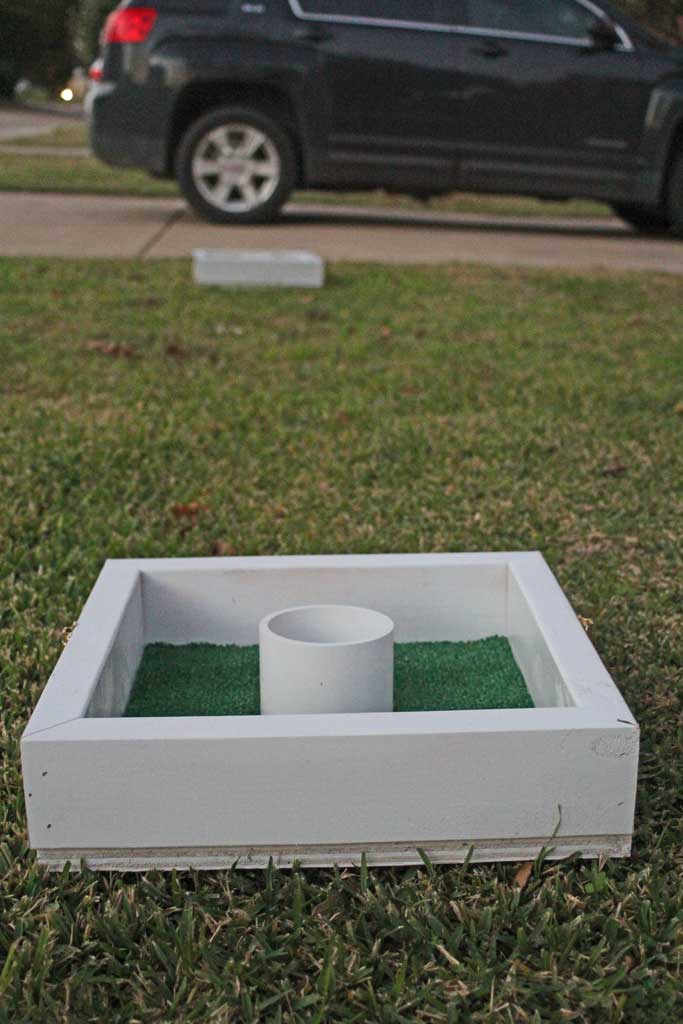
Now its time to put it all together. I used the nailgun to secure the piece of plywood to my square. And although it looks like its attached in the picture below, DON’T glue on your PVC pipe yet!! Because, it is time to paint! I spray painted them white since that’s what we had on hand, but you can really make it any color you want.

I’m actually missing pictures from the next few steps because my husband finished those while I was at work. But essentially, after they were painted he cut the faux grass carpeting to be 14″ square (I bought mine in the carpet section of HD… I had to buy a 12′ long section of it that was 14 inches wide because they only sold them in big long rolls, but I think even then it was only about 6 or 7 dollars). He then used a utility knife to cut out a circle for the PVC cup and glued both the PVC cup and the carpet down with E6000 (ps be careful with that stuff… it is strong). Since we will primarily use this outside and it will get pretty banged up anyway, I didn’t bother to patch my nail holes or make it look pretty… functionality over fashion? But if you wanted to spruce it up you could easily patch your holes and put a coat of wood-filler over the edge of the plywood to ‘finish’ it up a bit. But since we didn’t care so much… it is ready to play!!

We also attached a latch to each side of the box so that it will fit nicely together to store in the garage. To do that, but the boxes together before you screw in the latch so that you are sure they will line up correctly! Oh… and then we painted half of the washers red so that you can tell whose are whose. These were 2.5″ metal washers found at the hardware store. I think in the nuts and bolts section but I can’t quite remember.
And that is how you build your own set of washers!


 Hi, I'm MJ! I'm a DIY kind of girl and this is where I share my projects. I'm taking you along for the ride as I learn how to do woodworking, sew, bake, and renovate!


This looks cool and I would love to make for our cabin but how do you play?
You have the boxes 21′ apart and toss the washers into the other box, one point if you get it into the square and 3 points if you get it into the cup. For more detailed rules I found this website.
We play quite a bit at our cabin and it is super fun! Good luck!!
I love this idea! I made my own set. Took many ideas from it! Thank you! Wish I could post photos!! Thank you
I’m so glad you liked it! We love our set!
My first encounter with this game was while visiting family. I am wanting to build several of these for other family and friends and have no problem finding all the materials except for the washers. I have researched online but have not been able to find a reasonably priced supplier and or one where in which I can buy a reasonable amount not 500. Any help would be appreciated.