Thankful

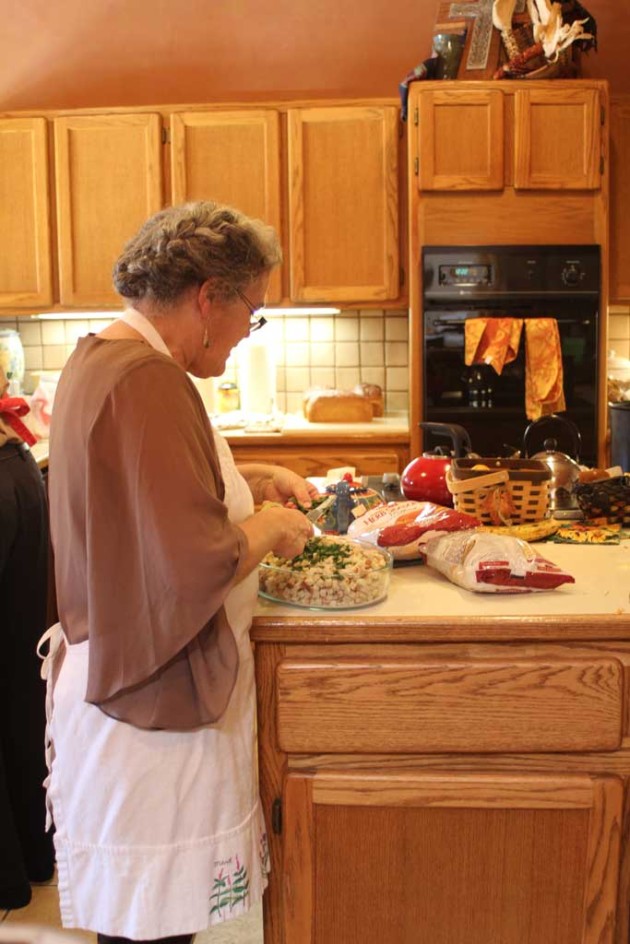
Yesterday, like most families in the US, we celebrated Thanksgiving with my family.  It was a small crowd this year, just my husband and I with my parents and my grandmother.  But my mom makes the BEST turkey dinner ever.  It has all the fixings and despite the small crowd, it was better than ever.  In fact it may have been a perfect day.

Reese and I started out with a 4 mile run (I run a half marathon in a week and a half that I am NOT prepared for), and came back in time to shower and help with dinner/lunch.  Kansas played basketball at 2:30, so of course we had to schedule our meal around the game.  Those of you who know my family will not be AT ALL surprised by this.

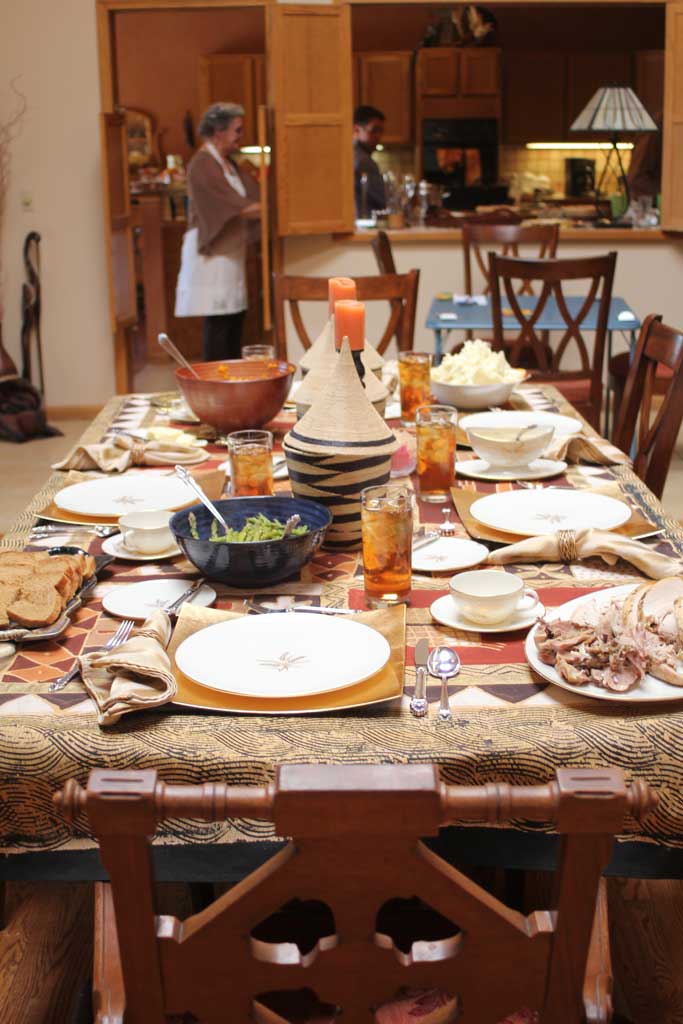
My mom and I have vastly different decorating styles, but her house is always decorated exquisitely and this Thanksgiving was no different.  She had sort of an African theme going on, with a cloth and baskets from her trips to Africa on the table.  It was a beautiful fall palette for our Thanksgiving meal.

thanksgiving3


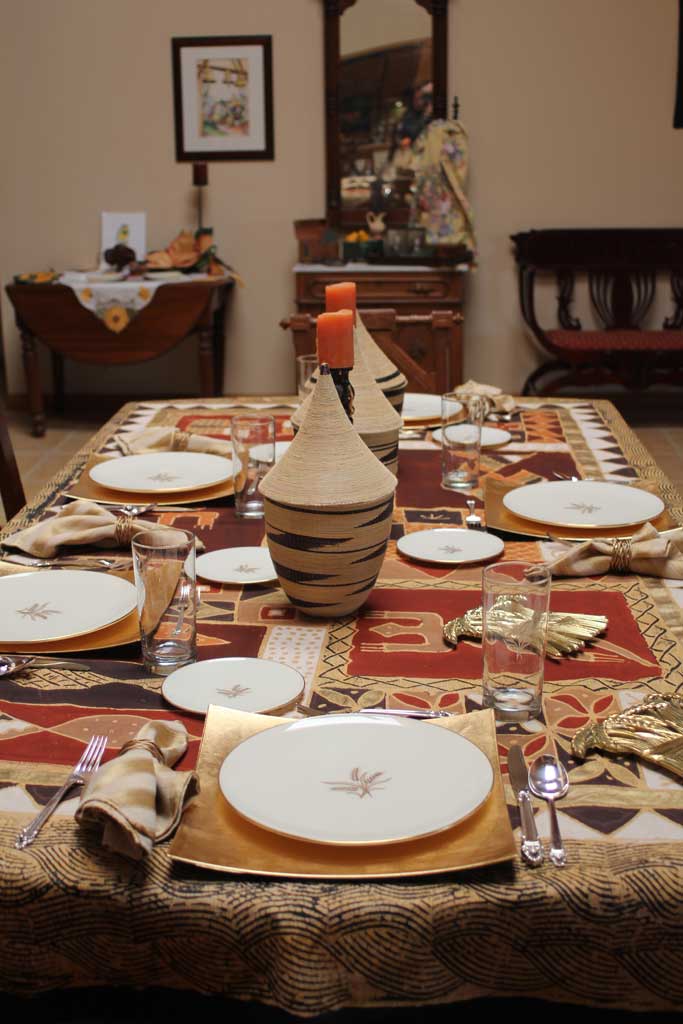
Can you tell we are from Kansas? Check out her gold wheat plates and matching glasses. Gorgeous.

thanksgiving9


Mom’s stuffing is delicious, made with croutons and broth from the Turkey, she adds onions and spices, and it is too die for.

thanksgiving7


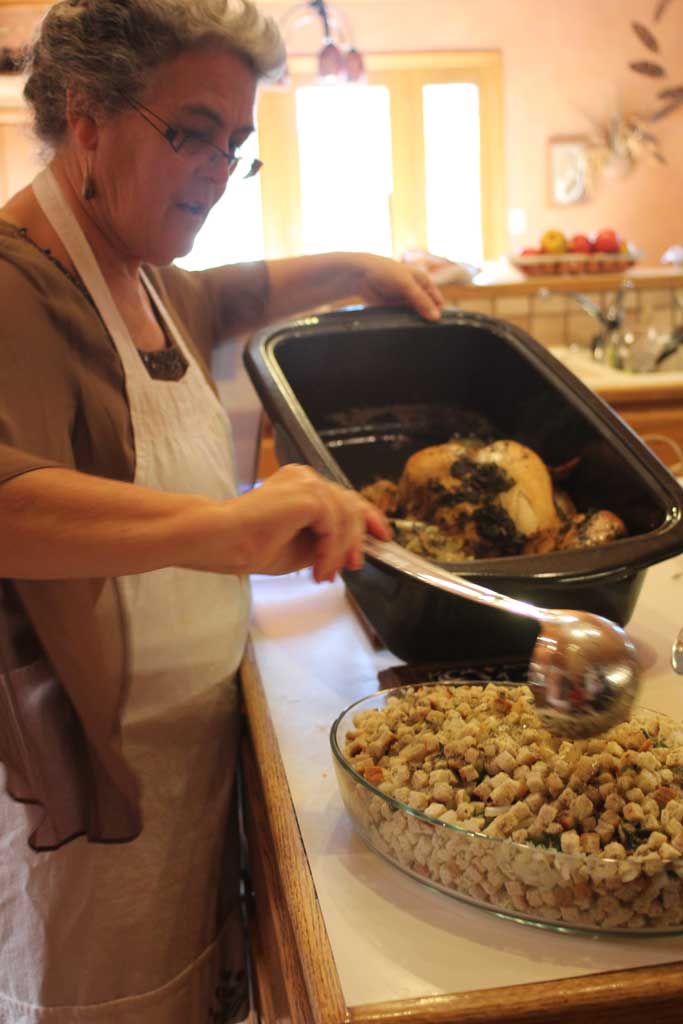
PS If you have a small oven which makes it hard to prepare all the Thanksgiving goods on time, you might think about investing in a roasting pan like this one.  It cooks a turkey beautifully, and can be plugged in wherever you need it to be.  One of the best parts of our Thanksgiving meal? Mom makes several loaves of home-made Swedish rye bread.  Its been a family recipe, that we’ve had as long as I can remember.

thanksgiving8

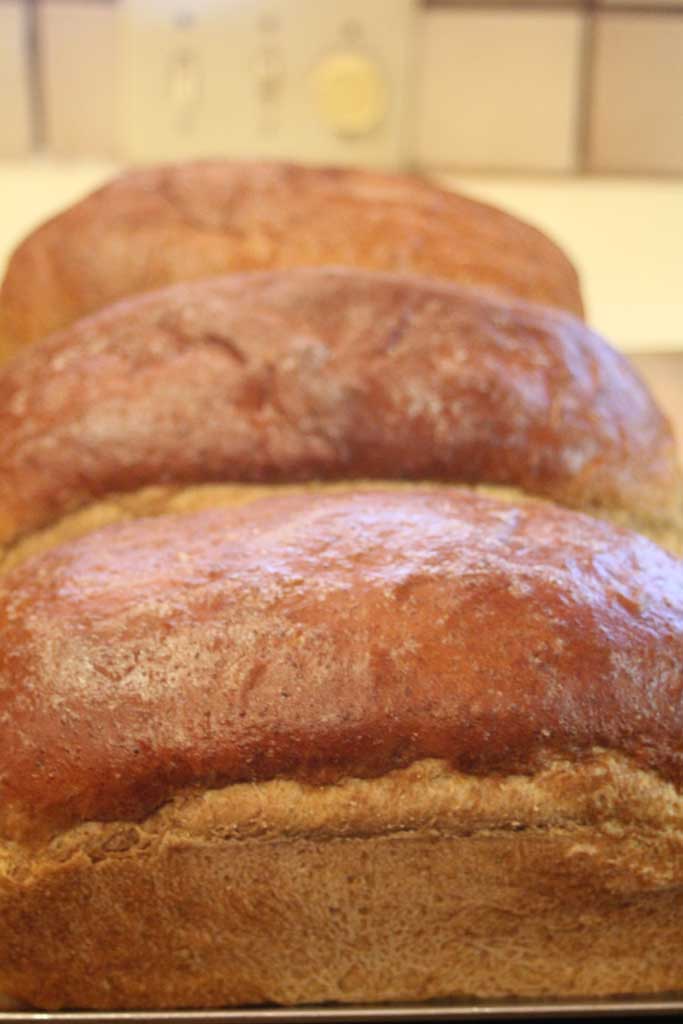
Its sweet and light and unbelievably delicious.  And it looks wonderful laid out on your Thanksgiving table.

thanksgiving6


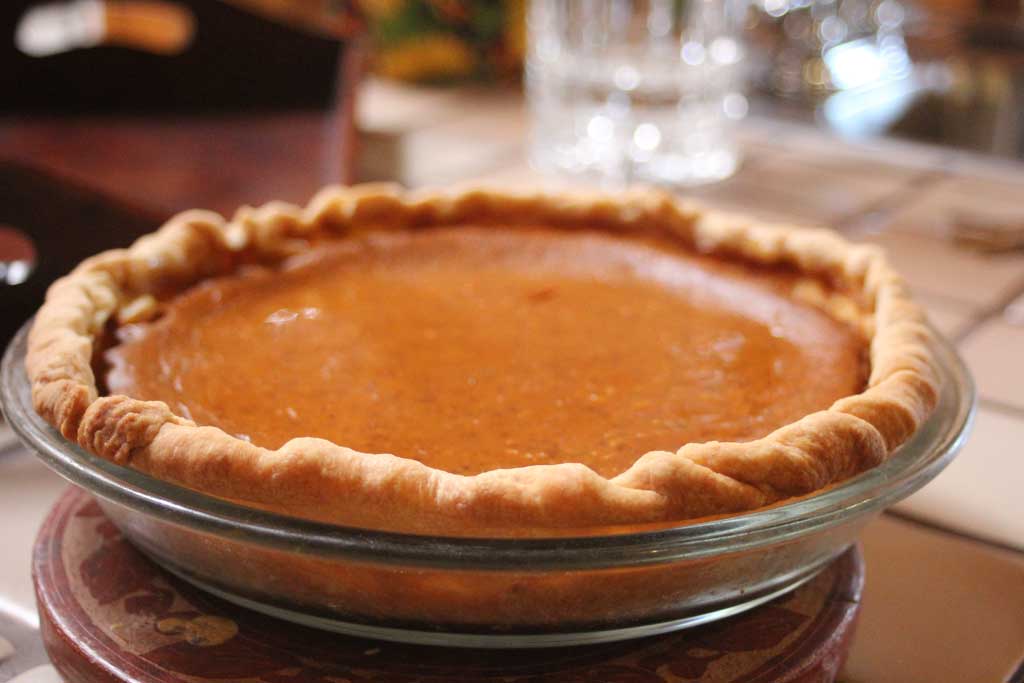
And you can’t forget pumpkin pie… my parents make it from scratch (including the whipped cream).  One year when we were in college my brothers (there are only 2 of them) ate 13 pumpkin pies over Thanksgiving break.

thanksgiving10


It was a delicious dinner: turkey, mashed potatoes, stuffing, butternut squash, asparagus, rye bread and pumpkin pie. Oh and dad’s home-made gravy. YUMMMMM.


thanksgiving5


Oh and KU won… so it was a REALLY good day. What did you guys have for Thanksgiving? Were you able to relax and enjoy your family?

Costuming It Up!

First of all… HAPPY HALLOWEEN! I hope everyone is safe and indulges in a bit of fun imagination and a LOT of candy.  For a Halloween Treat I thought I’d show you guys how I made my owl costume.  I got this idea because my (new!) last name is Popst and we thought it would be a punny play on words to have my husband dress up as a Tootsie Roll Pop (st) and I had long ago pinned this little cutie and thought it would make a cute adult Halloween costume too! And although it wasn’t an exact replica of the Tootsie Roll Pop Owl it was close enough that I thought it would work.

If you follow through on the Pinterest link above, you will eventually find this tutorial on how to make the costume, but 1. I didn’t have time to sew all those feathers on and 2. the beautiful thing about Halloween Costumes is that they only have to last one night.

Here’s what you need:

  • 1 or 2 yards of light colored brown felt (the felt I bought was extra wide, so 1 yard would have done just great)- 1.99/yard
  • 12 rectangles of varying colors of brown felt (usually about .25 cents at a fabric store)
  • Hot glue gun
  • elastic banding- 1.99

Total: $8 dollars!

I bought a stack of those rectangles of felt in a few different shades of brown and just freehanded feather-ish shapes and cut them out, I got 4 feathers from each rectangle.

hwowl3

Since this is the tedious part of the project I just cut them out while watching TV.  And while I was at it, I cut out a piece for the mask:

hwowl2

Once that was done, I went immediately upstairs to assemble the project waited until a day before the party to start assembling the costume.  For the part to glue it onto, I folded my large piece of felt in half, and traced a simple A-Line dress onto the fabric.  I erred on the side of too big so that I would have a little room for error.  Don’t forget to cut the hole for your head!  hwowl1


Once I got that cut out, I tried it on and adjusted the width a bit so that it would be a good fit.

hwowl6


Then I got out my sewing machine and did an EASY single stitch up each side leaving a 1/2 inch seam on each side.  Ooops… sorry, bad blogger… I don’t have any picture of that step.  But close your eyes and picture a sewing machine with this fabric in it… that’s all you are missing! Now it is time to put your feathers on.  I laid them all out to figure out where I wanted which color.  I didn’t follow any sort of pattern, I just laid them out and if it looked like there was too much of one color, I switched a few up.

hwowl5


I secured mine using felt glue, but I DO NOT RECOMMEND that method.  I should have just used a hot glue gun.  The felt glue worked on about 75% of them, but I ended up patching them here and there with hot glue right before the party.  No kidding… I had a hot glue gun plugged in on my bathroom counter during the party. Lesson learned.  Always trust my handy dandy glue gun.  I picked up each row and stacked them to the side so that I could go ahead and glue the bottom row first and go up from there.  Pretty soon it was all done!

hwowl4


And I think it looked GREAT!

hwtable8

Halloween Backdrop

While I was searching around for inspiration for my Halloween table, I came across this awesome party.  While a blood bar is a bit graphic for me, I did LOVE their background.   I did mine just a bit differently, as I thought it would look cool draping down so that it was longer at the center than it was on the sides.  All you need for this project is two bags of cheesecloth (6 yards), some twine and scissors.  (and a broom because this stuff sheds!)

hwbackground1


I took the cloth and just folded it at the length I wanted it to be, cutting the ends of one side.

hwbackgroun3

Then I took my scissors and cut strips that were approximately 3″ wide. The variance is one of the things I like about this project, so I wasn’t too specific about how wide to make each strip.

hwbackgroun4


I used two thumbtacks to string up some twine centered over my table and as I got strips cut I layered them over the twine.  As you can see I cut a few in half to exaggerate the draping. Here is what it looked like before I got the second bag put up and the black fabric background:

hwbackgroun5

Because I knew my life was going to be crazy for the last few weeks, I went ahead and set up my table about 3 weeks ago… so my poor husband has lived without a kitchen table and with our kitchen looking something like this for the last three weeks:

hwbackground6

Yep… he loves me and all my crazy a lot.  And if you missed yesterday’s post about the rest of the party decor… check it out here!

hwtable