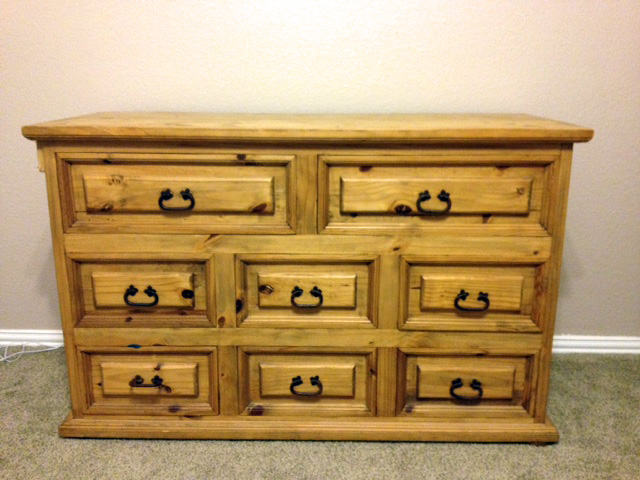
I know I haven’t really posted much on the master bedroom here on the blog yet. I feel like it is one of my most unfinished rooms. BUT I just finished one project for this room which definitely puts this room one step closer to being finished. When my husband moved into the house we knew we would have to figure out some additional storage for our clothes. I had two dressers, but I already had them packed to the max! Both were hand-me downs that I had refinished with Minwax Jacobean stain and put silver handles on. But one of them was still in pretty bad shape from being stored in the back of a warehouse for a while (the top was warped and even though I had ‘repaired’ the bottom drawer, it broke again and was pretty much beyond repair). So when a friend posted on Facebook about a dresser she had for sale I jumped at the chance to get it. We rented a truck from HD (long story, but I don’t recommend it!) and paid her $200 for the solid wood dresser, but it wasn’t really our ‘style’…yet. So I stored it in the garage (for about 6 months) until I could put the MJ stamp on it. I planned on staining it with the same Jacobean stain I had used for the other dressers (one of which is still in the room with it). But I read about someone using Danish oil instead of stain and thought I would try it out. (bad blogger… I forgot to take a true ‘before’ picture, this is the one my friend sent when I bought it)

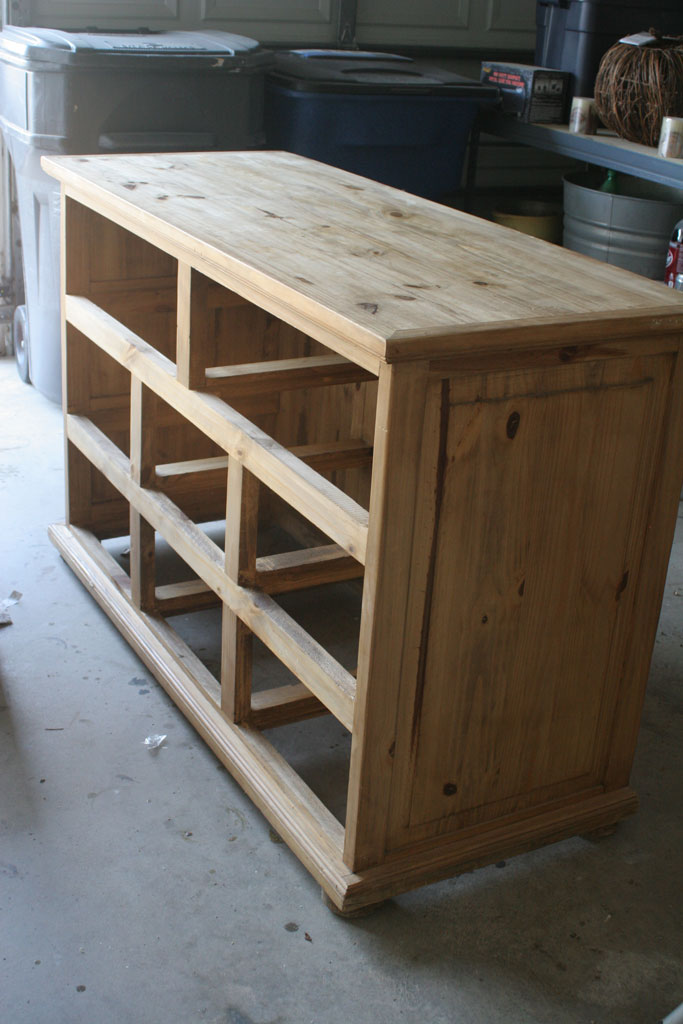
Fortunately the dresser was already mostly in a natural wood state so it wouldn’t require hours of sanding or using stripper, so to start out I just went over it once with a 220 grit sandpaper (its mostly what I had on hand and a good grit for ‘prepping a surface’). FYI in case you aren’t a sandpaper aficionado, sandpaper has different degrees of roughness and most that you’ll see at your local home improvement store are from 80 grit up to about 220 (there is a superfine that is somewhere in the 300s, but I don’t use it all that often). I have this cheap random orbital sander that I bought a few years ago and it works perfectly fine for most of my projects!

So I sanded it down a bit while the hubby removed all those handles, they were wired in with rusty wires and the holes were only 2″ apart. I discovered in this process that they don’t really sell 2″ wide handles, so I knew I’d have to drill new holes and because the old holes would still be there I needed a handle that would cover up the old holes too. Fortunately the handles I had JUST BOUGHT for my bathroom cabinets (which sits adjacent to where this dresser would be) would fit the bill.
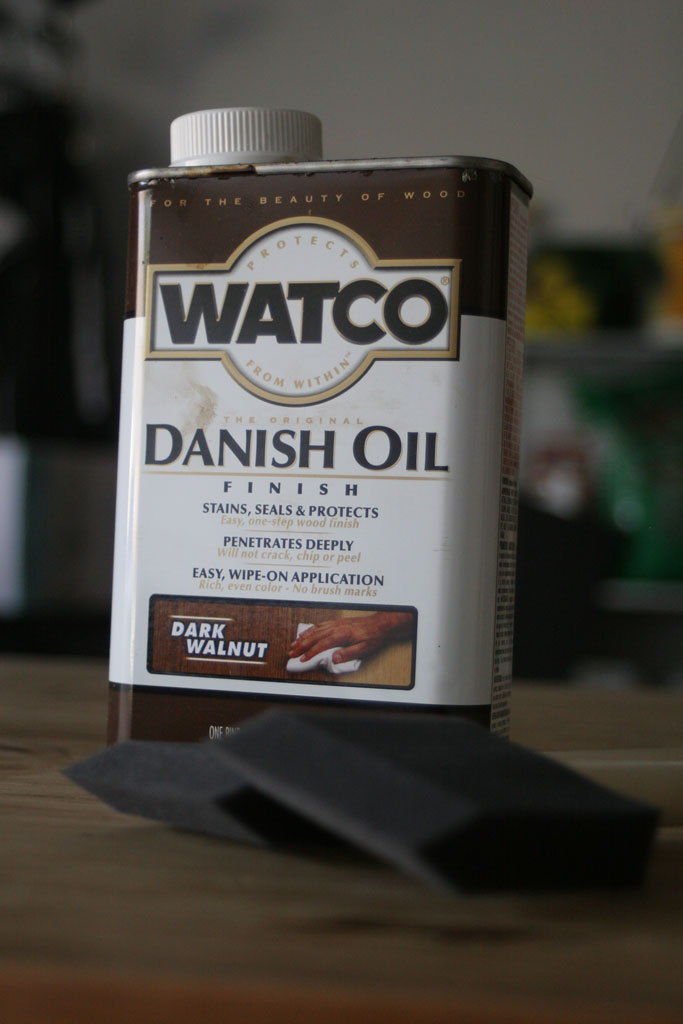
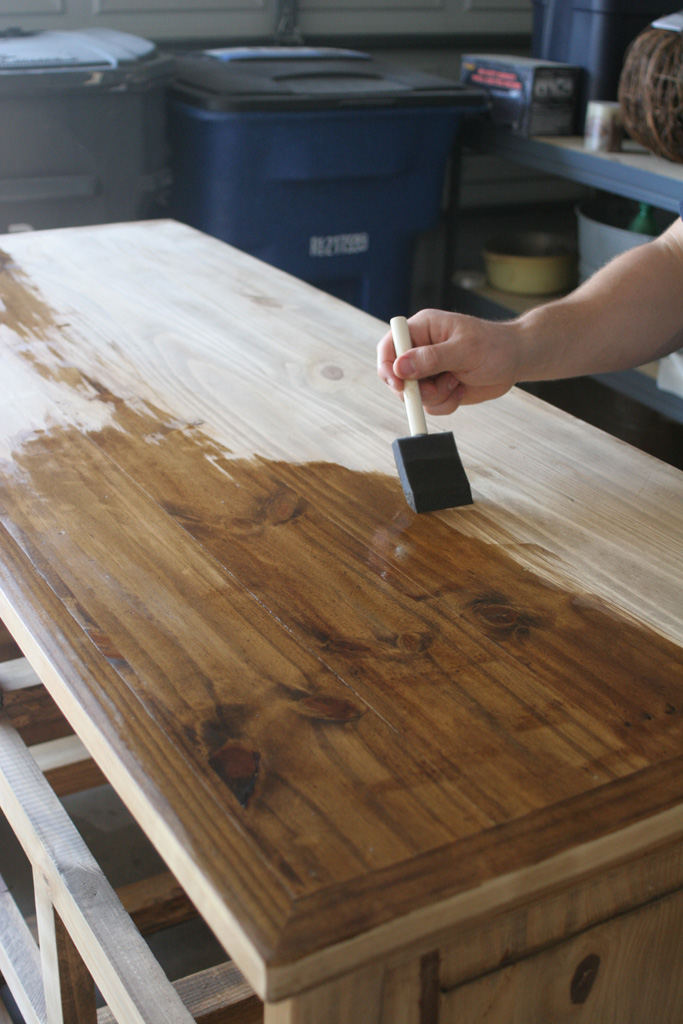
 Then we started applying the danish oil. We used Watco Danish Oil in Dark Walnut that was somewhere around 8 dollars per bottle. I thought I would only need one bottle, but with all the outsides and insides of the drawers I ended up using about a bottle and a half, so I had to go back to get another bottle before finishing up.
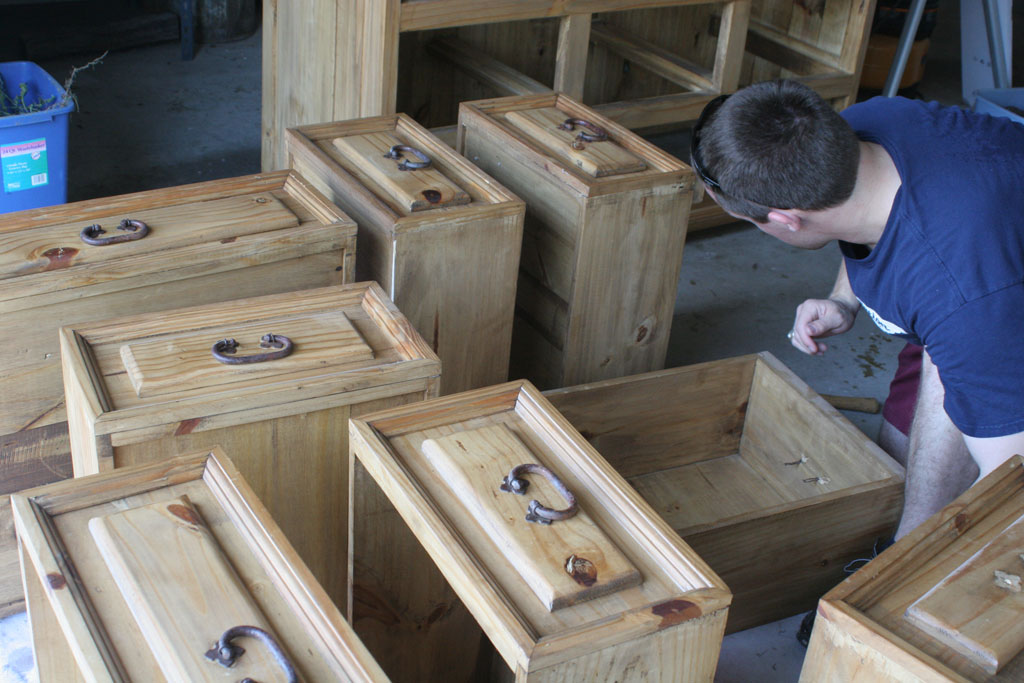
 I prefer to use these little disposable foam brushes for applying stain and things like that. They don’t leave any brush marks and since stain and Danish Oil are oil based they are harder to clean up, and nothing makes cleaning brushes easier than being able to throw them away. (that’s the husband’s hand brushing the oil onto the top in the picture below)
 The directions on the can call for you to put it on, let it penetrate the wood and then to apply a second coat after 30 minutes, then 15 minutes after the second coat wipe it down. I use old t-shirts to wipe things like this down (I seem to have a never-ending supply of old t-shirts around the house!). They say that after 8-10 hours it will be dry. I came back 8-10 hours later and still had a few spots that felt a little oily and made me worry about putting all my clean clothes into it. But since I finished up this project on my own and although I think I’m very strong moving this behemoth of a dresser on my own was definitely a no go, I just let it sit in the garage for a few days, and sure enough by 4 days later it had no oily feeling and left no residue on the white cloth I wiped all the surfaces down with just to be sure.

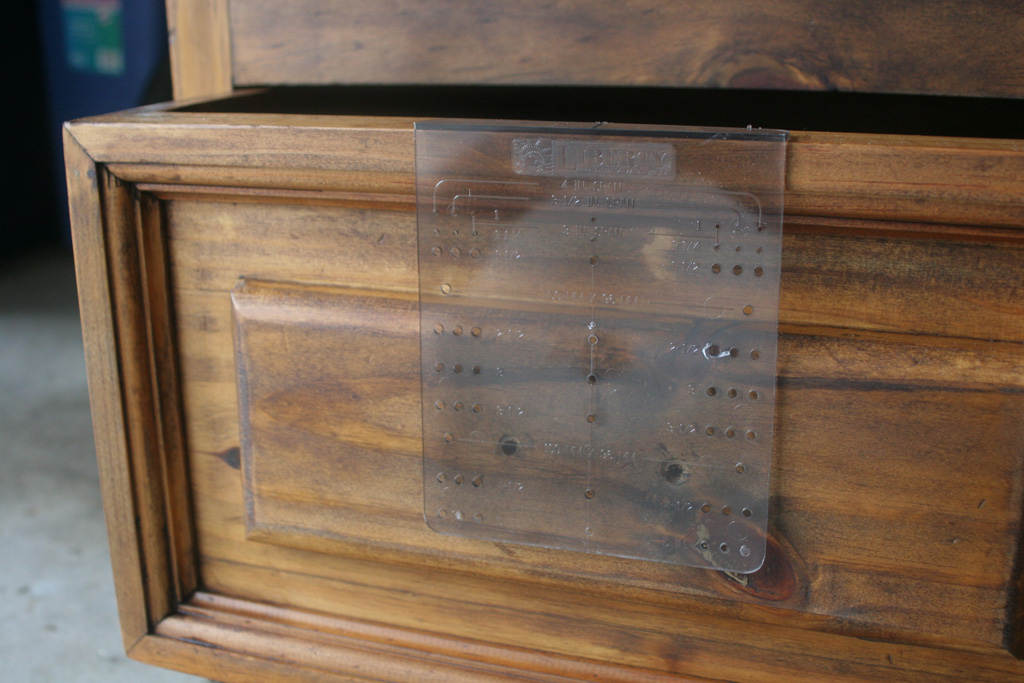
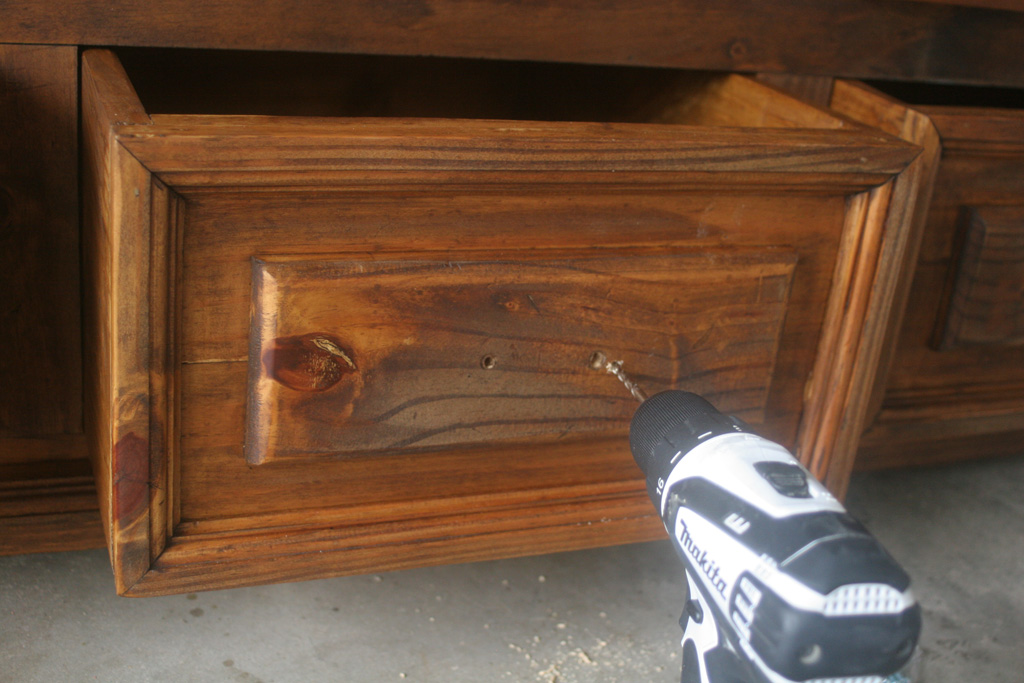
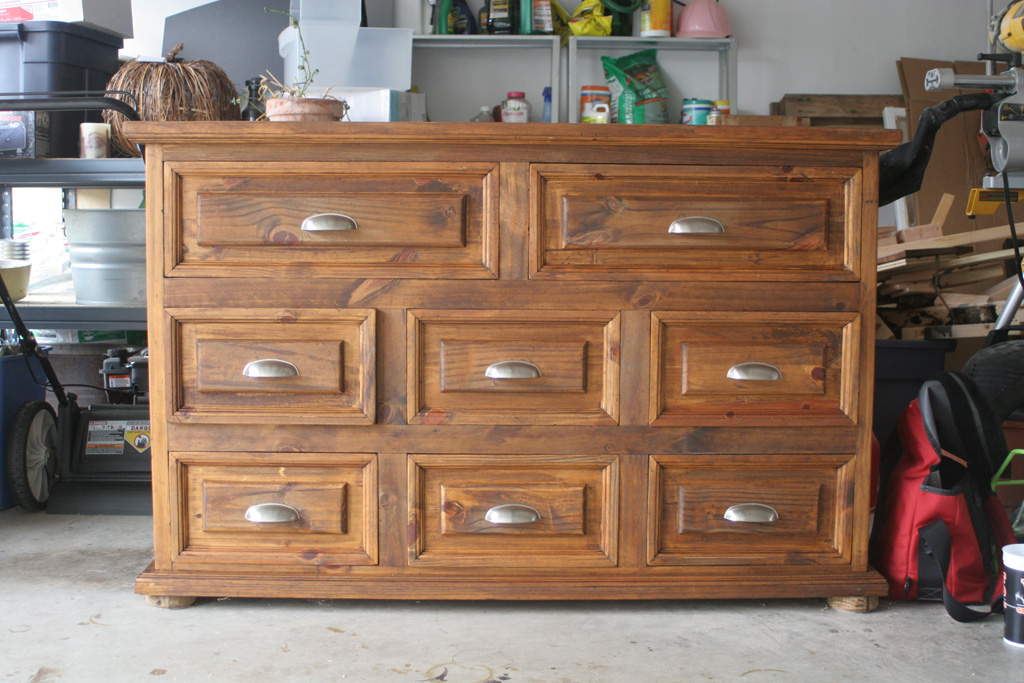
Back to the handles. Sorry I seem to be skipping around a bit… hang with me. After putting the oil on and letting it try a bit, it was time to drill the handles. (you can see I already tried one out before remembering to take the ‘in process’ picture). AAAAAND don’t mind the super messy garage. In Texas we don’t have basements… so all that storage is either in an attic or in my case… the garage. I bought a template from Home Depot that helped you figure out where to drill the holes and the right distance apart for 3″ handles. I just eyeballed the top to bottom height for where I thought the cup handles looked centered and found the closest set of holes. From there I lined the center line up with the center of my drawers (from side to side) and marked them with a sharpie.
 The instructions said to use a 3/16th drillbit (and even came with one in the package). It looked too big to me, but I trust that they knew what they were doing… so I went with it, and what do you know?! the manufacturers knew what they were doing, it was the perfect size. You can see below that the new holes were slightly wider and set down a bit from the previous holes. That was what looked most centered and what would also cover the other holes up.
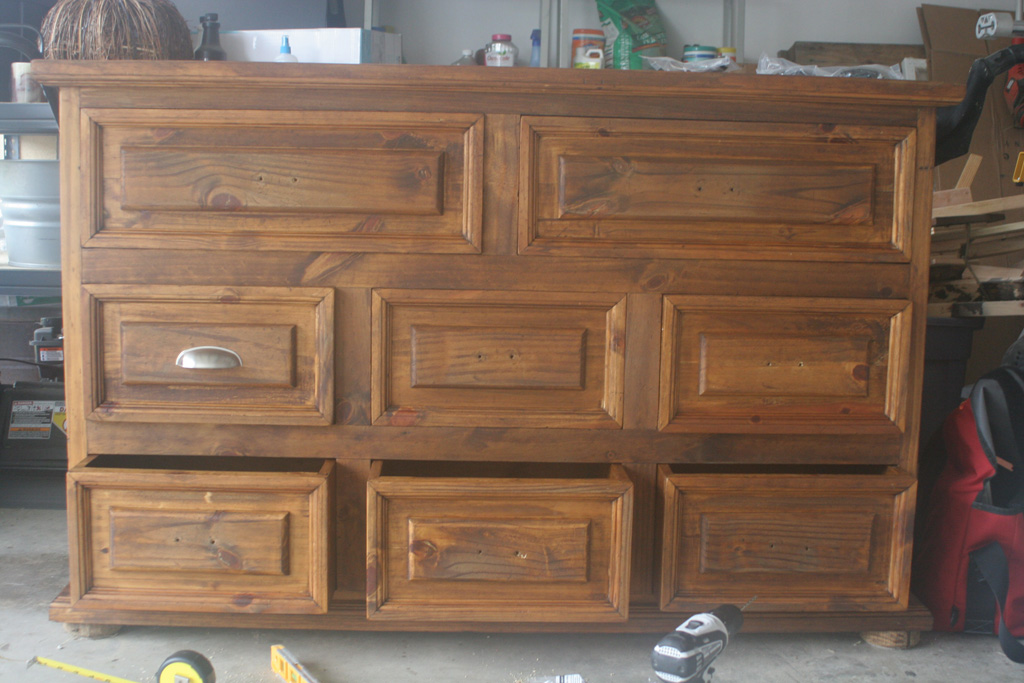
 Rinse and repeat on all 8 drawers and this is what it turns out like! I bought these pulls from Home Depot. They weren’t cheap, but they look great, and match the ones in the bathroom, so I went with them. I feel like drawer hardware is a lot like area rugs… they are way more expensive than I think they should be and I’m not sure why… but sometimes you just have to bite the bullet and go for it.

I let it dry for a few more days (mostly because we got busy and didn’t have the time to move it and switch out all our clothes). But once we got it moved in it made a huge difference! (I’ll try to find a before picture with the way too small dresser in this location).
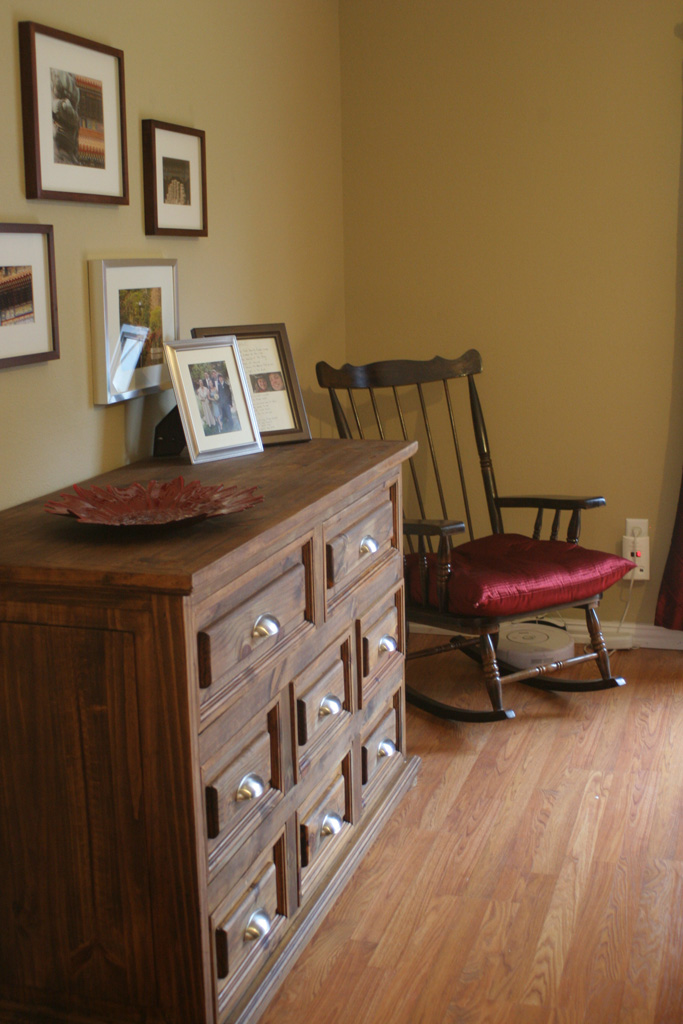

For the first time in our married life we have places for all our clothes to belong, which definitely helps with the clutter in the room and keeping up with laundry. The pictures on the wall were all there before in a sort of random gallery wall design. I’ll show them in more detail when I show you the rest of the master bedroom, but the ones in the brown frames are all from a trip to China I took with my graduate school program, and the ones in the silver frames are from my trip to Japan to visit our foreign exchange students (we had two from Japan when I was a little girl and we still keep in close contact with them and their families).
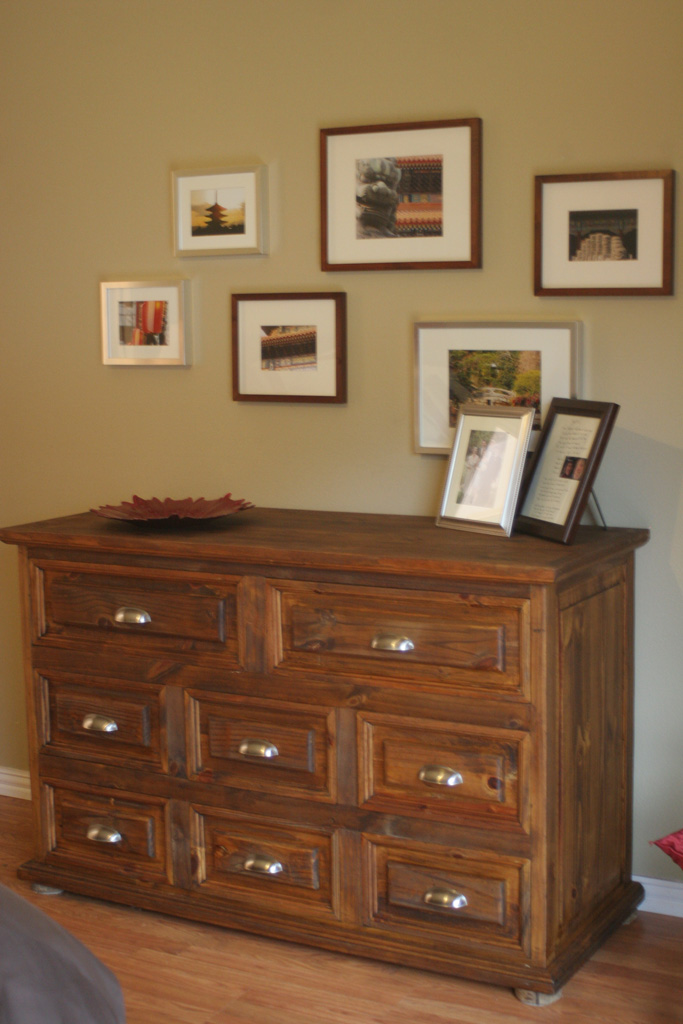

I love the way it turned out and I really love the extra storage!


 Hi, I'm MJ! I'm a DIY kind of girl and this is where I share my projects. I'm taking you along for the ride as I learn how to do woodworking, sew, bake, and renovate!


Speak Your Mind