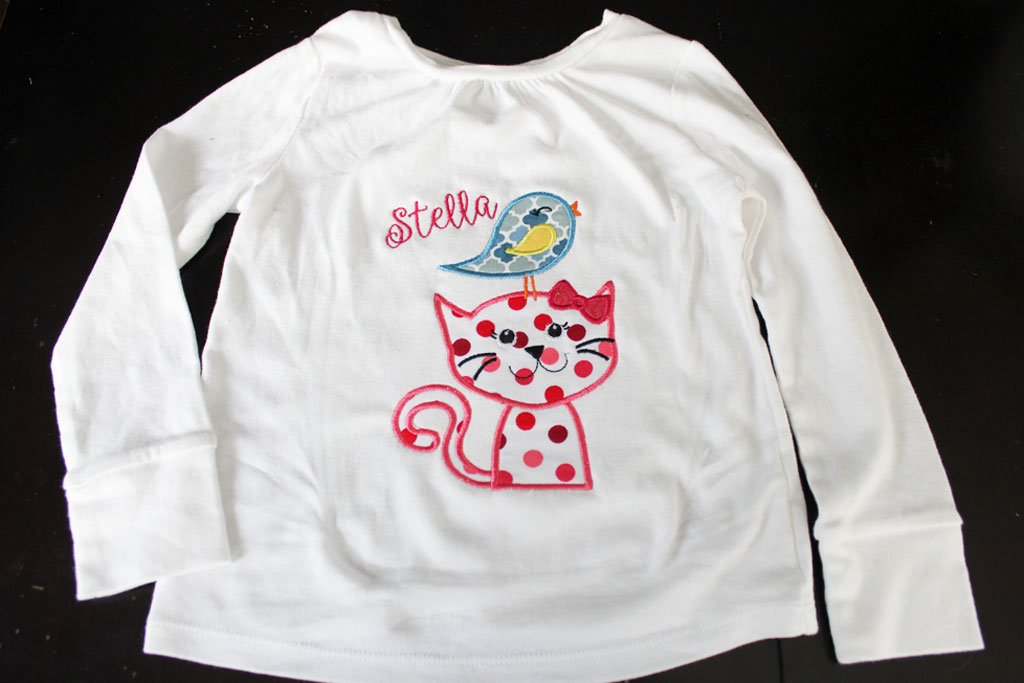
Alright, I promised last week when I showed off some of my crafty projects that I have done during maternity leave that I would write up a post on how I use my embroidery machine to applique. ANDDDDD I really meant to have this post done and up on Monday or Tuesday, but here it is on Thursday and I’m just posting… but that’s new motherhood for you! And I will start this post out by saying I am a total novice at this, but after having the machine for 8 months, I’ve learned a few things and thought I would share for those of you who want to buy a machine or have one and want to know some of my tricks. Here is the final product:

First of all, lets talk about equipment.
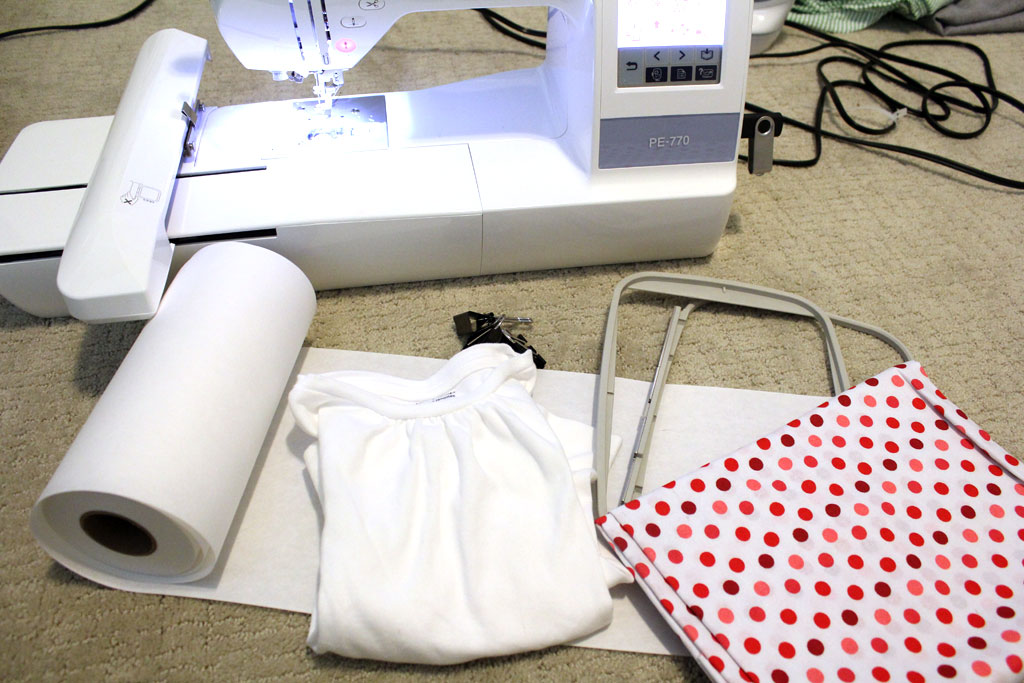

Here’s what you need:
- An embroidery machine: I have a Brother PE 770 Embroidery Machine.
- An embroidery hoop: my machine came with a 5×7 inch hoop (its the two piece gray thing in the picture above), but I also purchased a 4×4 hoop so that I can do smaller pieces as well
- Stabilizer- I have two types: above is a roll of cut away medium duty stabilizer that is great for t-shirts and other lighter weight fabrics; I also have some tear away stabilizer (I actually bought mine at JoAnns, but the amazon link is something similar) that I use for things like embroidering the names on my burp cloths.
- An applique embroidery design (I buy mine off of Etsy for $2-$5 a piece–see below for some of my favorite shops so far)
- Fabric for the design–I am a hoarder so I typically save my fabric scraps, and applique is a great way to use up some of those smaller pieces!
- Embroidery Thread– I bought this box of 100 colors when I first started and so far haven’t really needed to buy any additional thread. There are definitely some ugly colors in the bunch, but I’ve been happy with the quality and it is nice to not have to think about which threads I need to buy for each project.
- Basting spray or heat n’ bond– read below for more details on this
- for embroidering t-shirts or onesies– medium binder clips
- (optional) embroidery software– more details below
Finding a design: Etsy has been my go to place for buying designs/fonts etc. If I’m looking for a particular thing, I just search Etsy as a whole, so for this project I wanted to find a design with a cat on it, so I searched around until I found this one that I liked. But if I’m just looking for something fun to applique (or I’m just bored) I go to one of my favorite shops and search their designs. Here are some of my favorite shops
- Rivermill Embroidery— So far their fonts, monograms and designs have all been very high quality– on this shirts I showed you in this post I used the chachi font, their turtle and their lady bug.
- Applique Cafe Designs— I’ve used their Dinosaur design, but I have plans to use several more of their super cute designs!
- Monogram Font Store–I love the fonts they have and have used several on lots of projects!
- Ballerina Script by Hoop Mama Embroidery–This is the font I used for this project to add Stella’s name.
And that brings me to my next point. Software: If all you ever want to do is pre-made designs, you don’t need any software. BUT, the whole point for me of getting an embroidery machine was to be able to add monograms and personalized things to my projects, so I wanted to be able to add letters, names, etc. Software is the easiest way to do that. I searched around for a while and settled on Embird software, mostly because it was cheap. I think it was about $150 (some embroidery software programs are in the 1,000s of dollars… no thank you.) Again, I’m not creating my own files or doing anything fancy… I just wanted to be able to lay out my designs with letters. So for every project that I want to personalize, I open up my software and lay it out. So for this project I downloaded the cat file that I picked out from Etsy, and then in Embird I merged it with the Ballerina font 1″ letters that spelled out Stella. From there I saved the file to a USB drive and loaded it into my machine. Each machine is different… but read your instructions on how to import a file from USB.
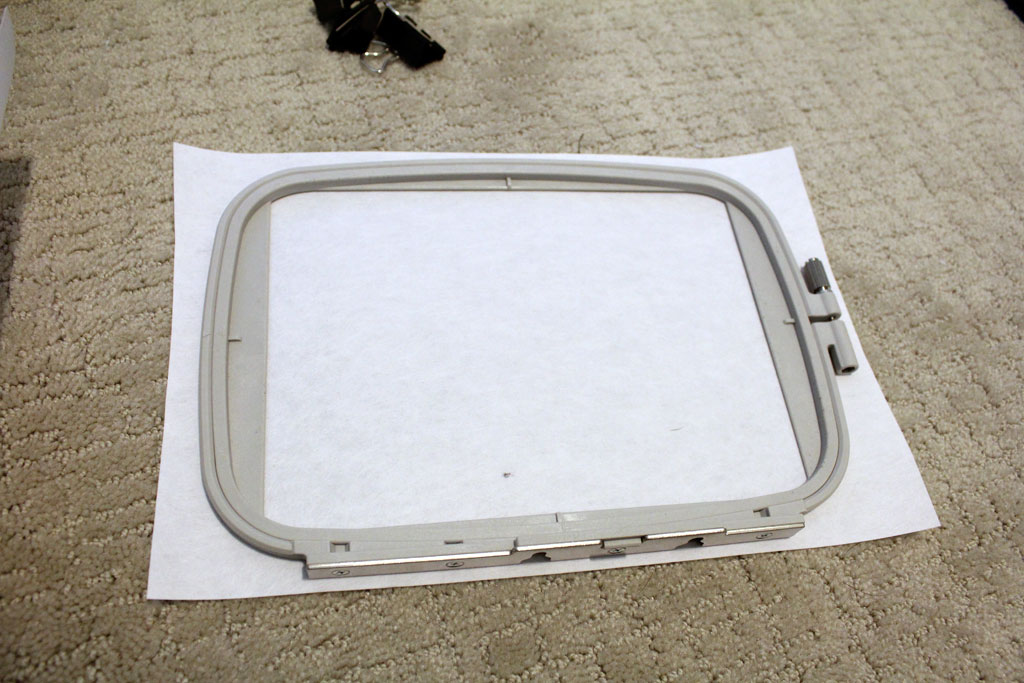
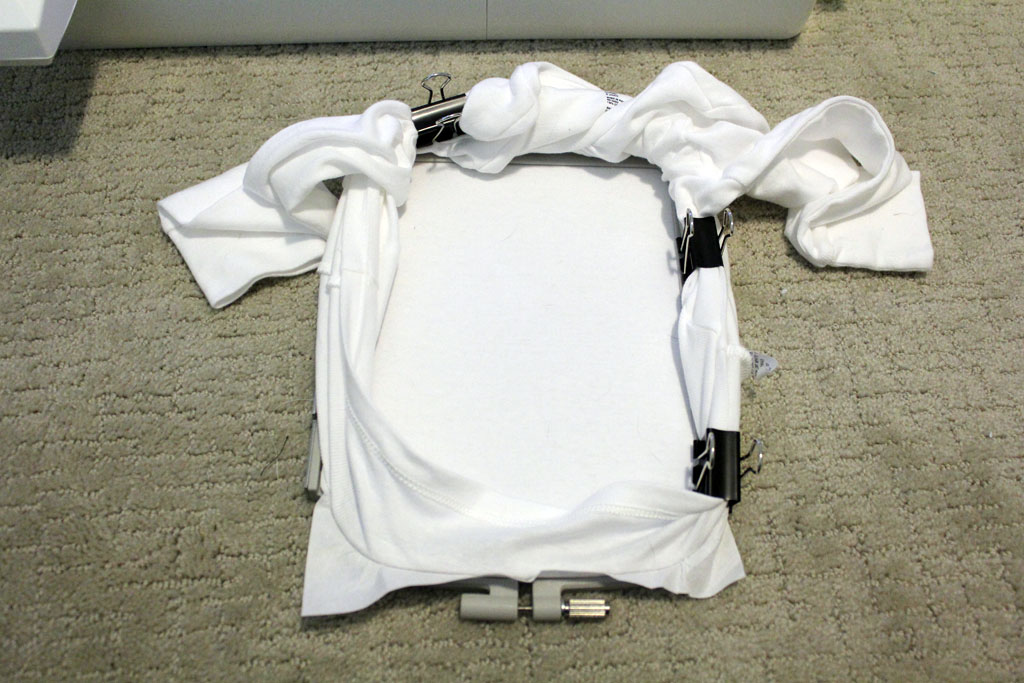
The first step in applique is then to hoop your fabric and stabilizer. I cut out a piece of stabilizer larger than my hoop:

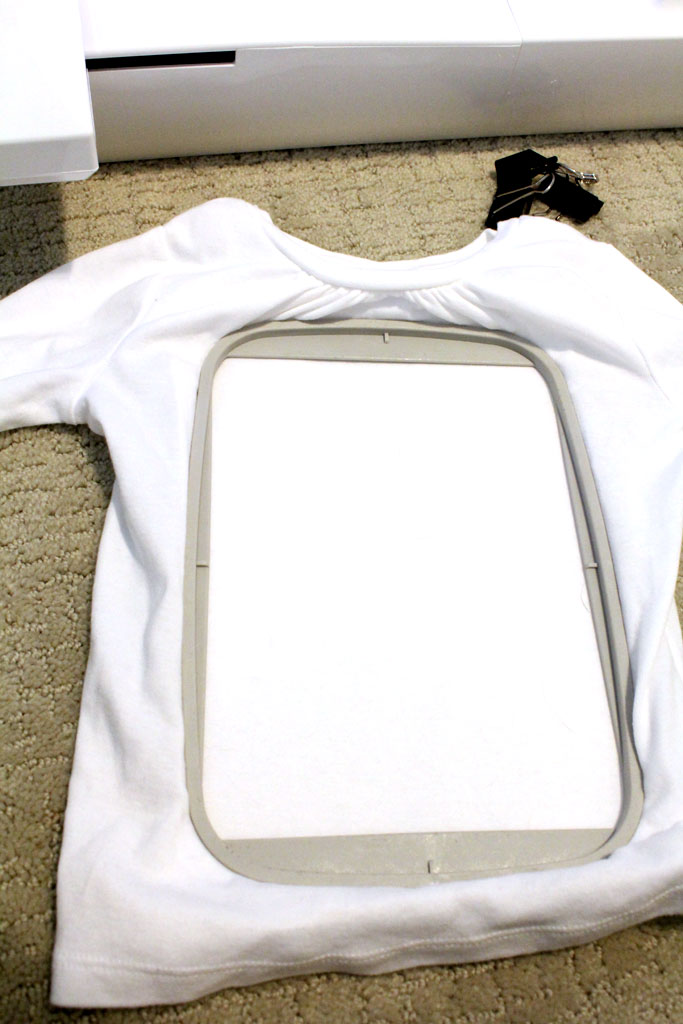
Then I center the hoop and stabilizer onto my fabric. In this case I put it onto a Playtime Favorites T-shirt from Gap Kids (bought at 40% off).
I find centering and hooping my fabric to be the hardest part of machine applique: you want to make sure that your fabric is smooth and tight and that your hoop is straight and centered on the shirt. (a very hard task for a non-perfectionist like me!)

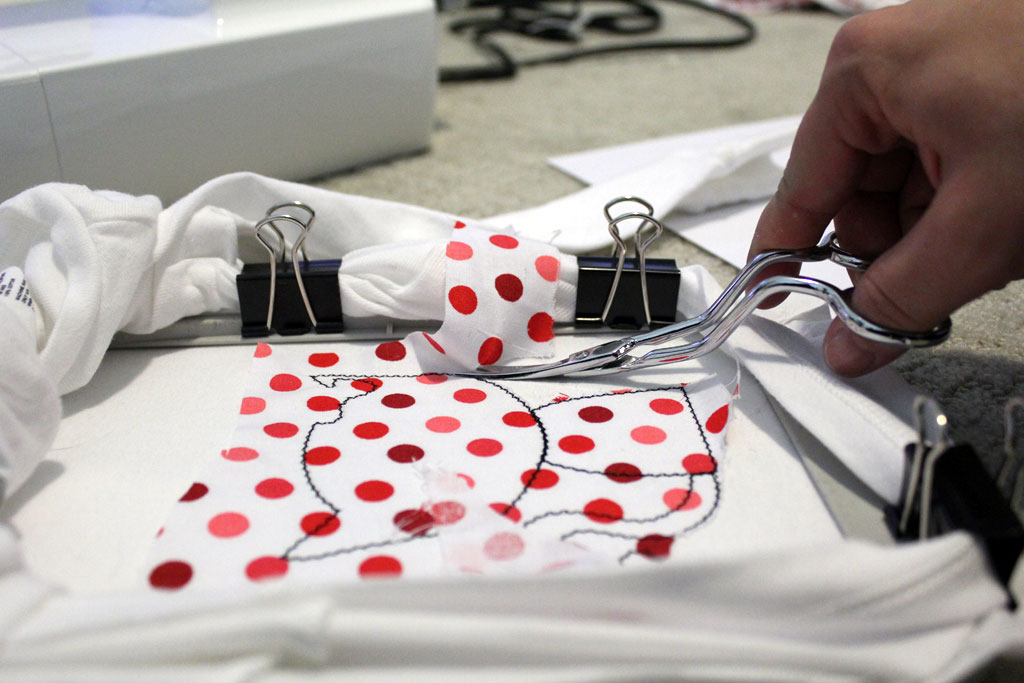
Because you obviously don’t want the machine to stitch through both the back and the front of the shirt, I use a trick I found on this video on YouTube— I use binder clips to clip the rest of the shirt to the outside of my hoop. You have to be careful that they won’t get in the way of the needle, but it works really well to keep your fabric bunched on the outside.

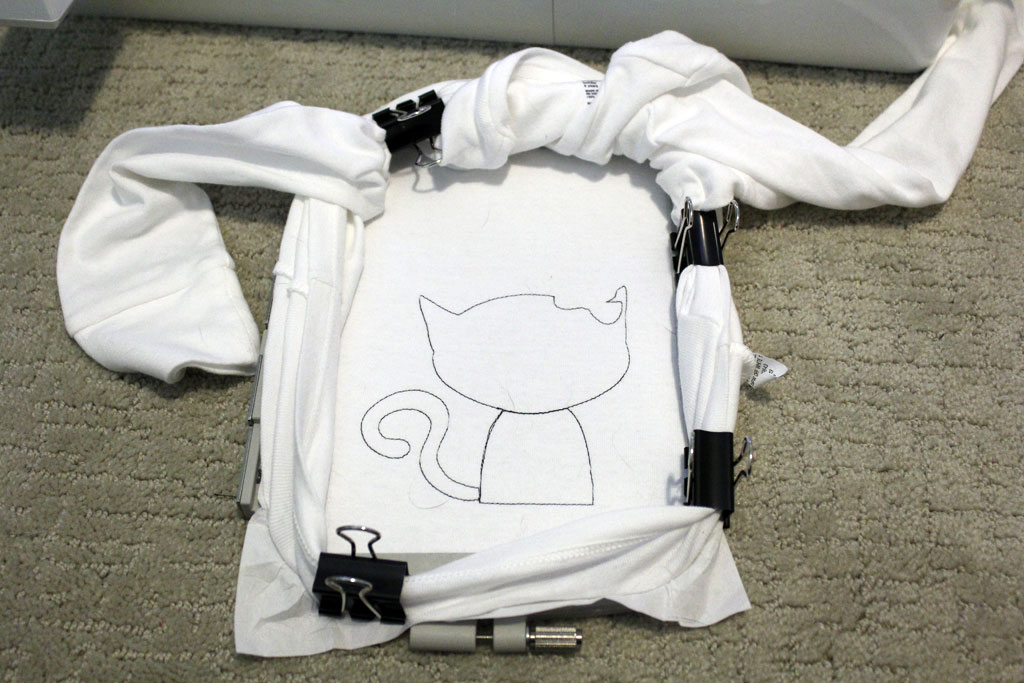
Most applique designs come with an order list of stitches so that you know which part comes next, so I print this if it came with one.
Usually each different part has 3 steps: the first is the outline so you know where to put your fabric:

Then you lay your fabric down on top. This is the step where you should use either basting spray or heat ‘n bond lite. I typically use basting spray because I’m lazy and it is faster. But if you are doing a large section that won’t have any detailing and you don’t want it bubbling up at all from your t-shirt– you should use the heat ‘n bond lite (if you want details on how to do that google or search for that on pinterest and you’ll get some good tutorials).
So I spray my fabric that is larger than the stitched area with basting spray (its the purple and white can in the photo below) and then stick my fabric over the design.
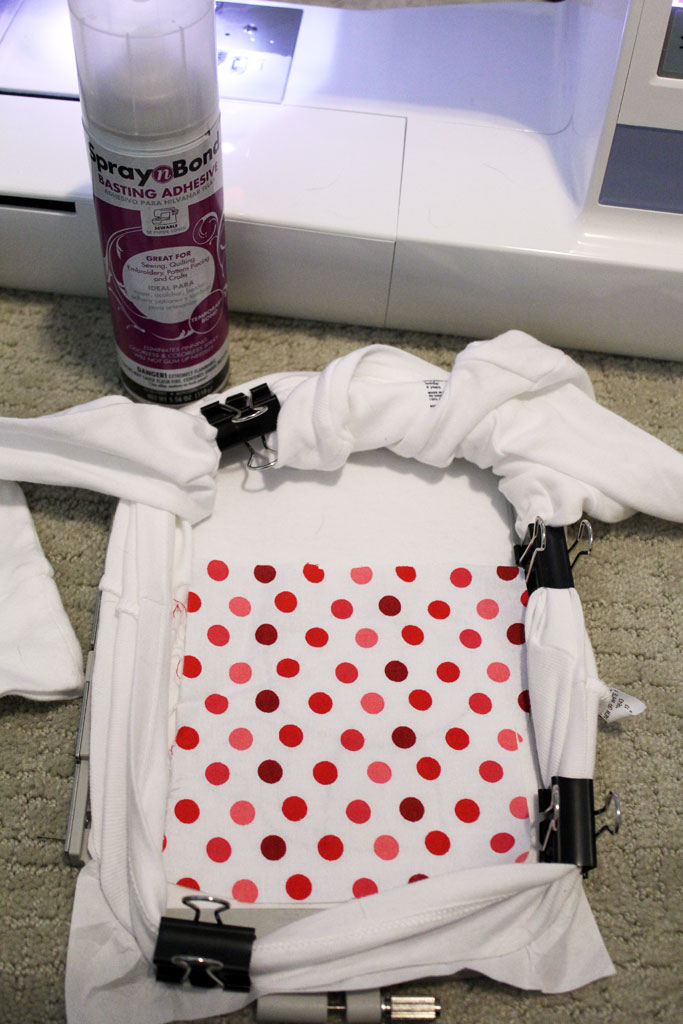

Next put the hoop back into the machine and let it do the ‘tackdown stitch’ (not all of them are zigzags… this design just happened to be).
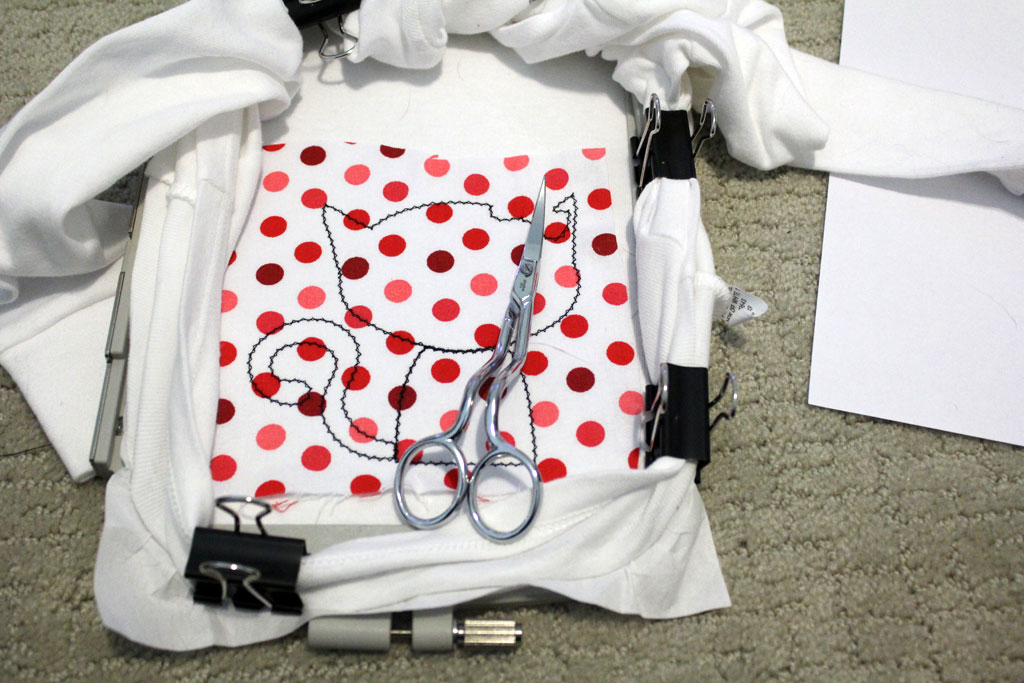

Now cut around the design as close as possible to the stitching. I HIGHLY recommend a pair of embroidery scissors because you can get a LOT closer to the design and they are easier to use. These are the ones I have. I find it easiest to pull up on the loose fabric to make it tight enough to get in closer to the stitching.

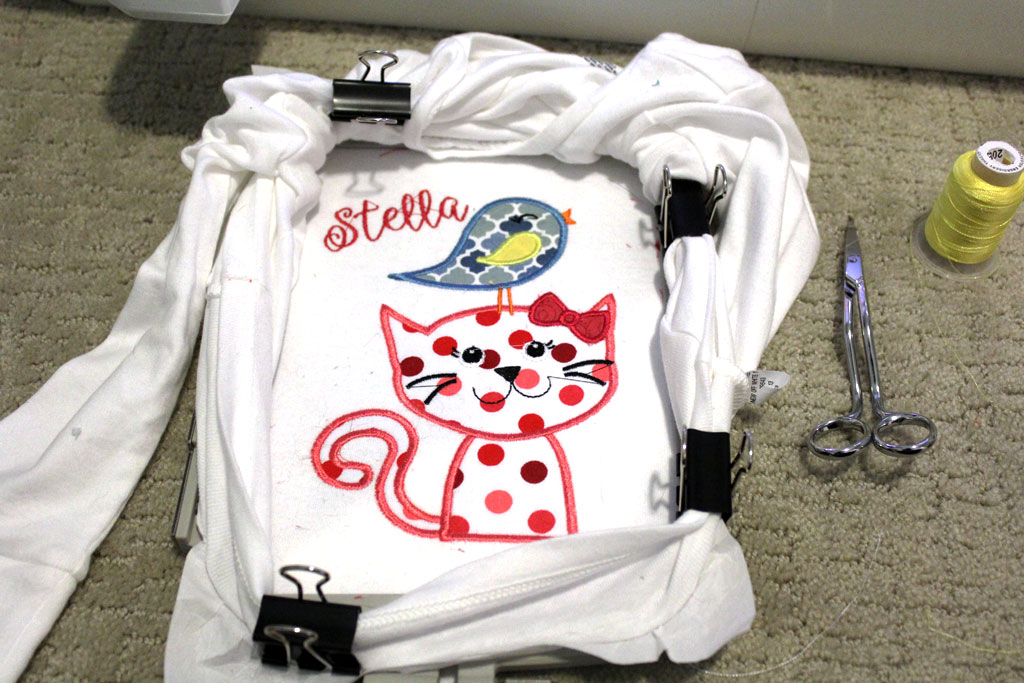
So here is what mine looks like with all the fabric on, but before the satin stitches.


And then you just follow the stitch order, swapping out your thread colors in between each step. So here is my final product before I take it off the hoop and trim all of my threads.

The last step is to trim the stabilizer from the back. It will soften after a few washes, but I try to trim as much as I can away without cutting the shirt or my design!
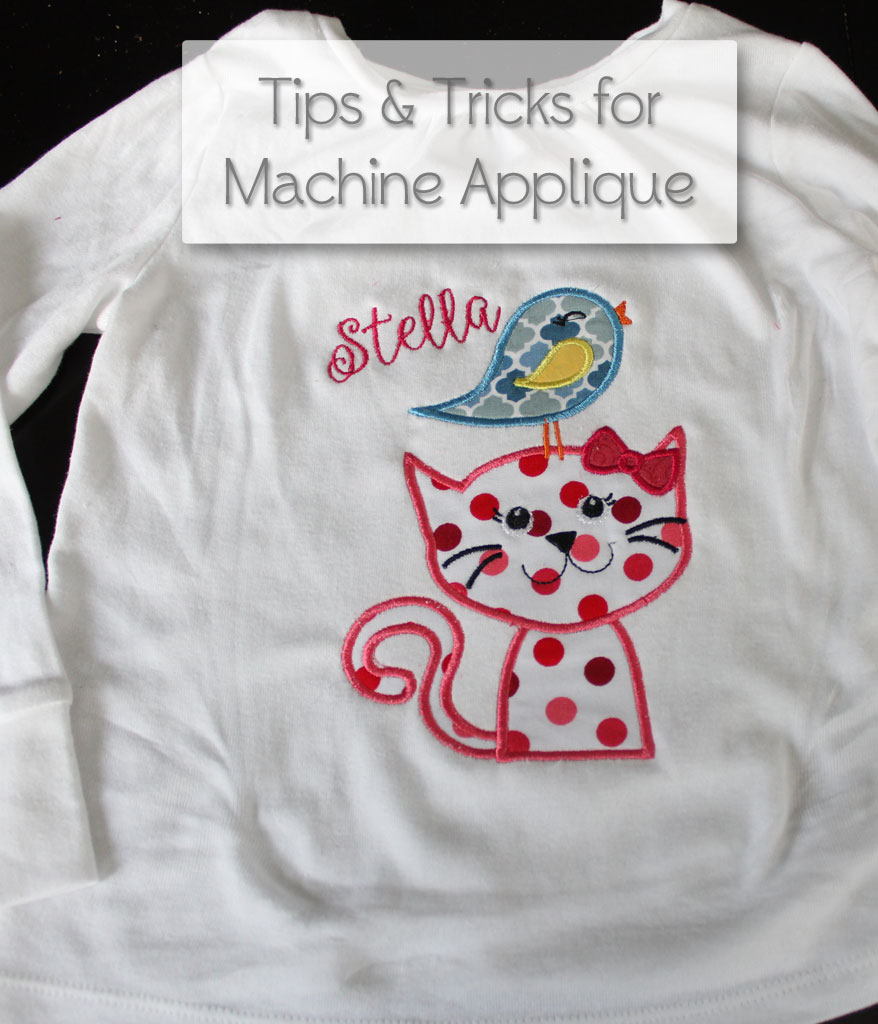

And then you are done! A super cute, personalized gift!


 Hi, I'm MJ! I'm a DIY kind of girl and this is where I share my projects. I'm taking you along for the ride as I learn how to do woodworking, sew, bake, and renovate!


I just love this! So adorable! I recently got a Brother Embroidery machine for my birthday (the end of June) and I am just now figuring some stuff out. I have made a few things just from the embroidery patterns loaded on the machine. Mostly I have used my machine (to get to know and feel comfortable using it) to piece and sew a quilt I was working on. I had not even realized that you could do the machine applique! What a huge bonus. Your blog has inspired me to move on. I plan to take a class at the place where we purchased the machine and this definitely is something I will want the instructor to cover.
Kathy, I am so glad!! I’m having so much fun using mine!
You are a superstar!
Love this!!! I really, really do!!! Thank you for sharing!!! Can you tell me the kind of stabilizer you are using? I had some puckers around a Michigan Logo for a surgical cap I was making today and I think using the right stabilizer is very important. Did you use any on your fabric that you put on your t-shirt? Some use (if I remember correctly) heat bond lite. I get all confused bout all the stabilizers..
Diane, I have been using two kinds- one is a medium weight cut away stabilizer and I have been using that on T-shirts underneath the applique. The other is a tear away stabilizer that is lighter weight that I have used on fabrics that are heavier weight and not as stretchy. As far as adding any to the fabric that I am using (like heat bond lite) I have done that before, but I find that it is an unnecessary step when I use the basting spray. I think the purpose of using it is to make the fabric lay flat and in position and I haven’t found that to be a problem on any of mine. Most of the designs I have used don’t have large areas that aren’t stitched down, so I don’t worry about them wrinkling after the basting spray washes out. But I would use heat n bond lite if I had a larger area that didn’t have any stitching so that it would lay flat even after several washes.