I showed you guys this table that I built pre-blogging for the church service (where my brother preaches) to use as a communion table. Well, when we finished sprucing up the youth space, they needed a table for communion too. I jumped at the chance to build another one of these super quick and easy tables… photographing it this time for a tutorial!! Warning… this post is gonna be LONG.
The plan for the original table came from Ana-White and used 2×2’s for the legs. I wanted this guy to be a little more substantial, so I decided to use 2×4’s for each leg instead. For the first step, we cut down all our 2×4’s to the length we wanted.
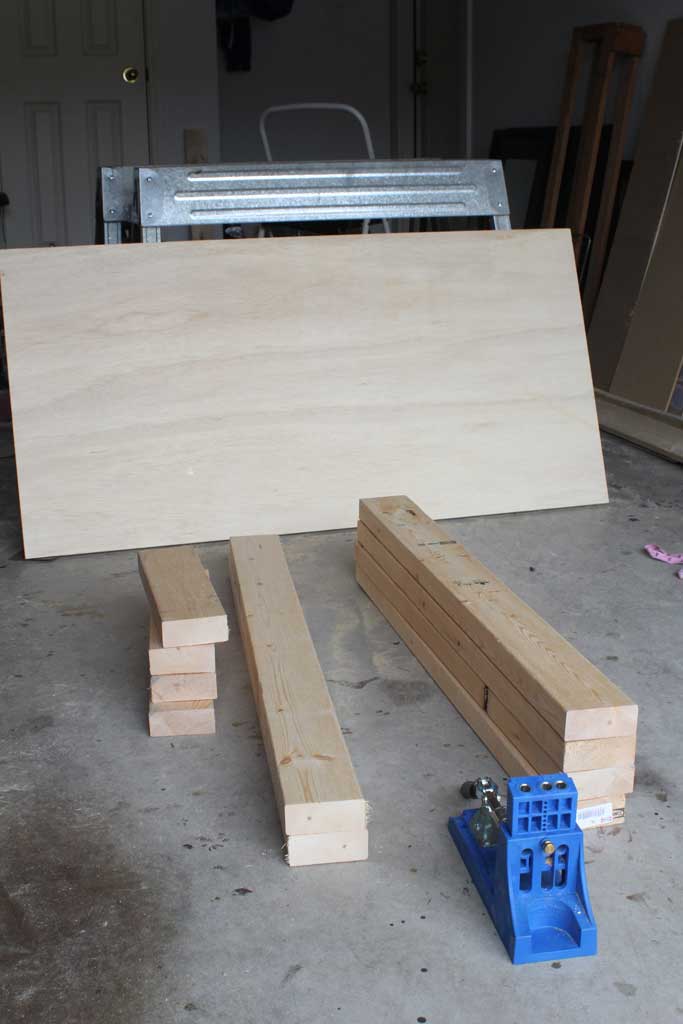
Here are your materials: (sizes can be changed to fit your particular space)
4-2″x4″s 33 inches long (for the legs)
2-2″x4″s 40 inches long (for the length)
4- 2″x4″s 15 inches long (for the width)
A precut half sheet of furniture grade plywood for the top (24″x48″)
Drill
Woodglue
2″ Kreg screws (I buy all mine off of Amazon)
Stain

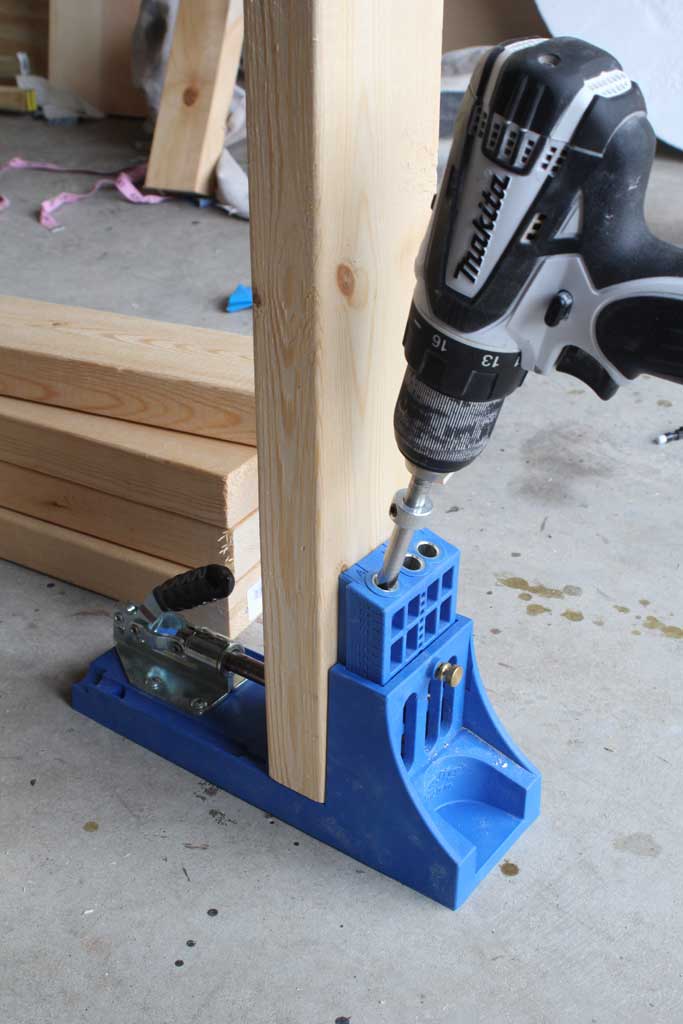
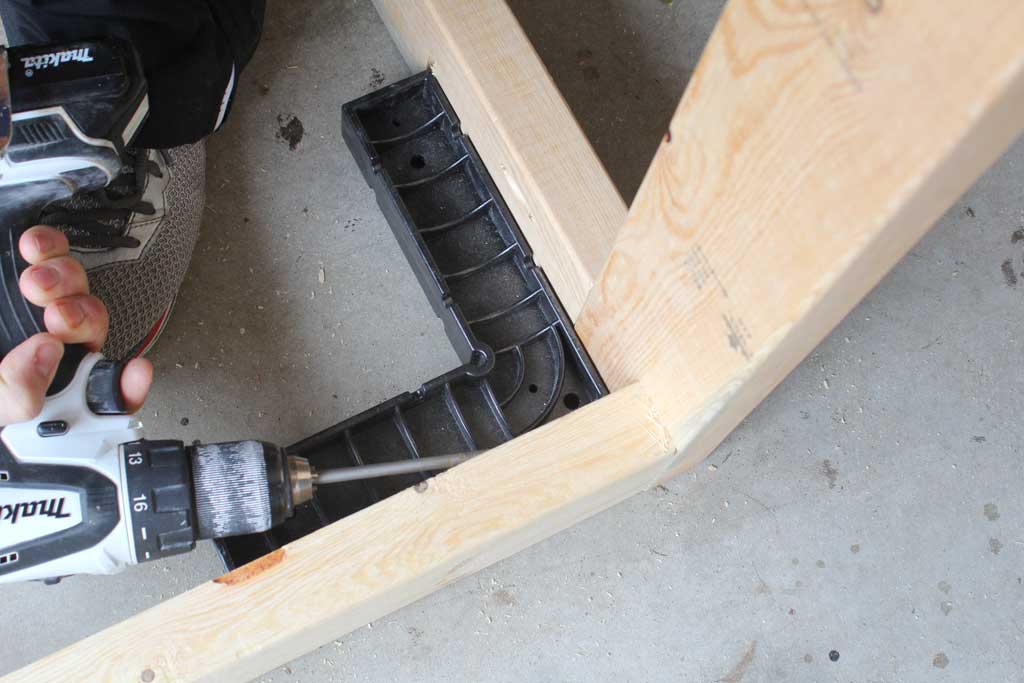
If you have never used a Kreg Jig before, click on this link to see how it works, but it is an AWESOME tool that drills pocket holes for you so that you can secure two boards together and hide some of your screw holes. It comes with its own special drill bit and you secure the board in the jig like and drill your hole, like this:

So when writing up this post I went back to the original plans, and realized that I had put my pocket holes in different locations than Ana-White’s plans call for, but mine works just as well, but perhaps aren’t quite as hidden as hers are. I’ll just have to build another one to try that out!
I basically drill 2 holes in the end of each of my length and width 2x4s, but not the legs. You can see in the picture above I am drilling into the hold marked A. While the board is still clamped in the same location, I’ll drill hole C and make two pocket holes fairly evenly spaced across the board (this gives it a more secure grip when it is secured into the leg.
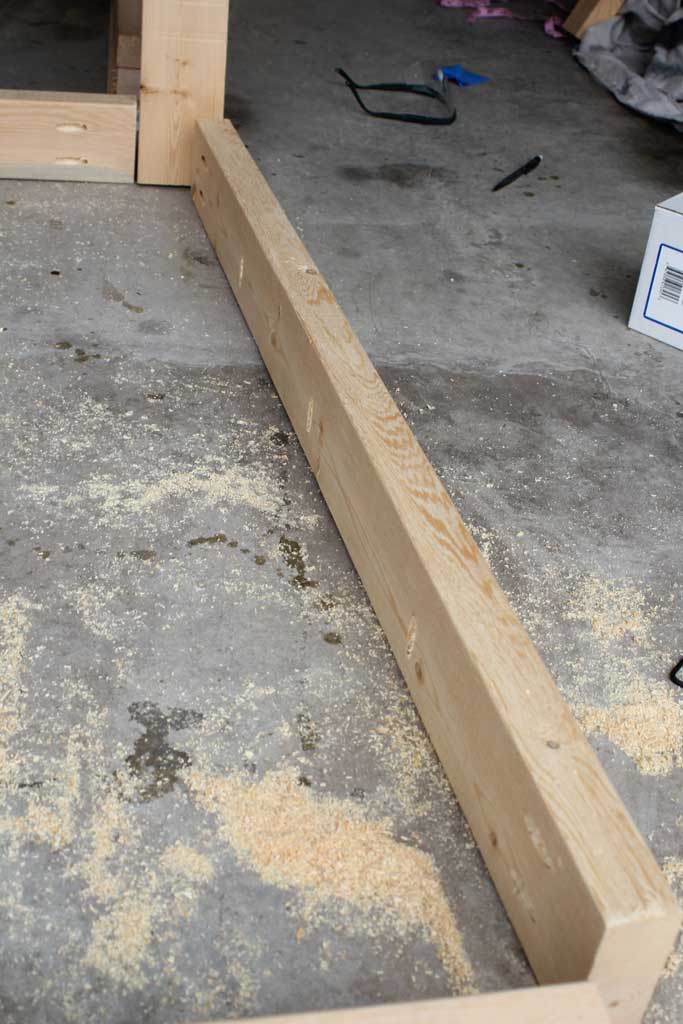
I also at this point drill 3 or 4 pocket holes on the inside of the long boards facing up so that when I go to put the top on, I can secure the top on without screwing through the top. I’ll also make one or two in the center of 2 of the shorter boards for the same purpose. In the picture below the frame of the table is upside down, but you can see where some of my hole placement is.

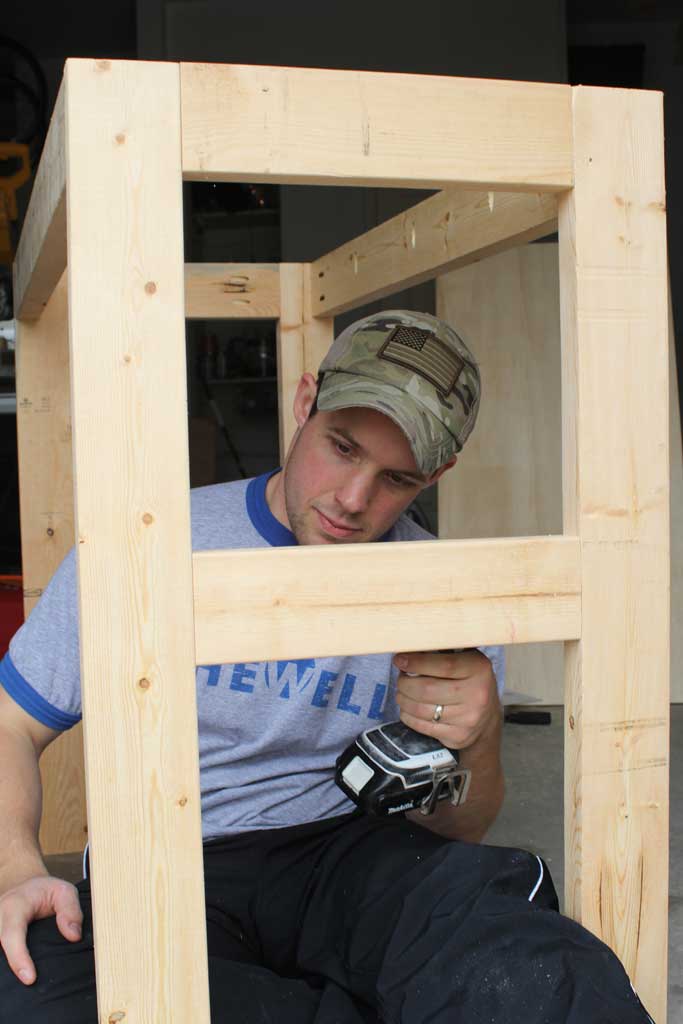
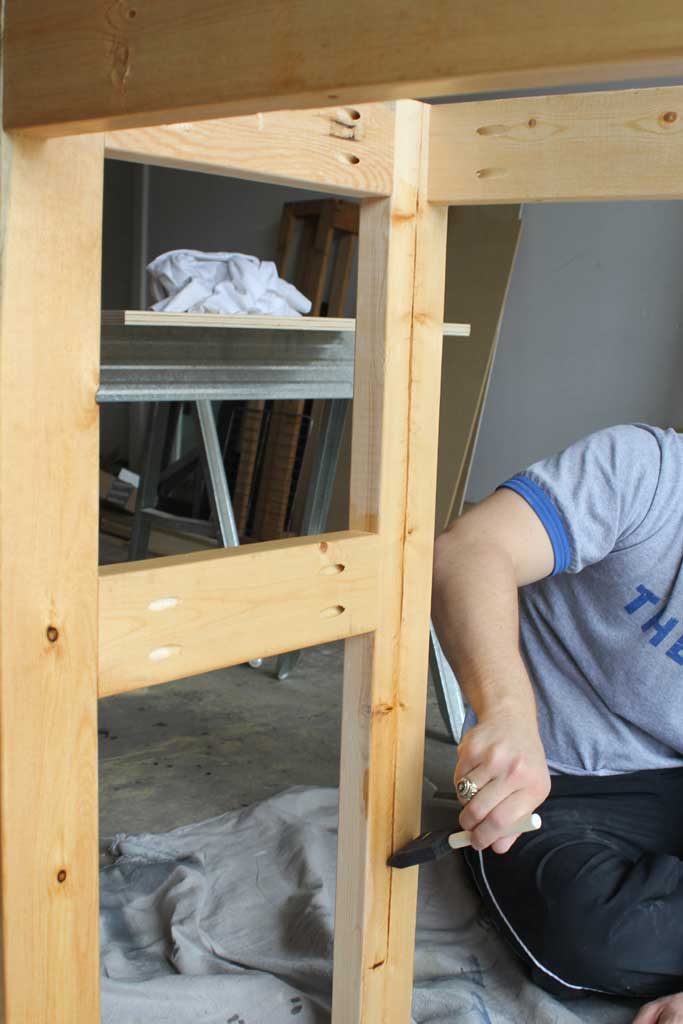
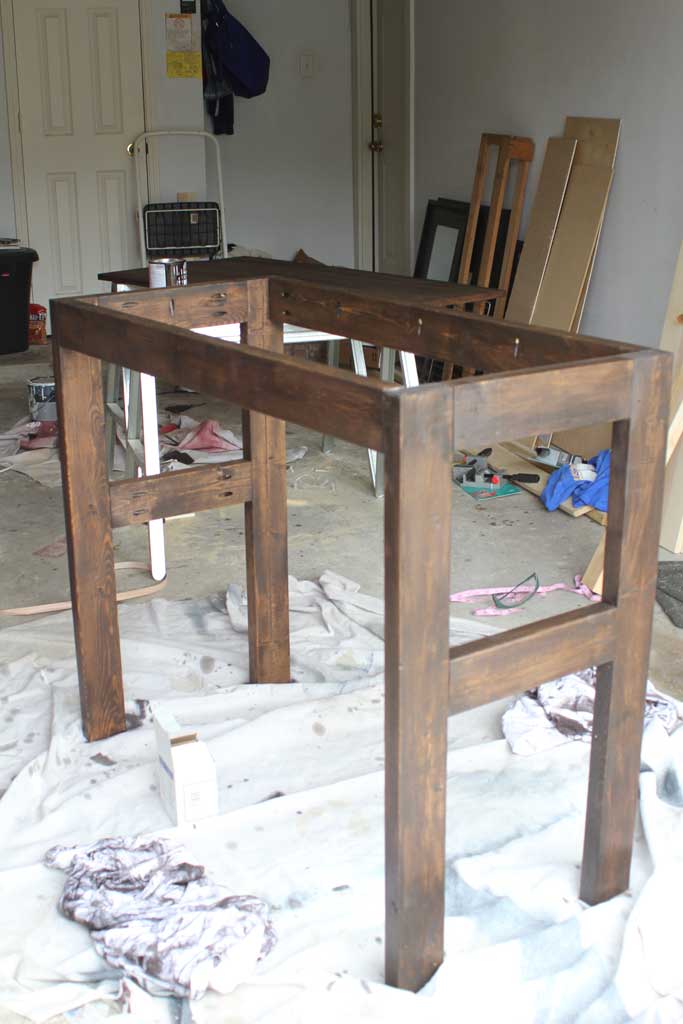
My next step is to start screwing the frame together. I created my measurements based on the fact that the 2×4 legs would have their widest part on the sides of the table (so from the front you can only see the 2″… which is actually only 1.5″… side). So you can see my lovely model starting to piece it together to start assembly. I told him after looking at all these pictures it makes it look like he built the whole project and I just sat and took pictures… his response was: “what it doesn’t show is that while you drilled all the holes I played your assistant and went to chick fil a to buy you a Dr. Pepper. ” Best. Husband. Ever.
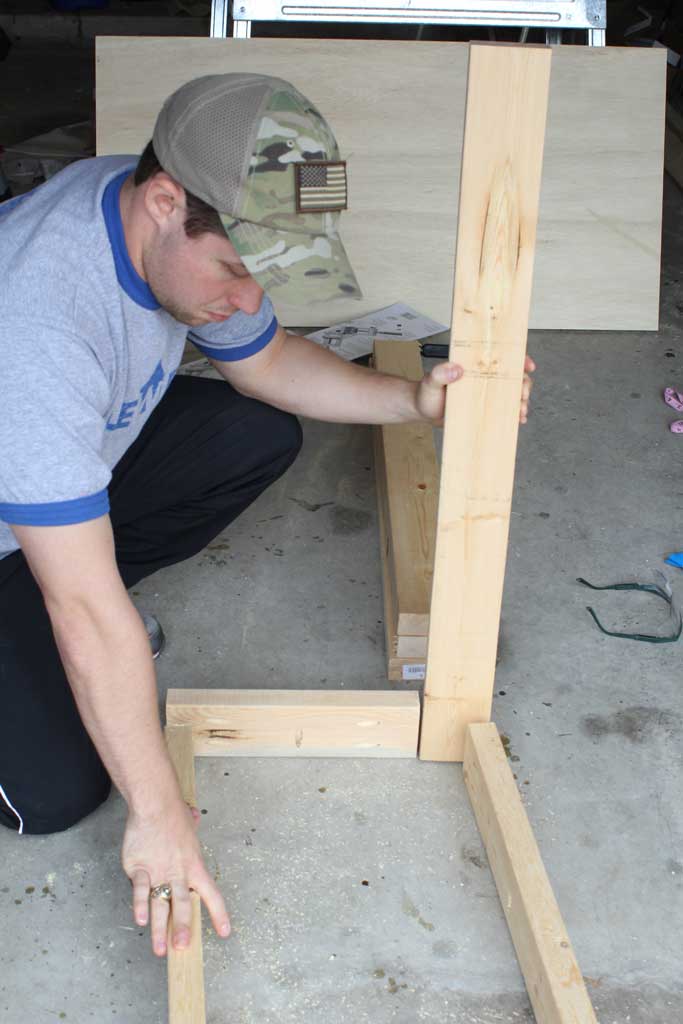

At that point we used a squaring piece to make sure it was square before screwing in the sides to the legs:

After all four of the legs are secured, its time to secure the side braces (these should be your two shorter pieces left and not have holes drilled upwards to secure the top on it… just the four to screw into the legs… unless you want to add a shelf). We marked an equi-distance from the bottom of the legs up to the bottom of where we wanted the brace and then used a level to make sure the braces were level, and then screwed them in using the same 2″ Kreg Screws.

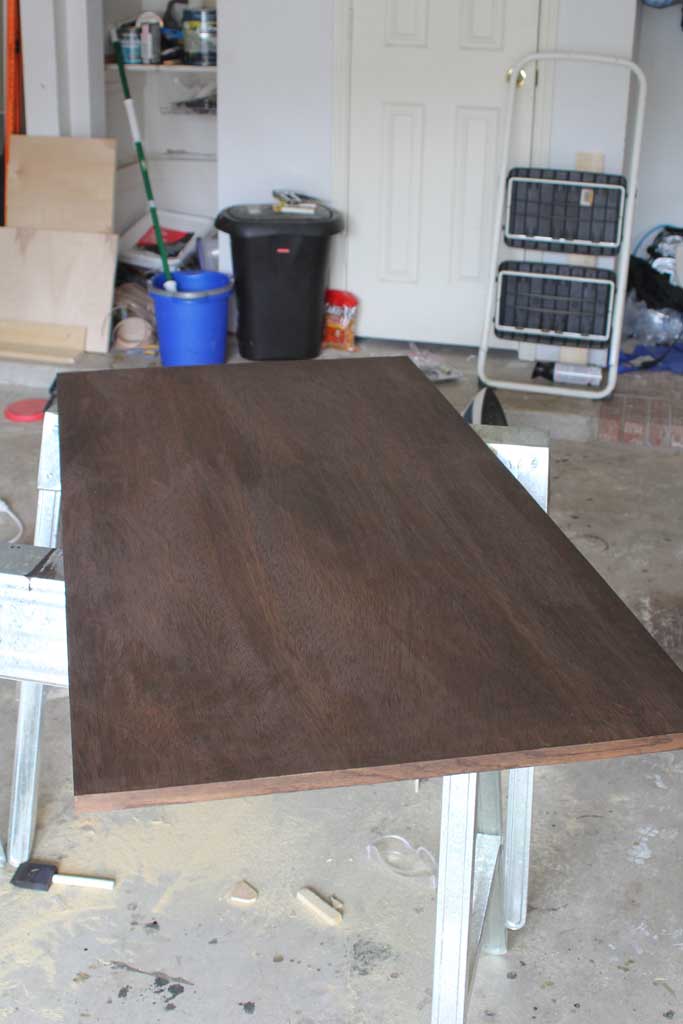
Once you have it all assembled, the bottom part is ready for sanding and staining. But first I wanted to prep the top so that I could stain the whole thing at once. The top was already the size I wanted it to be, but with furniture grade plywood, the sides are rough and not very pretty. However for about 4$ a pop, they sell birch veneer that is iron on and comes in a roll (you can see the remainder of the roll in the picture below). At my Home Depot it is located with the nicer wood hanging below the racks of wood. But you can always ask someone. It is a pretty simple process, line up the veneer, go over it with an iron set without steam. The instructions actually tell you to put some foil or something in between, but I only have two hands so I find that kind of tricky, and I had no problems ironing directly onto the veneer.
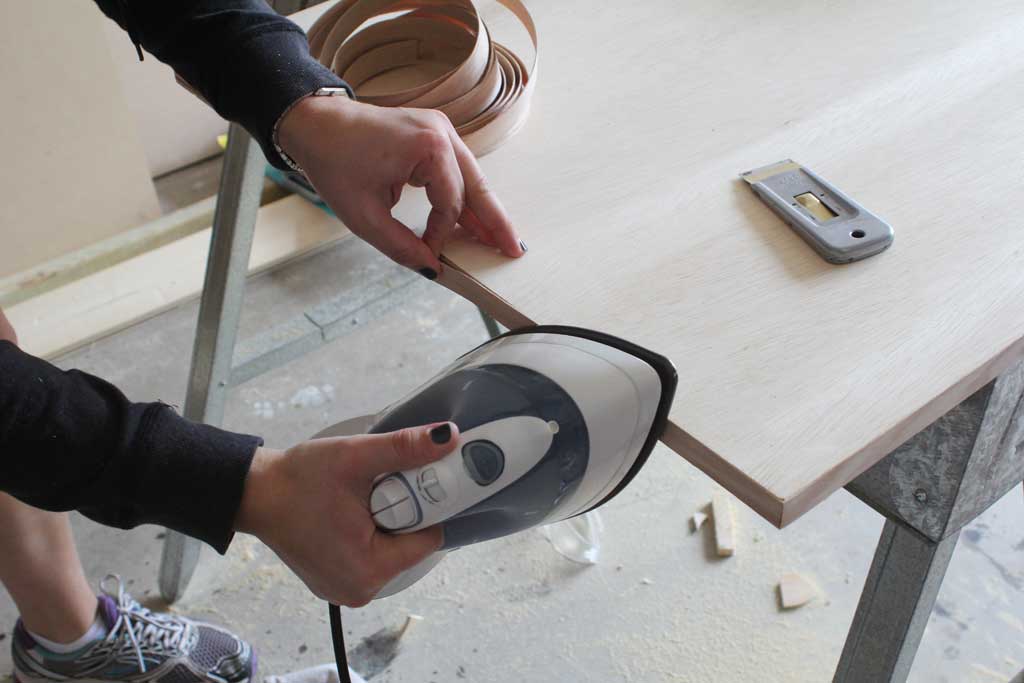

The trickiest part are the corners. I didn’t want to have to cut each piece to length, so I just started at one corner went the length of the table and then when I got to the next corner I scored the outside of it with an exacto knife:
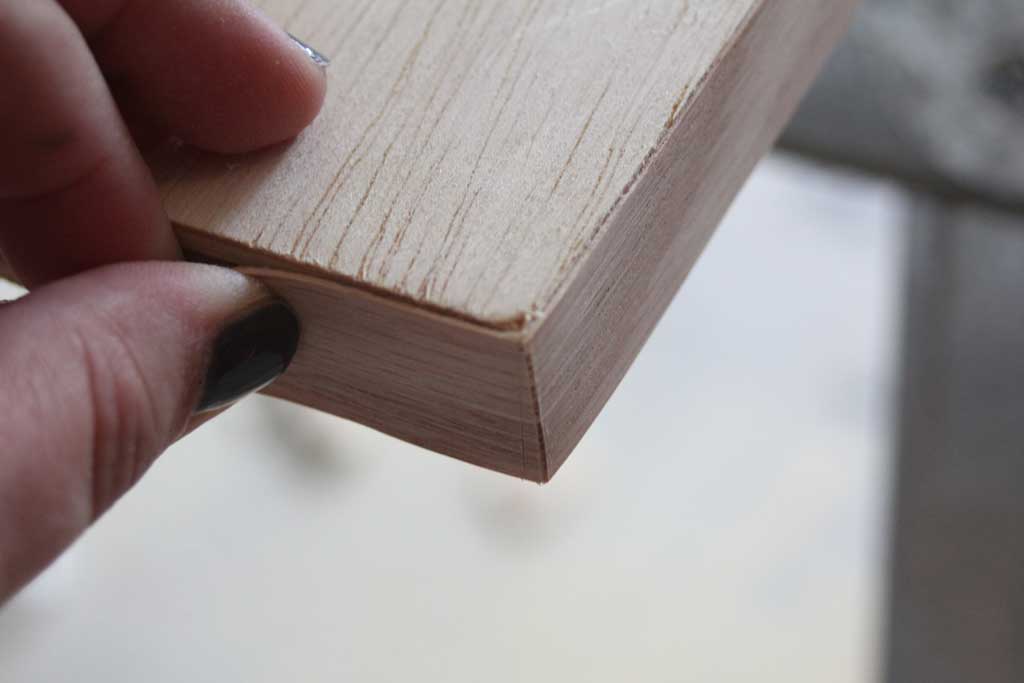

Which allowed it to bend exactly at the corner and from there just proceeded to iron the rest of the veneer on, doing this for each corner.

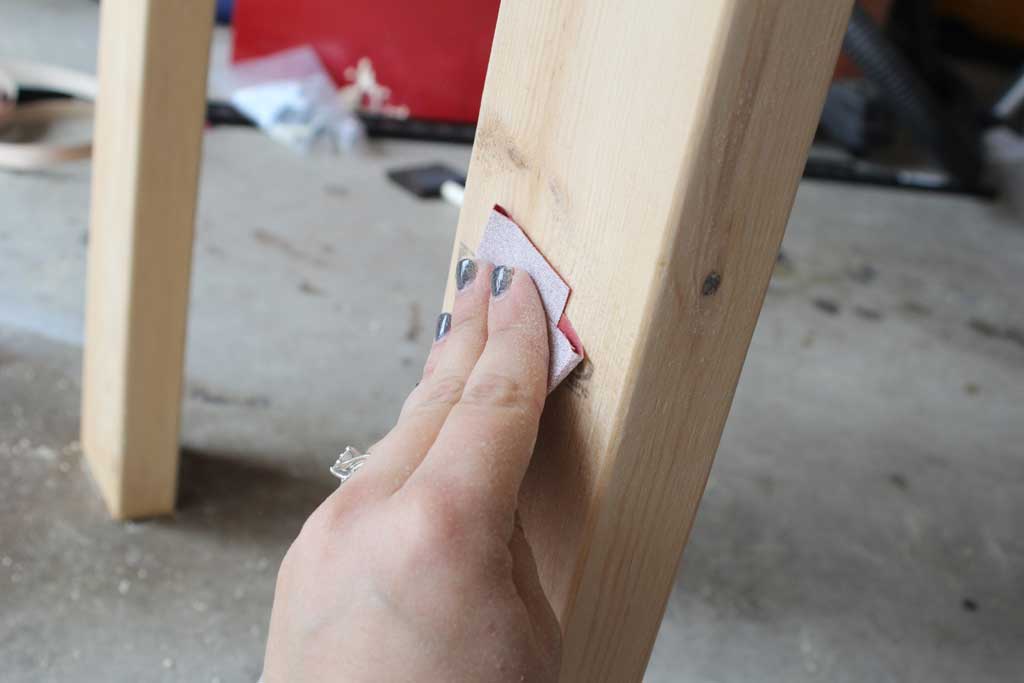
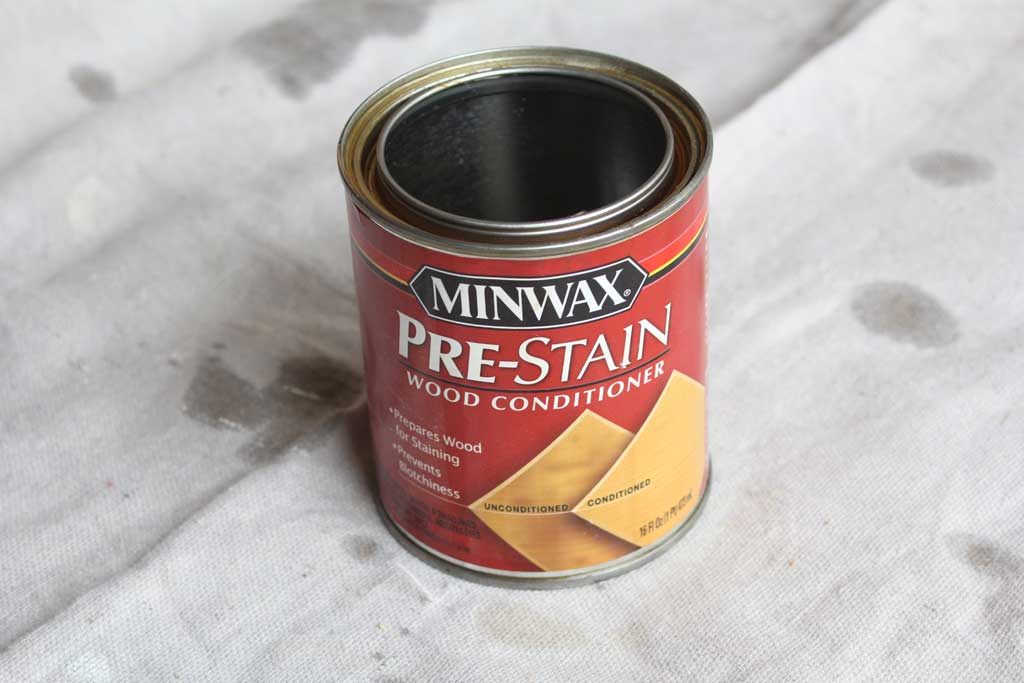
Now we just had to stain the piece! I have tips for staining in this post. But the quick version is:
Sand

In this case we used pre-stain:


And then stain


Kreg Jig does sell some plugs that you can put into your pocket holes to make them disappear, but since this table will be used on a stage a good distance from the congregation, I decided just staining in the holes was sufficient, especially since all those ones on the top pieces will be mostly covered by the table top, so the only ones you can see are the 4 on each side piece.
We left it in two pieces so that it would be easier to transport to the church but here is what the two pieces finished look like:


I totally meant to go take a picture of this table in action this weekend… but other things sort of side tracked me (hello halloween party!) and I didn’t get it done.
This really is such a simple table to make, taking us less than 3 hours from start to finish, staining and all (excluding dry time, obviously). And the size could be adapted to anything: side tables, console table, coffee table, etc. You can also add more side braces along the bottom or even a shelf down there. It is very adaptable. This is a GREAT beginner project if you want to try your hand at woodworking.


 Hi, I'm MJ! I'm a DIY kind of girl and this is where I share my projects. I'm taking you along for the ride as I learn how to do woodworking, sew, bake, and renovate!


Speak Your Mind