Jewelry Organization

One of the bloggers I stumbled across a year or two ago and just adore is Jen Woodhouse.  She has some of the most beautiful woodworking projects, and a fun personality to go with it (at least on the internet… I of course have never met her!) But right around the time I was searching for a way to deal with all of my jewelry, she wrote a post for another blog I follow, I Heart Organizing, showing off her jewelry organization and I just knew this was the right solution for me.

She has a great tutorial, so go on over there to read how to do it, but if you want to see mine in progress, read on!

I cut mine down into 3 12″ sections and I used some scrap cedar boards that I had lying around (I’ve promised the husband to try to whittle down our wood pile before I go out and buy more for a project!), but you could use anything that is 1×2 (or even chunkier if you wanted a different look!).

DIY Jewelry Holder

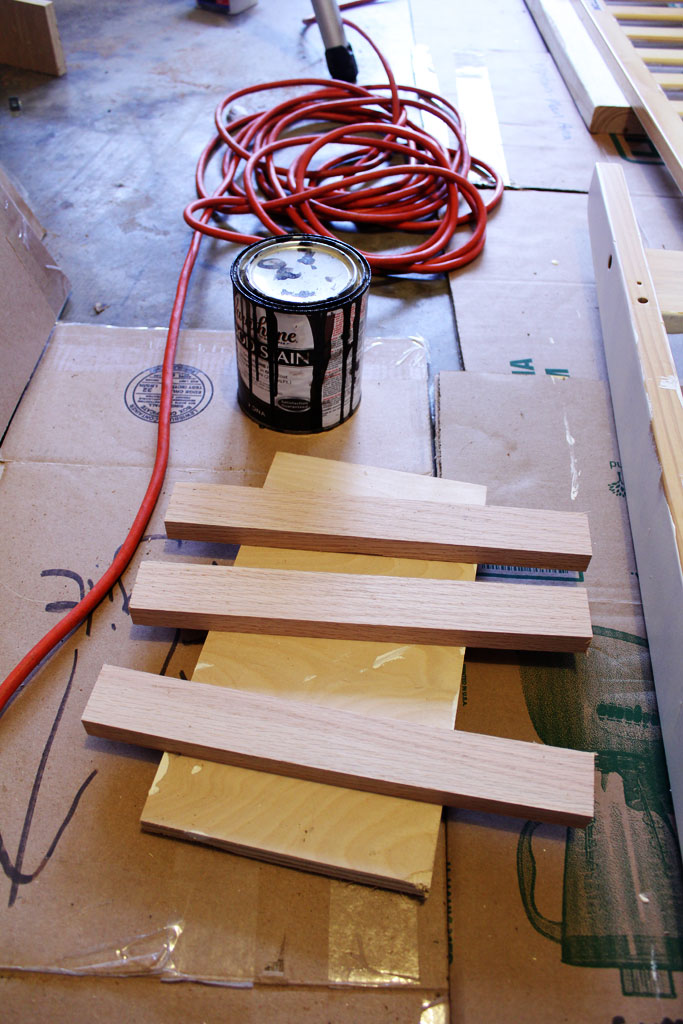
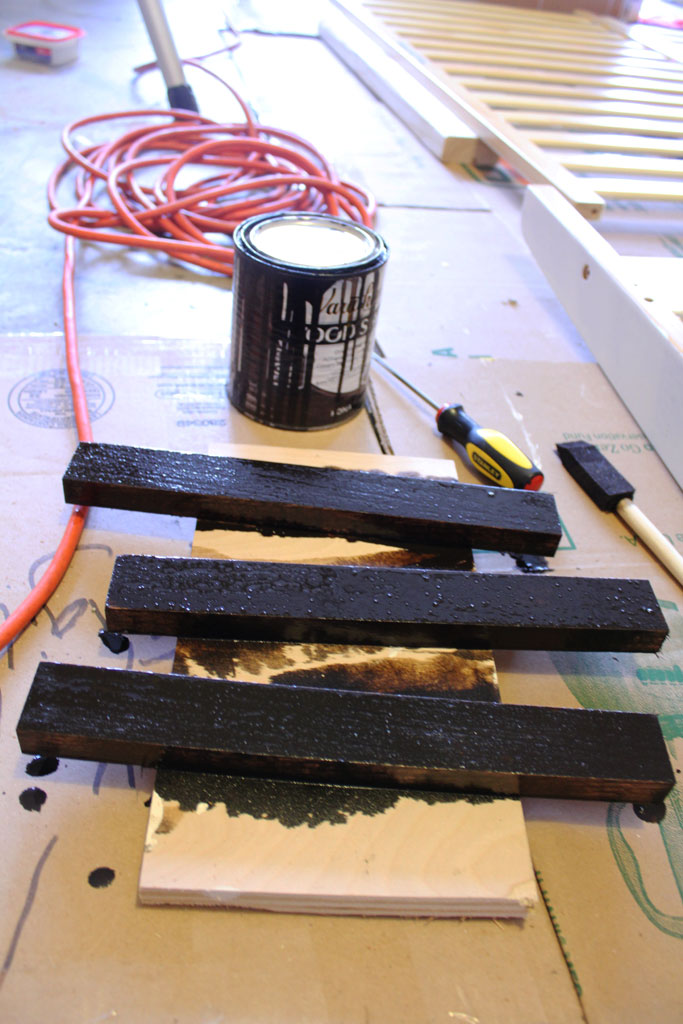
So for my first step, I stained them with some leftover stain (I’m pretty sure it is Kona from Varthane, but the can is getting a little hard to read).

Here they are before I wiped off the excess:

DIY Jewelry Holder

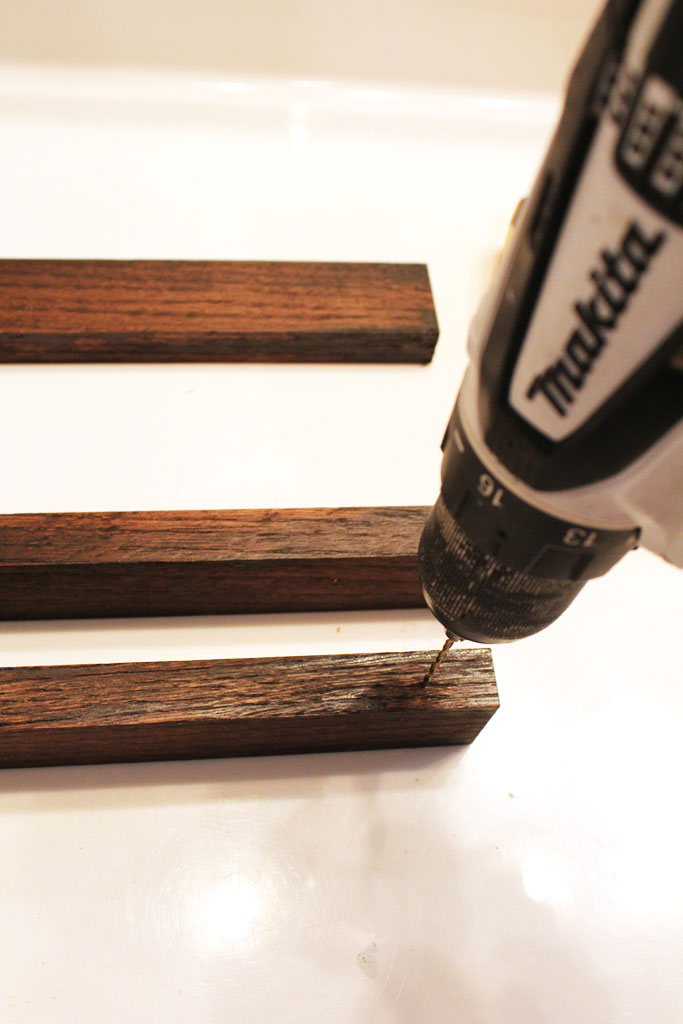
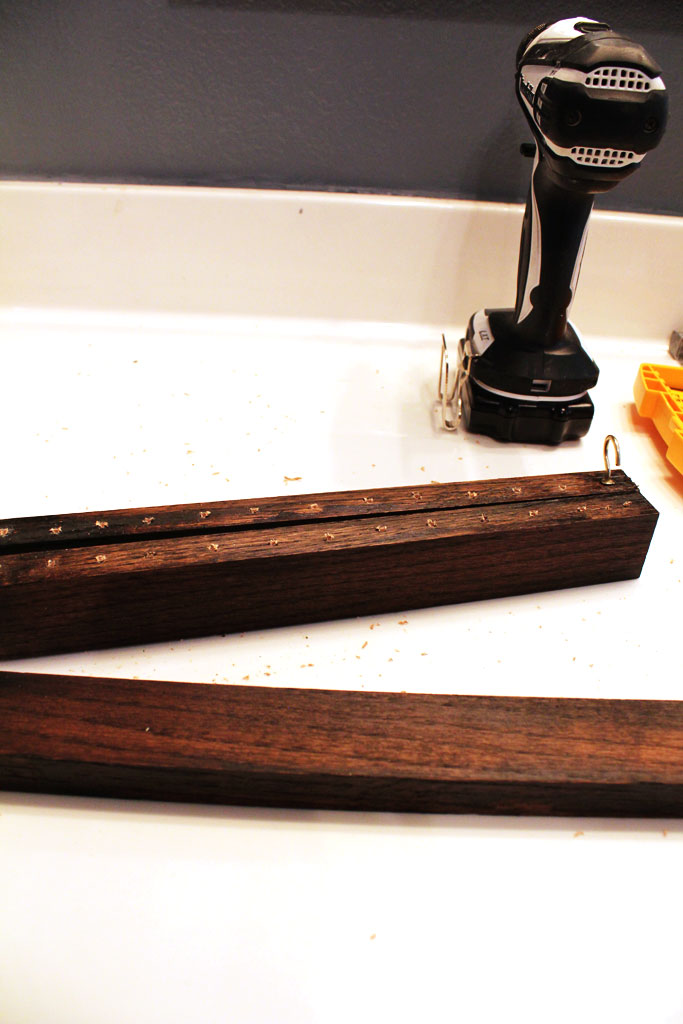
Then I took them upstairs to the bathroom and drilled the holes in them right there (because who doesn’t need a little extra sawdust in their bathroom?!):

DIY Jewelry Holder

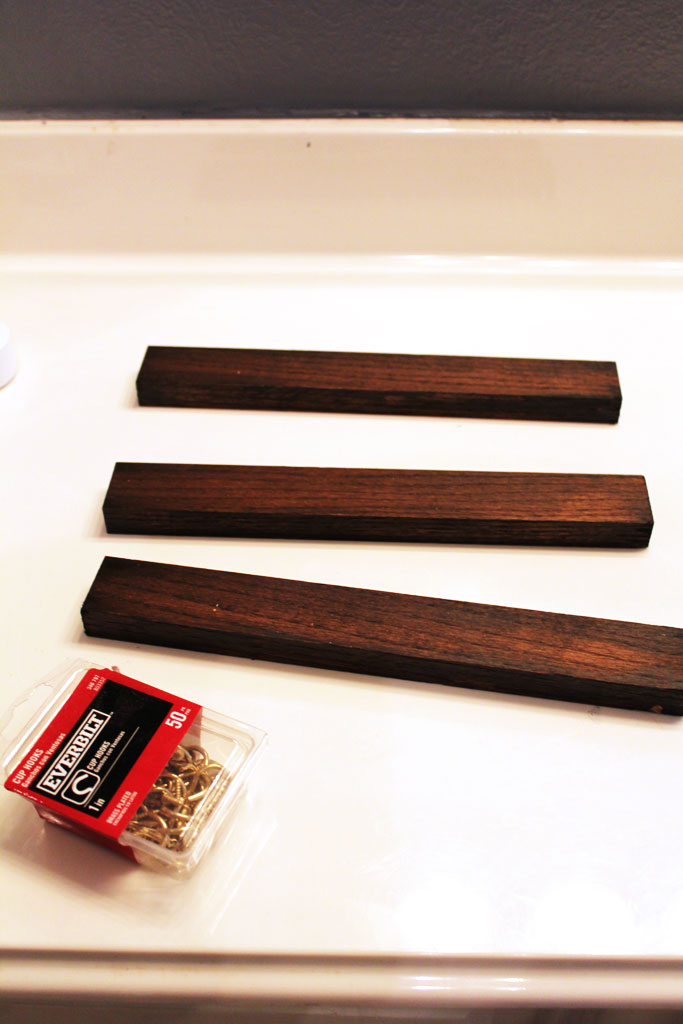
PS those little hooks are monsters to screw in, my fingers were definitely tired after screwing in about 20 of them, but it is worth it!

DIY Jewelry Holder

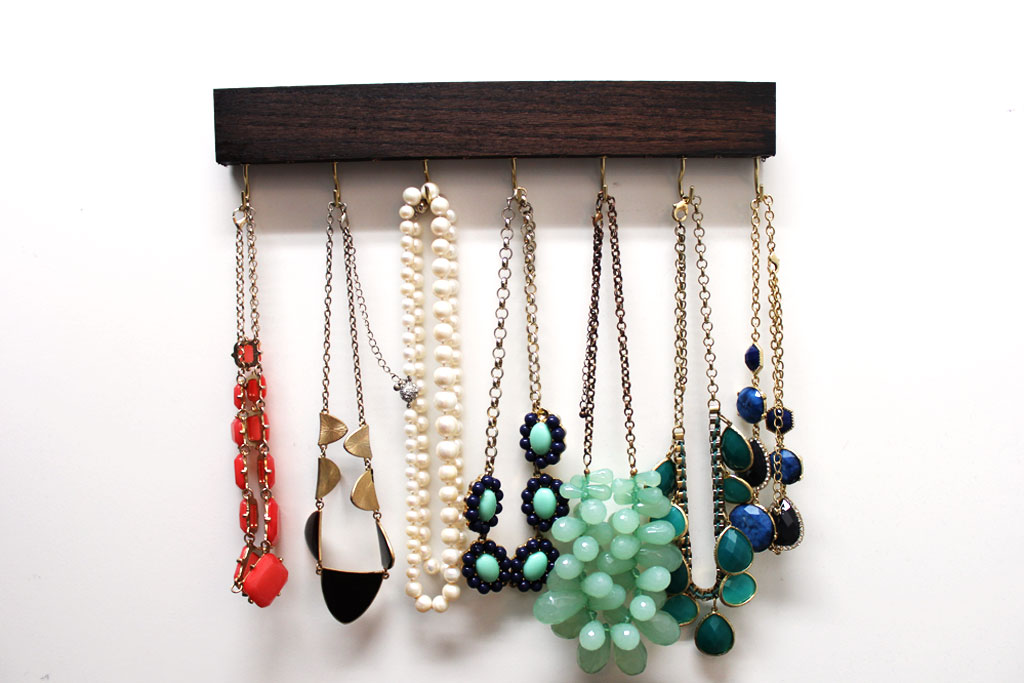
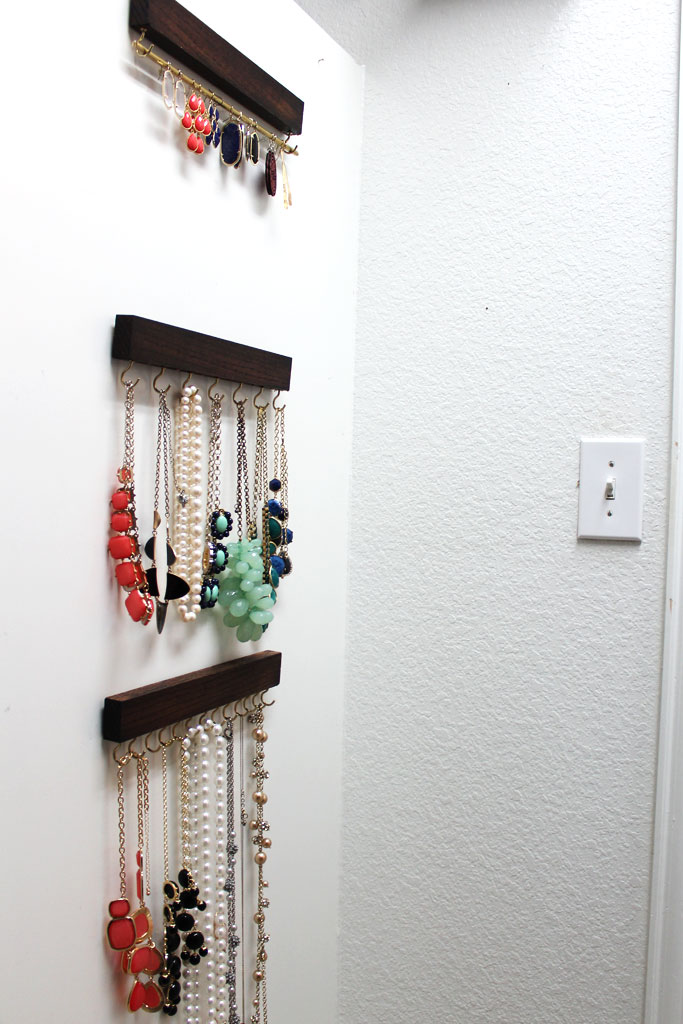
I made three with different uses One with LOTS of hooks for narrower items, one with hooks in every other hole for my chunkier ‘statement’ pieces and then one with the brass rod to hang earrings and other items from.

DIY Jewelry Holder

One thing Jen doesn’t mention in her post is how thick the brass rod is, so the first one I ordered was too thick for my earrings to fit around.  The one I ordered from Amazon is 1/4 inch, but I also think you could get away with the 1/8th of an inch.  A couple of my earrings that have tighter hoops have a hard time staying on the rod.  But I thought this was an ingenious way to display my jewelry and is a perfect use of the blank wall in my closet that is the back of my husband’s shelves!

DIY Jewelry Holder

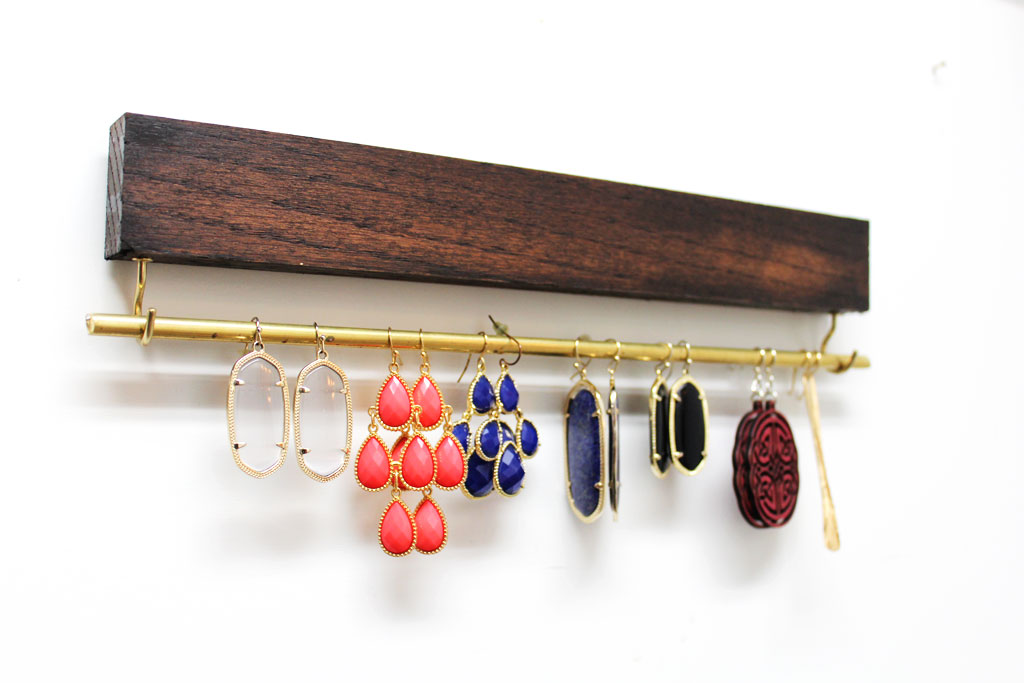
I love that it makes all my jewelry easy to see and easy to grab!  DIY Jewelry Holder

I may add another shelf under the earring shelf or may just move it down since it is hung a wee bit high… but for now, this works really well!

DIY Jewelry Holder

Now I just need a way to display my bracelets!

A Piece of the Mass House

When I was in college my parents bought a house that they then rented to my brother and several of his friends over the next few years.  I lived there with 5 guys for about 1 month during one summer (and ps that was about as good of an idea as it sounds like it would be… hence only being for one month!)

But over the course of several years at KU, several of our friends lived in that house and it is a cute little yellow house on a busy street.  It was the perfect house for the guys to live in, and I have a lot of good memories there.  For several reasons my parents kept that house for several years after we were all gone from Lawrence.  They have sold it now, but during all that time it was discovered that the big tree in the backyard needed to be taken down.  When the guy came to cut down the tree, Mom had them save two sections of the tree stump for me in case I wanted to do something with them.

So for about 2 years those tree stumps sat in my garage (one is still there) waiting for inspiration to strike.  Well, one day inspiration struck in the form of a blog called The Art of Doing Stuff.  I’m not sure really how I got there, and it has been about 2 or 3 years since I found it, and my memory doesn’t last that long!

But she has a fabulous tutorial on how to do this, and since I did it pre-blogging I have no in process pictures for you all, but it is such a neat project and has a great memory to go along with it!

stumpstool

I did not stain mine because I liked the variation already in the stump.  And I will say it is not very easy to sand a round log, but I think the whole project took me only a few hours from start to finish.

stumpstool2


And as you can see in the photo above, if you don’t have control over cutting the log so that it will be even, the adjustable legs from Ikea are key… otherwise this would be a VERY uneven table.  It is still mostly decorative, but pretty close to level.

Connection Corner Table Part 2!

Okay, I left you on the edge of your seats yesterday waiting for the conclusion of our table/kitchen island saga yesterday with this guy:

cctable1


All ready to get stained, but also looking a bit boring.  So we decided to spice things up a bit.  Claire and I had the brilliant idea of using a herringbone pattern on the front of this guy to give him a little pizzazz.  (PS TOTALLY WORTH IT NOW, but partway through this project I was DEFINITELY regretting this idea).  If you’ve been around here for a little while you may remember the stage project that we did for the youth area of the church with different shades of wood stain, so we decided to carry that trend through the church for this project. I used wood molding from Home Depot and just started out cutting 8″ long pieces and laying them out in a herringbone pattern.

cctable9

Once we had all of the pieces cut, we stained them in 3 different shades of stain:

cctable12

And in case some of you who have known me forever have seen my recent organizing posts and said: That is NOT THE MJ I KNOW! Rest assured, I’m still the same old me… here’s what the rest of the garage looked like during this project:

cctable11 LOVELY.

Anyway, the next part was the hardest part of the whole project: painstakingly piecing together all of the smaller pieces of the herringbone pattern.  And here is where I have to say that it is SO IMPORTANT to have good friends and family, I was on a deadline to get this done and I had to go to an event I had promised someone I would attend.  So I left my husband, my brother and his wife to finish up the final steps of this project.  We figured out the easiest way to do it was take the already stained pieces and lay each one over the spot it needed to go, mark it and cut them individually.  So it worked best to have someone marking them and someone cutting them (CAREFULLY) on the miter saw.

Once they were all cut, we just wood glued them down.  The fit was pretty tight already, so the wood glue was just a little extra insurance.  And this isn’t going to get a lot of wear and tear since it is on the front of the piece.

BUT OHHHHH it was worth it… Check out how cool it looks!!

cctable13

cctable15

Like any home made piece, it isn’t perfect.  But I love it! And I love seeing it in its home at church:

cctable16


We have an artist who works for the church who painted that mural and hand-drew with chalk the cover to the CD that is displayed on the right.  CRAZY talented.  CRAZY.

The backside is a little rough, but the drawer works (mostly) and it has enough room for all the things they needed to store, so its perfect! (PS Can you tell I worked connection corner on Sunday and had my Dr. Pepper addiction fulfilled?)

cctable19

Looks pretty good if I do say so myself!!

cctable18