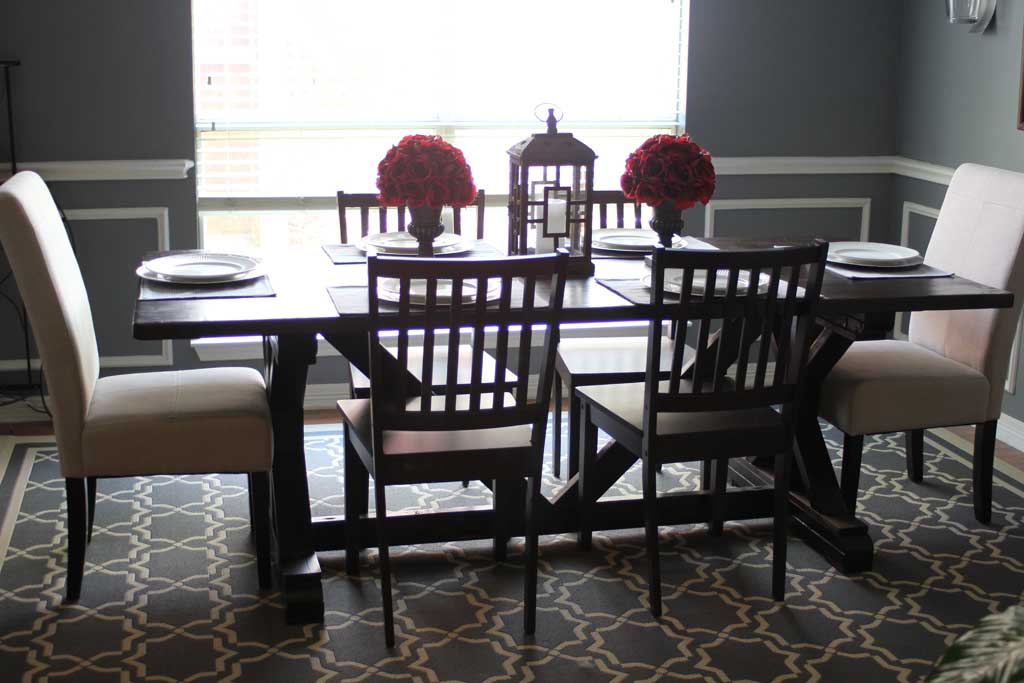
Do you have those friends who just ‘get you’? They enjoy the same things, put up with your intense craziness and are always up to help you out when you need something? For Reese and I, some of our best couple friends have been Kory and Julie. They were both in our wedding and we love spending time with them.
Kory and I are kindred spirits when it comes to projects. Both of our spouses love the fruits of our labors, but they tolerate more than love our project driven natures. But when we all get together and start talking about projects, we tend to spur each other’s crazy project ideas on. So when they moved into their house last year and needed a table, I gladly went along with their idea to build one. From scratch. Despite the fact that I had only built a small simple communion table for the church before and Kory had no experience building tables, we were confident we could give it a go (and if it ended up terribly, we were out less than $150 dollars). And unfortunately since this build was a year ago I only started taking pictures once I was sure this table would actually function and stand up on its own. But clearly, it did:

Julie, Kory and I emailed back and forth for about a week about designs and I found some Ana-White table plans and sent them a few different options. We talked about what we thought we could feasibly do, and picked the X-Table that Ana-White created. If you want to build a table like this for yourself, Ana-White’s plans are AMAZING and easy to follow. Click here if you want to see those plans. Together we came up with a materials list for them to purchase before our build day.
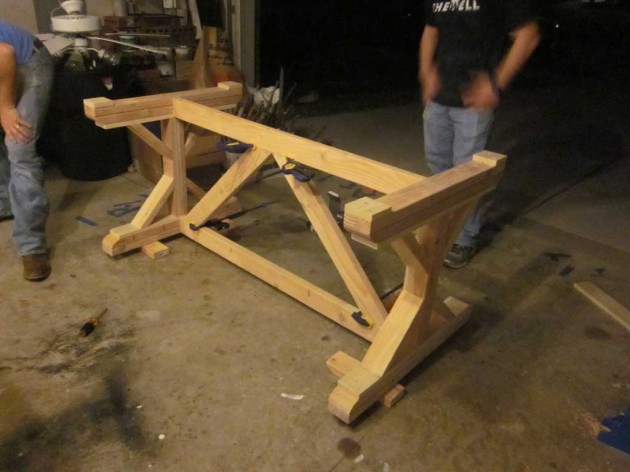
Bright and early Saturday morning Reese and I showed up at their house with all my tools in tow and we quickly set about following the plans. The plans call for you to build the two X legs first, so we started following their direction carefully. We secured every board with both wood glue and screws to make sure it would be extra solid. (For the most part we built these two from the top down while they were upside down, putting screws in the bottom side so they would be less visible, so in some of these pictures these are upside down).
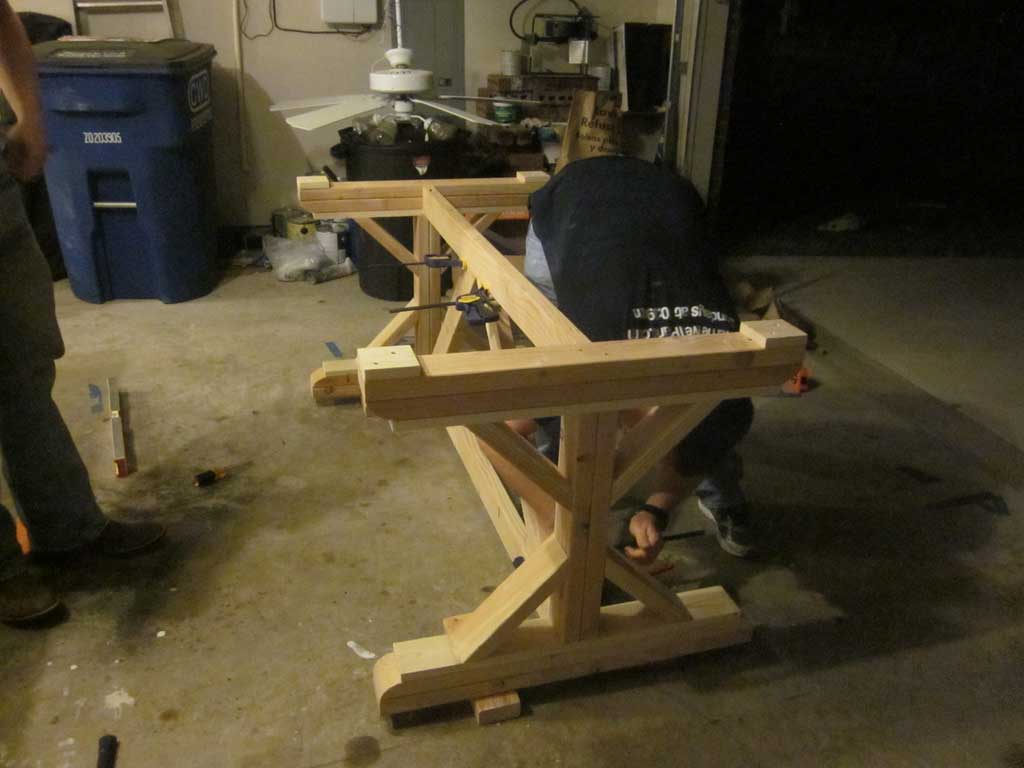

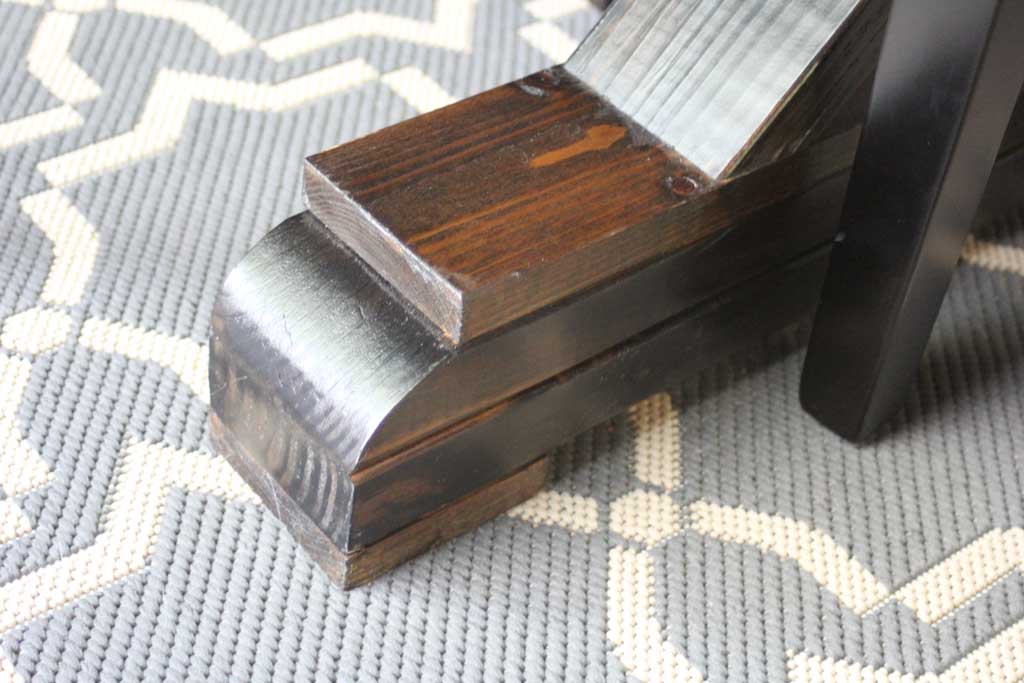
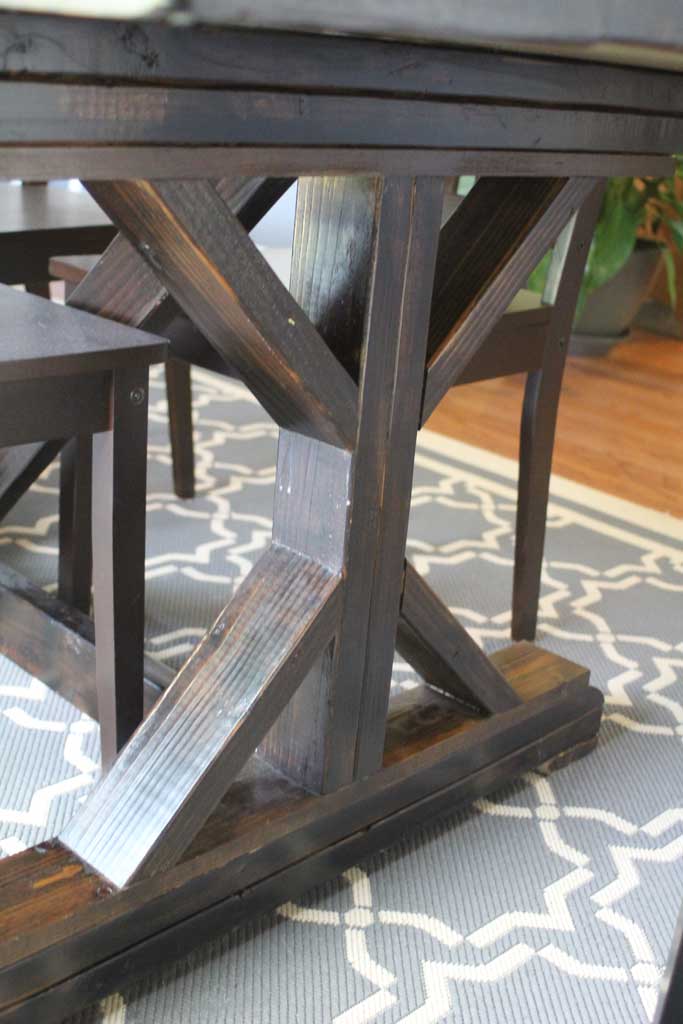
When it came down to the bottom of the legs there were two options: cut the board at a 45° angle, or cut it at multiple angles and then round it off with a belt sander. We both liked the look of the rounded edges better than the harsher line of the 45° angle. But since neither of us had ever tried this before (this was one of my first big projects with my baby) we found some scrap wood and decided to try it out and see if we could get it to work first. And sure enough it was EASY. We drew out the curve we thought we wanted and then just started changing the degree of the cut to match it. If I remember correctly we did about 4 cuts at varying angles and then Kory took the belt sander to it to smooth out any rough parts and make it more curved. From there we just repeated the process on the other end of that board and then made 3 more matching boards. The most important part here is to make sure the edges of your board are still the same length as the board below (or above) for a seamless transition. The picture below shows what that curve looks like when the table is finished.

At this point in time we had two freestanding X legs for either end of the table. Now it was time to build the top. We had 4 2×8’s that were 8 feet long. The plans after all called for an 8’ table. But as we were starting to build the top of the table I looked at the pile of 8’ boards on the floor and said… This is going to be a MASSIVE table… are you sure it’s going to fit in your dining room? So we decided to go measure again… and sure enough… 8’ would have left little to no room for chairs at the head and foot of the table. The good news was we didn’t have any of the long pieces cut or assembled yet, so we just took off an extra foot of the table to make it more of an appropriate size for their room. And here is the first and most important rule of DIY-ing (besides safety of course) MEASURE TWICE! (In our table the V boards touch, while in Ana-White’s plans they have about a foot gap in between)
Once we had decided on that, we began the assembly of the top. Using my Kreg Jig, we drilled pocket holes in the bottom of the 2x8s and secured them together with a small bead of glue between each board (we didn’t have clamps big enough to go across two boards, but trusted that the screws would keep them together enough to let the glue dry). This is what the top of the table looks like:
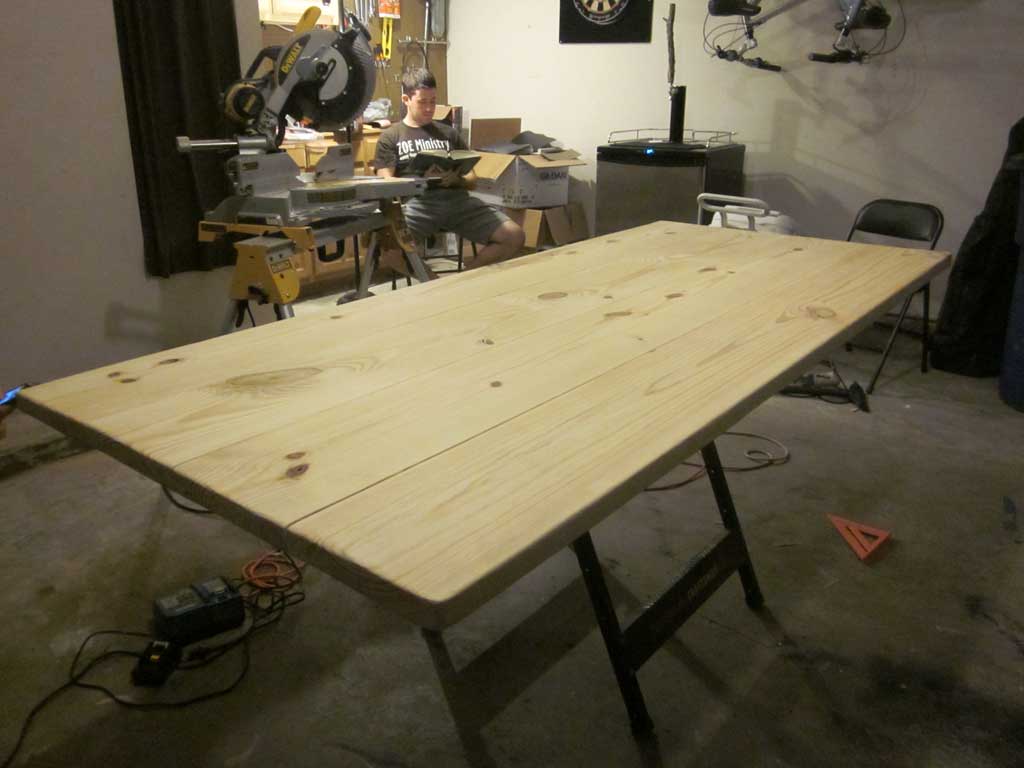

Next we secured the cross beam and the V boards (I’m sure they have a technical name and I’m equally sure I don’t know what it is) to the end pieces. And this is where we left it for the evening. Just to get a good visual we put the top on the bottom pieces to take a few pictures and see what it would look like.

Not bad for a day’s work and about $150 worth of supplies! The whole project with stain and all was less than $200 dollars all in, which is pretty good for a 7’ long solid wood table!
The next day we came back to finish up the project, Kory had used the belt sander to sand the top smooth. An un-evenness in the boards or flaws were sanded smooth. It takes a lot of sanding, but this step is SO WORTH IT for a nice smooth top. He also used it to round off the harsher edges of the top boards so that you can easily rest your forearms on the table without hurting them!
After we left, Kory and Julie did an ‘antiquing’ treatment Kory had read about online with steel wool, vinegar and tea. It is very similar to this tutorial. Then they stained the table with Minwax’s Dark Walnut and a couple coats of Polyurethane.
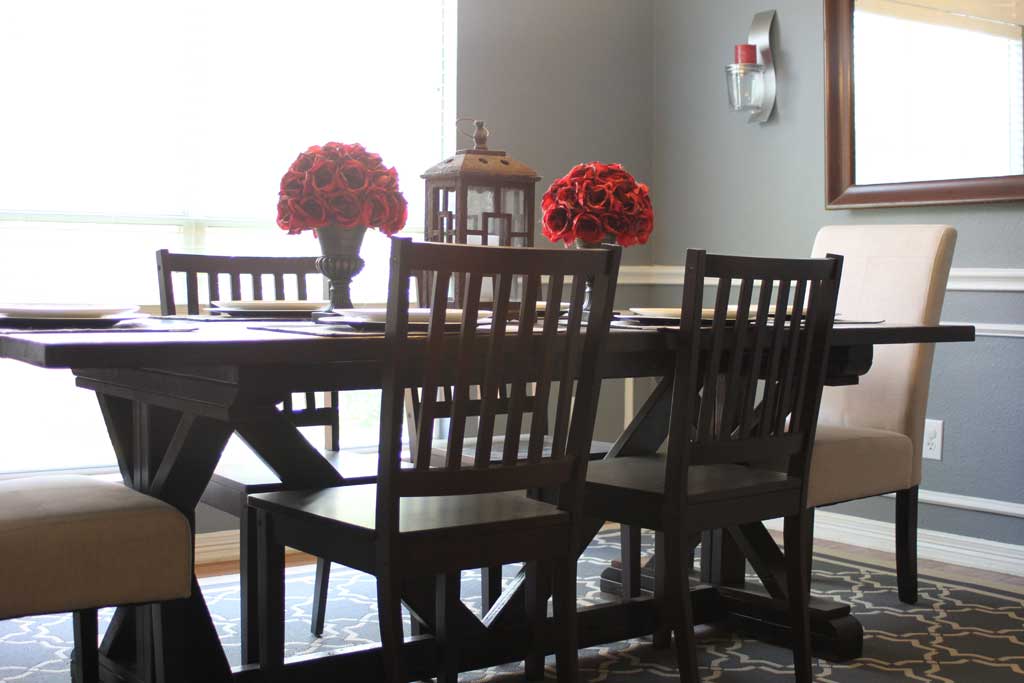

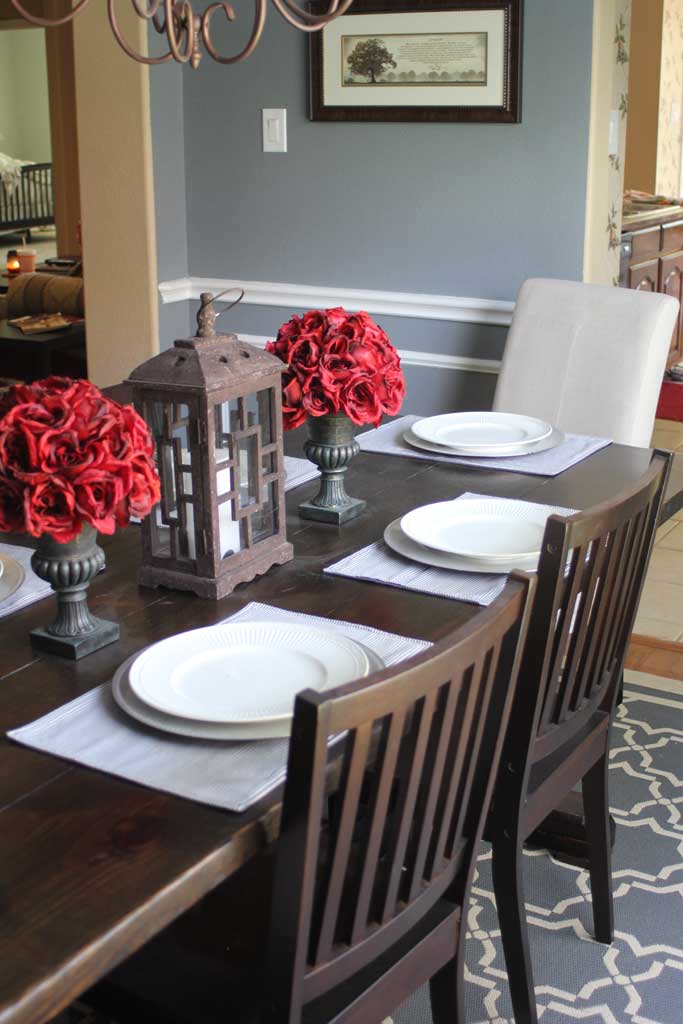
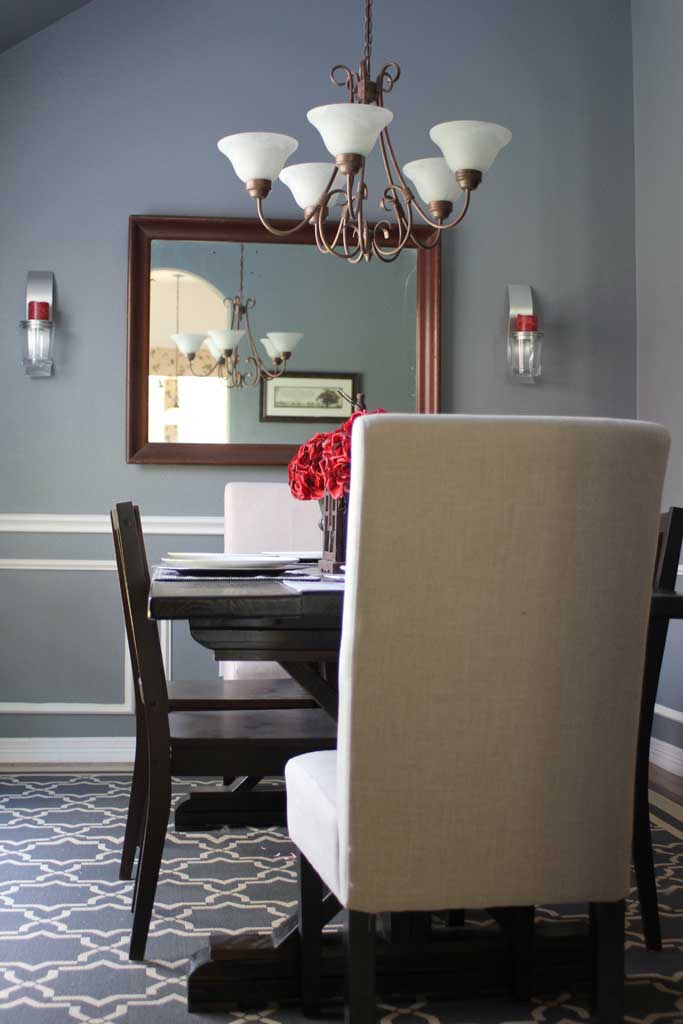
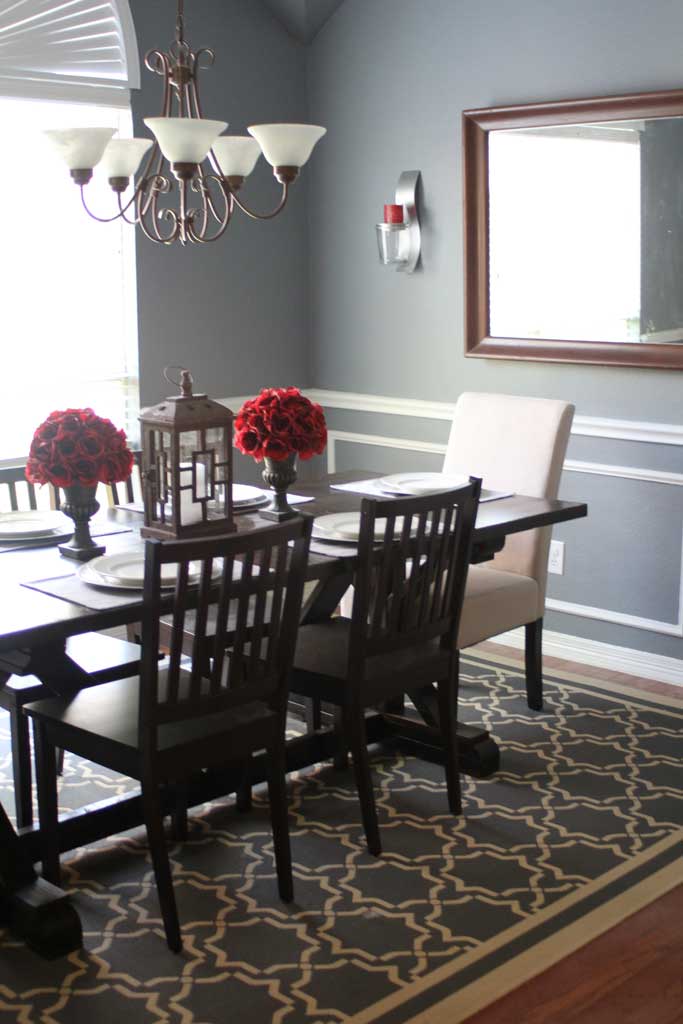
I think this table looks FANTASTIC and is a great addition to their home and we have gotten to enjoy the fruits of our labor with several good meals at this table! And didn’t she style it so well! I love this room… it is so happy and cheerful!! PS… All of these pictures were taken this past weekend, so this is what the table looks like almost 10 months after we built it!

An upclose of the legs:


 Hi, I'm MJ! I'm a DIY kind of girl and this is where I share my projects. I'm taking you along for the ride as I learn how to do woodworking, sew, bake, and renovate!


This table came out fabulous! I’m so impressed that you guys were able to build it yourselves! Wow!
Visiting from Miss Mustard Seed’s link party 🙂
Brynne, thanks for visiting! I actually spent all weekend working on another table just like this one for my brother-in-law! It is not nearly as hard as it looks!! :)-MJ
Hi! I love your version of the Ana White table. Can I ask where you got your chairs?
This is actually my friends house, we built the table for them, but she says they were all purchased from overstock.com. It has been over a year, so I’m not sure they’ll have the exact same ones, but you should be able to find something similar!
I got to the part where you make the curved part on the legs and I’m stumped. I get that you make multiple angle cuts but how do you get it to be the right length to match the board above? Any help would be greatly appreciated!
Amanda,
We marked the length of the top board, and used that as a guide to make our angled cuts (so start at the mark from the top board and cut a little bit off, change the angle and cut off the next section and then change it again to cut it off making sure the end of that cut is the length of your bottom board). It will look a little rough and chunky, but your sander (we used a belt sander but you can easily use an orbital) will smooth it out and make it rounder.
Hi,
I was wondering what kind of wood did you use? Construction grade wood or was it higher grade wood? Thanks!
Trinh
Trinh, We just used construction grade pine from Lowe’s. And several years later it is still holding strong and looks pretty good! Pine is a softer wood, so will dent more easily, but they were going for a bit of the more rustic look anyway, so they didn’t mind! I find higher grade wood harder to find in the right sizes, and it is much more expensive.