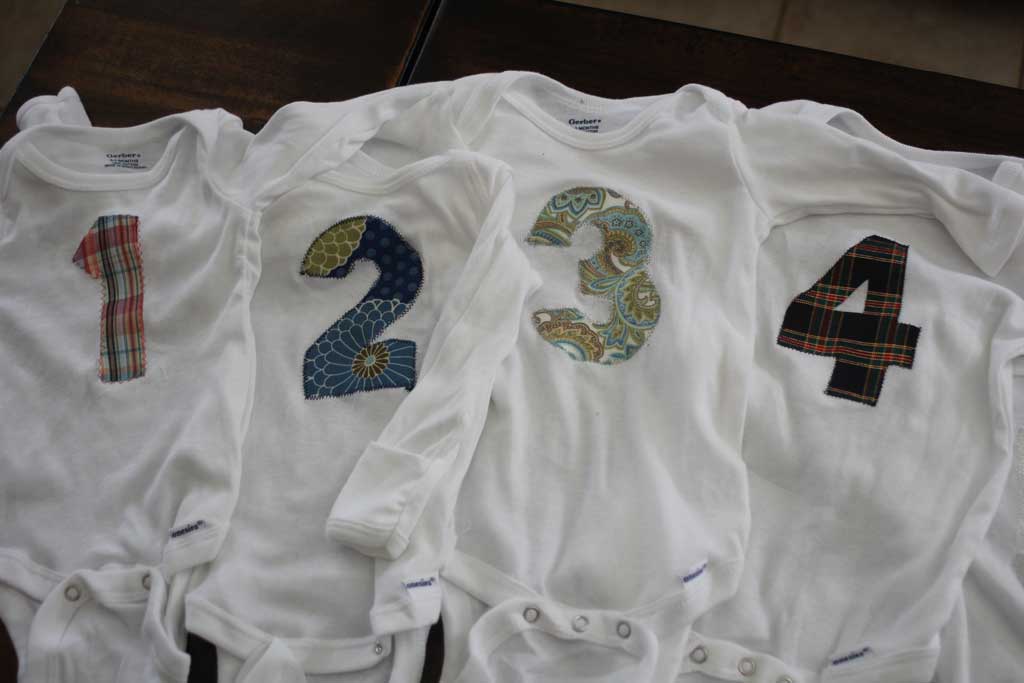
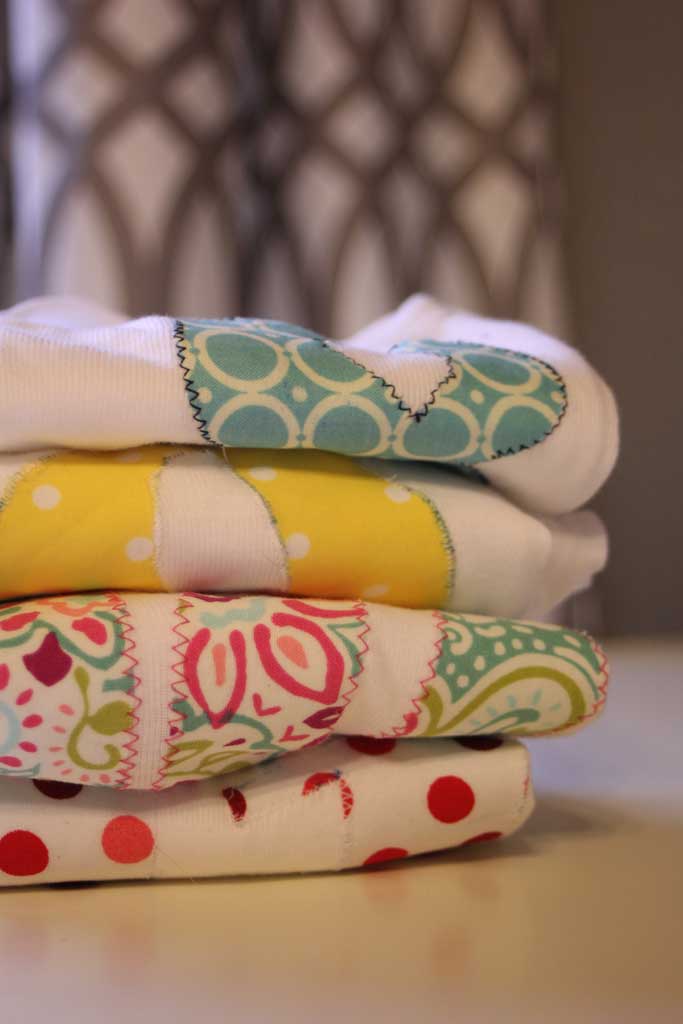
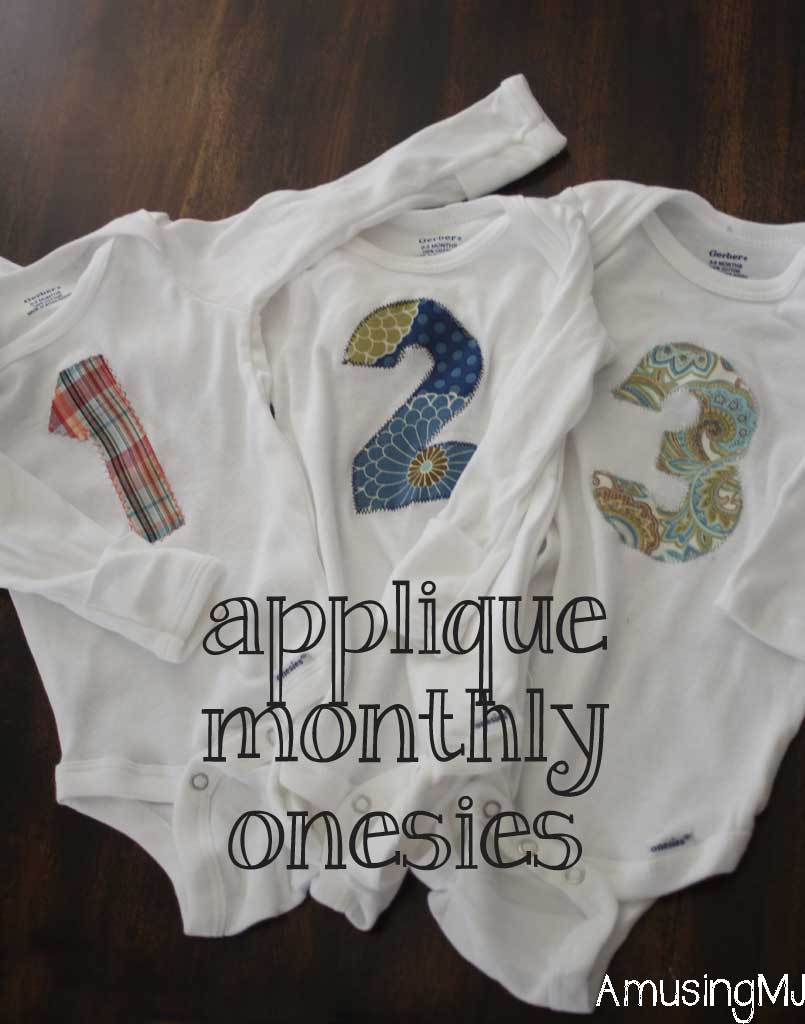
How were y’all’s weekends? Mine was UBER productive, and I can’t wait to share some of the projects that I wrapped up this weekend. You know how I told you last week I was having major project ADD? Well this weekend was just the antidote I needed to get my bum in gear and finish a bunch of those up to share with y’all! This is one of those that I started a LOOOONG time ago, but didn’t get around to finishing until just this weekend. 7 months ago my brother and his wife had their first child and didn’t find out the gender until my niece was born. I decided it would be fun to make onesies for him/her for each monthly birthday.
I didn’t know her gender at the time, so I tried to pick fairly gender neutral colors (btw it is very hard to find boy-ish fabrics). I mostly used what I had on hand, but tried to match the fabrics up with the month–so I picked a black/red/green plaid for Christmas, a white/silvery one for January and a KU fabric for March (which sadly didn’t give us any luck!!).

To make this project you’ll need fabric, wonder-under fusible web, thread, onesies for each age, and a sewing machine.
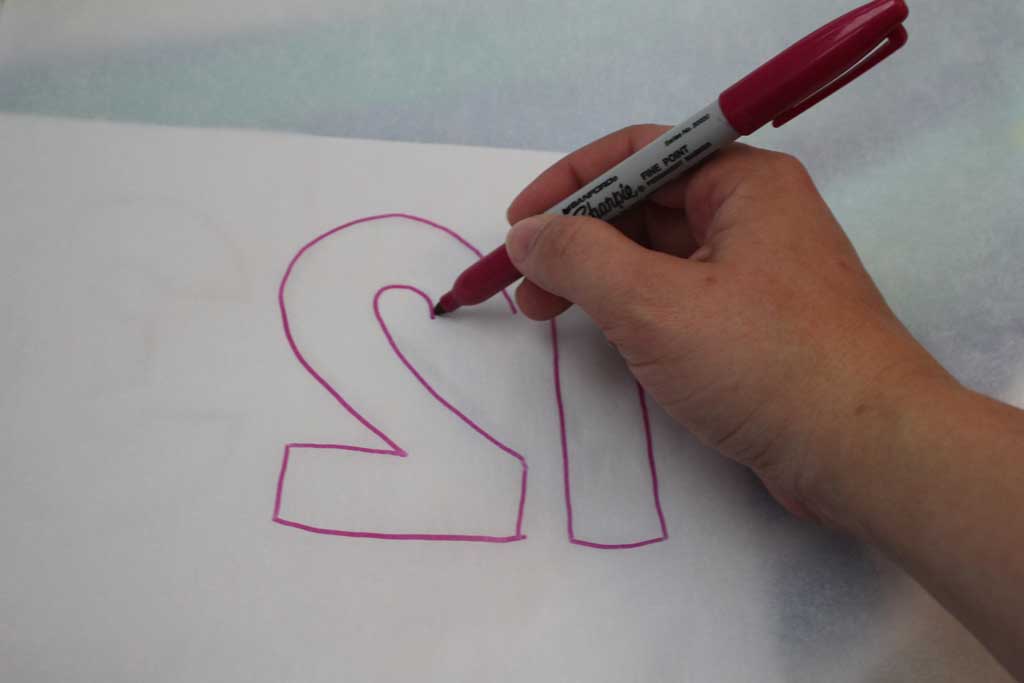
You can either freehand your numbers, or you can print them off and trace them onto the wonder under. I’m not so good at free handing so I printed off some numbers on my computer in the size I wanted.
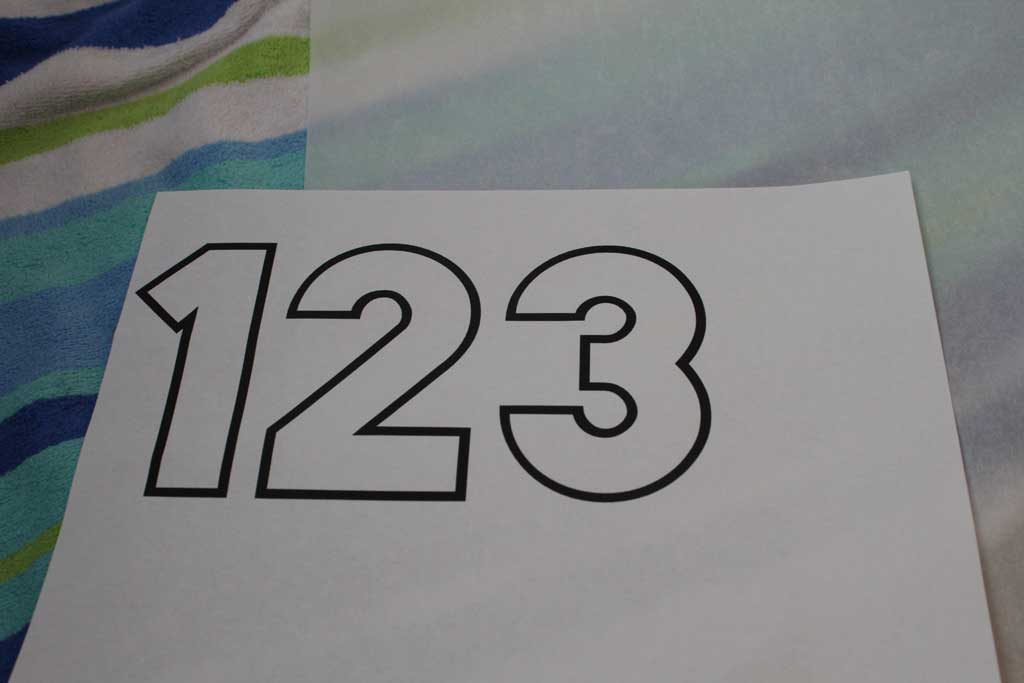

Be sure to trace it backwards on the paper side of the wonder under so that when you iron it onto the wrong side of the fabric it will then be right side up.

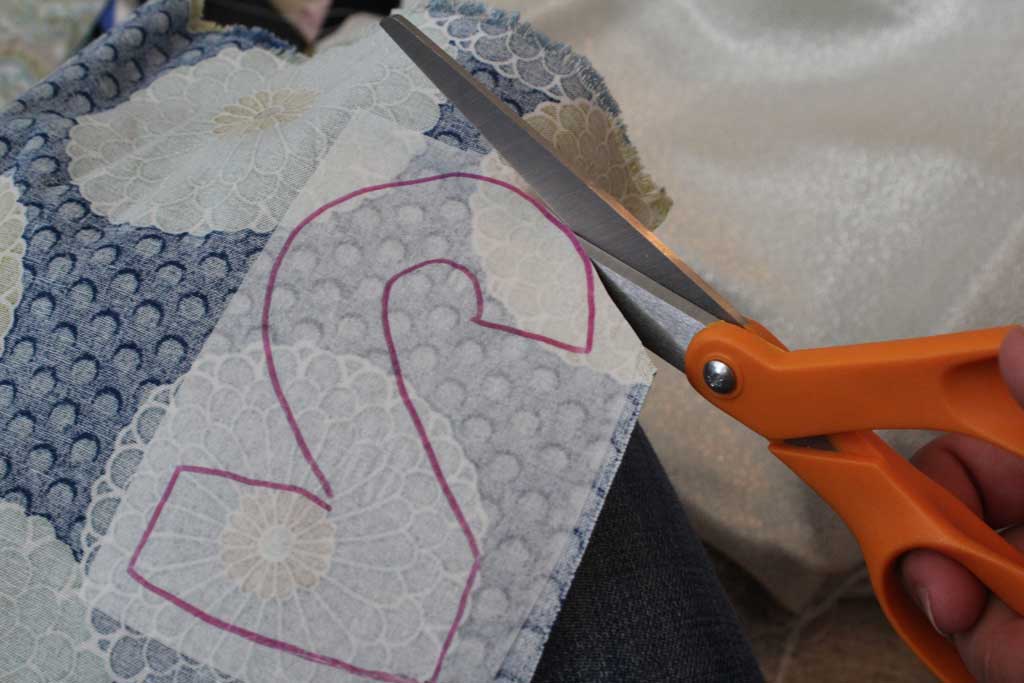
Iron it onto the wrong side of your fabric, then cut your shape.


 Once you have that, iron it onto your fabric, following the instructions for your fusible web. Then using a zigzag stitch, trace around your number on the onesie. I’ll use this opportunity to explain that I am NOT an expert at applique-ing. My onesies are anything but perfect. But I did learn a few things:
- GO SLOW. It is much easier to be accurate when you are stitching very slowly.
- Related to the first one, but slightly different: don’t be afraid to go stitch by stitch. Using the wheel of your sewing machine, sometimes it is easiest at tricky parts to go stitch by stitch.
- At angles or turns, leave your needle down but pick up your presser foot to realign the onesie.
- Using a longer width (the Vs of the zig zag are deeper) gives you more grace at being inaccurate, if I had to start over, I would use the same stitch I used for month 10 on all of them:
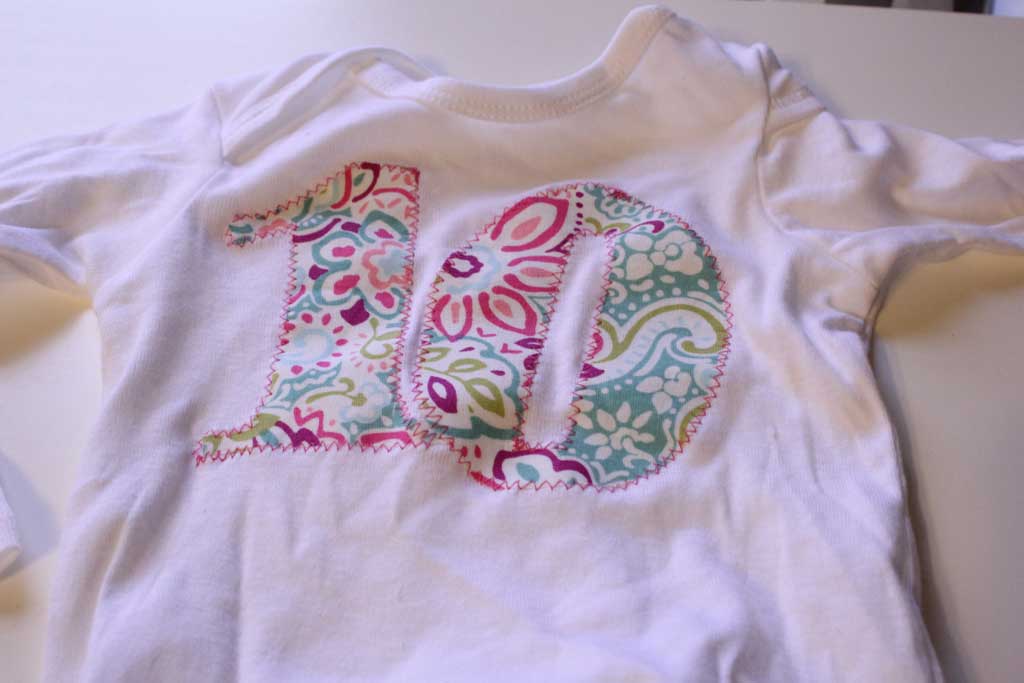
 Even though I wasn’t 100% accurate, the stitch is on the fabric and the onesie for almost all of the way around, making it look more professional.
 - Trace your number onto the paper, not the wonder under. In the 7 months between making the first 7 and the last 4, I forgot this fact, and my #9 has a bit of blue ink bleed from when I ironed on the fabric. So going about this again, I wouldn’t do that.


And that’s how it is done! I didn’t do a 12 month one because I figured her mom would want to do something different for her first birthday, but I’ll probably think of some fun home-made gift to make my only niece for her first birthday… and you know me, I’ll share it here of course!
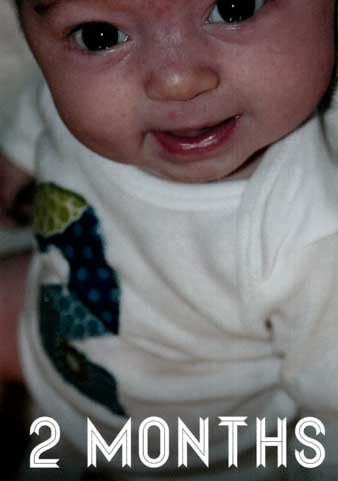
The best part of this whole project? Her mom has been sending my whole family adorable monthly photos of my niece that she has printed from inked.com Here she is sporting her 2 month and 6 month onesies:
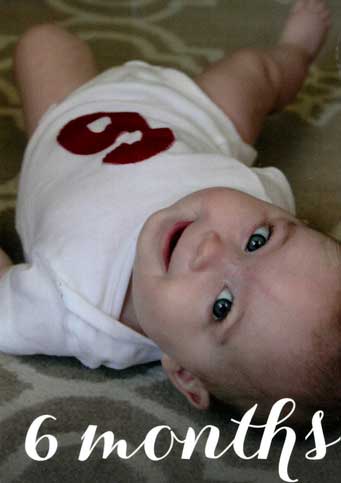

Isn’t she precious?? I’m kinda in love.

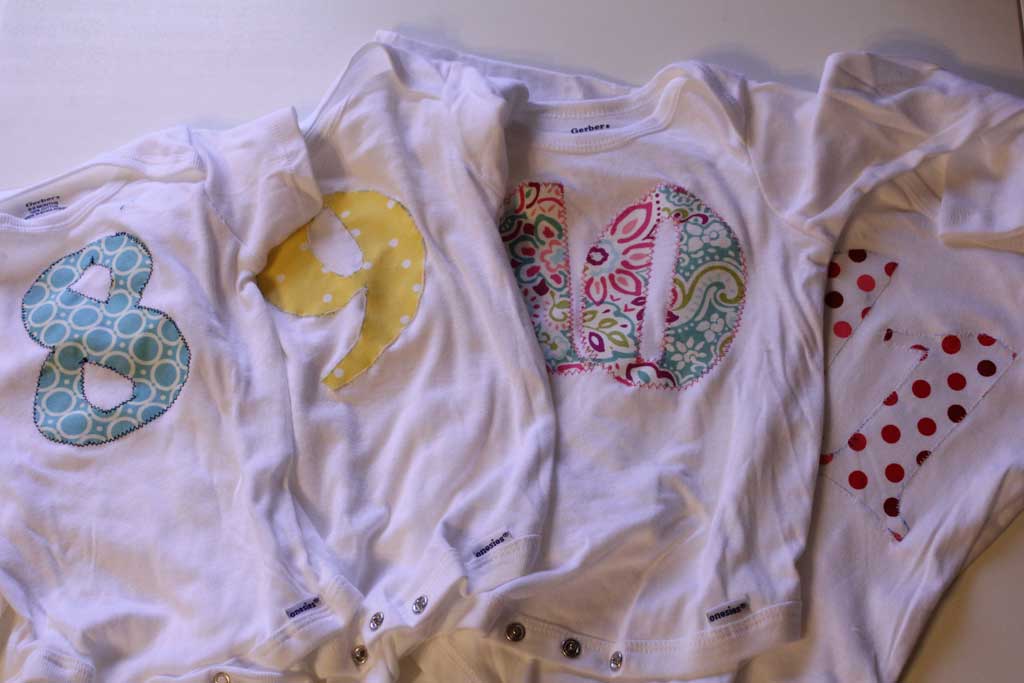
And I’m mailing these last four today!


 Hi, I'm MJ! I'm a DIY kind of girl and this is where I share my projects. I'm taking you along for the ride as I learn how to do woodworking, sew, bake, and renovate!


Such a cute idea! A great alternative to the stickers! She is just precious.