So I mentioned a while back that I got some cabin fever during Dallas’ seemingly never ending rounds of snow/sleet/ice/cold weather (and yes for those of you who live in actual cold climates that get snow I know how ridiculous that sounds). And since I didn’t want to be out in my frigid garage working on any projects, I decided to start our downstairs bathroom remodel. Nevermind that there were probably 15 projects on the to do list that were ‘more important’. Nevermind that I’m pregnant and can’t use about half the products necessary to do this. Nevermind that we didn’t really have a plan for this room other than NOT THAT WALLPAPER. I just started peeling wallpaper. And roped Reese in to help me. 🙂
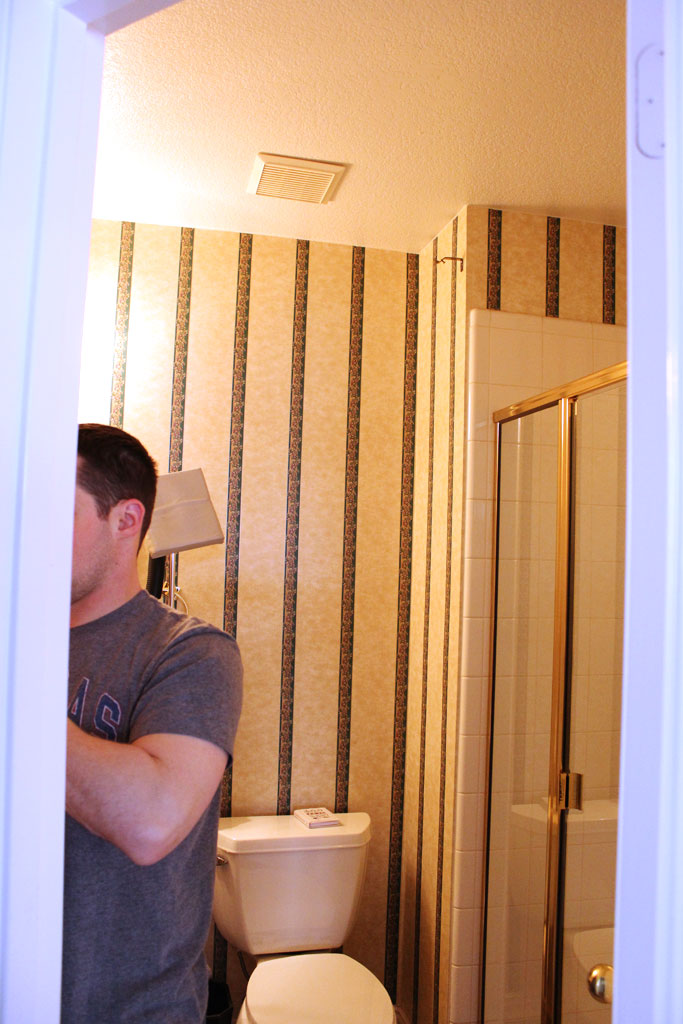

I had read that if you had a clothing steamer you could steam off the wallpaper and I’d had some friends who had some moderate success with this method. And that’s one of the things that worked for Young House Love (totally miss their wisdom btw), so I brought down the steamer and Reese and I got to work. Turns out, whoever built this bathroom did a few crazy things. (I actually think the first thing isn’t that uncommon… just impossible to undo)
The first crazy thing they did is that the wallpaper was glued directly to the top layer of drywall with no barrier in between. Which means that try as you might, separating them without tearing any of the drywall paper is virtually impossible. After complaining about this a few weeks ago I got a couple of great recommendations from friends, which I tried out a few of: Water and dish soap, but that didn’t do anything to the top layer, which was the hardest to remove without damaging the paper. I also tried water and fabric softener, and that worked a bit, but not nearly as well as the scoring tool (this guy from amazon) and WP Chomp Wallpaper Removal Spray from Home Depot. This was the only combo that allowed us to pull larger than quarter size pieces off the wall at once.
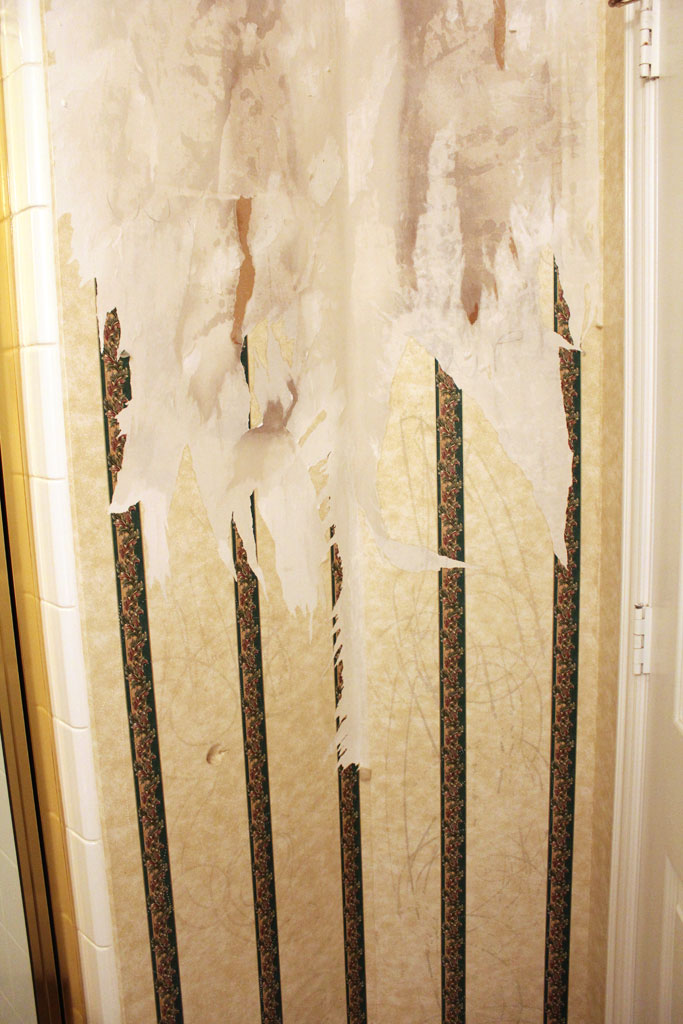

Fair warning, the scoring tool makes the WORST noise ever, like a cross between knives scraping across dishes and nails on a chalkboard. But if you look in the picture above you can see the dark squiggles where I ran the scorer and then sprayed it down with the Chomp stuff. Once I had done that and let it sit for a minute or so, I could start to peel off the top layer. Then I would respray, saturating it with the spray and peel the backing off. And in MOST places it came off without the drywall paper.
So once we had removed the paper this is what we were left with:
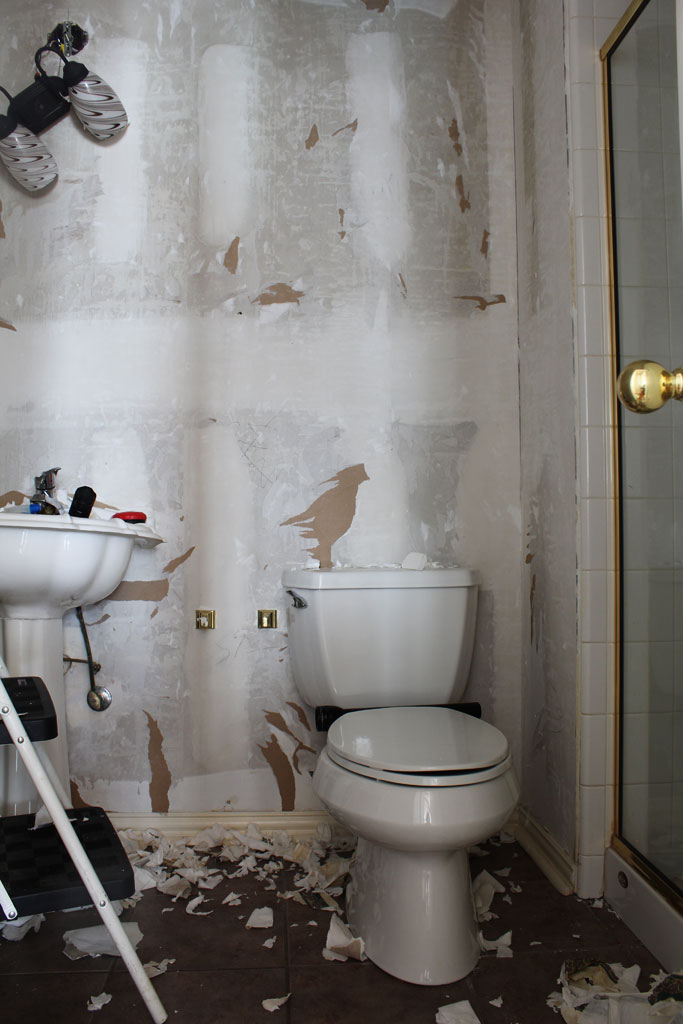

As you can see.. NOT PRETTY. And the paper on the floor should give you a good idea of the frustration level this project inflicts.
On a side note, this is where we discovered the second crazy thing whoever built this project did. During our inspection one of the things that needed to be fixed was that the pedestal sink had completely come away from the wall. So we knew we would either have to re-caulk and connect it or replace it. If you have toddlers or young children pedestal sinks that aren’t well attached to the wall are a definite tip over hazard. So we decided this would be a great time to replace it. But it turns out, our pedestal sink had copper plumbing that hardwired it’s builder grade fixture to the hot and cold waterlines behind the wall. Which meant that our plan of ripping out the sink and simply replacing it with a new vanity and faucet became something WAY above our pay grade. (We actually did this in our old house and it was super simple, so we went into this project thinking it would be something we could easily do, but alas, we were wrong) After discovering this, we called in our favorite plumbing company (If you live in the Dallas/Houston Area it is Star Home Comfort and they do both HVAC and plumbing and are AWESOME) to do the trick. Reese watched Brent do this change over and as soon as he broke out the blow torch we were confident we had made the right decision to call in the professionals on this gig!! But I don’t have any pictures of the new vanity yet as we are waiting to install that until after it is painted… so stay tuned later this week (or maybe next week).
Anyway, back to the walls. So our bathroom was looking like a massive train wreck and I should add that we have guests coming to stay with us over this next weekend and I am currently travelling for work… so we definitely were on a time crunch to get this to look a little less horror show. The original plan was to skim coat and have smooth walls in this room, and I read several tutorials online, but ultimately we decided that would make this the ONLY room in the house without textured walls, and because of drying/waiting times would end up taking longer than we really had planned. So we decided to test out the spray can texture route.
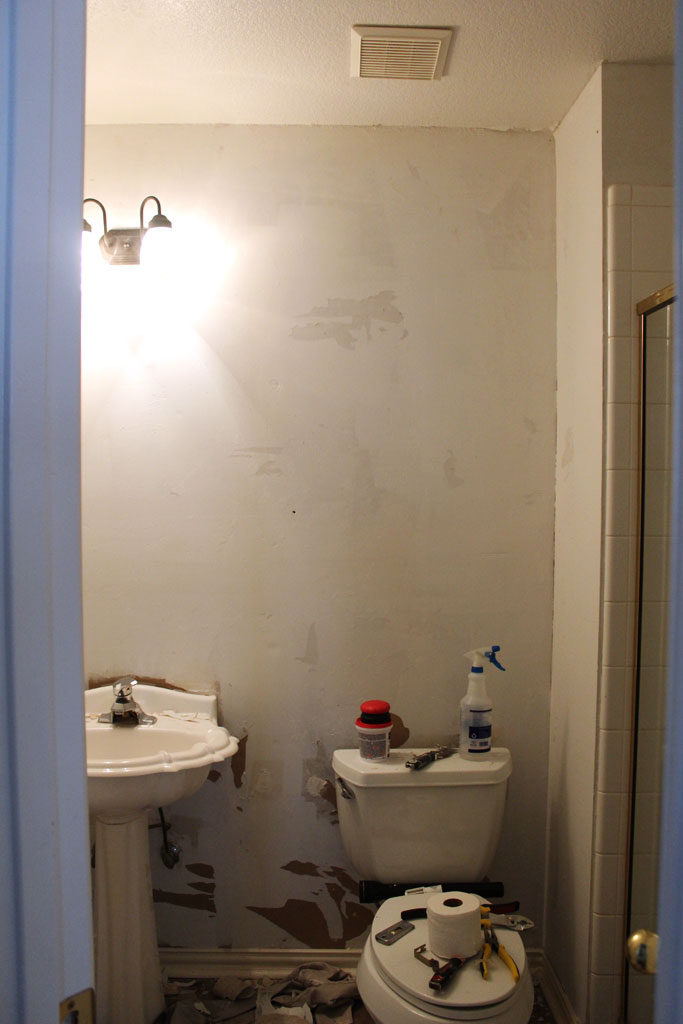
Before priming Reese took a razor blade and cut away any peeling areas or any drywall paper that had pulled away from the wall, creating a ‘mostly’ smooth surface. And then the next step was to prime the walls with an oil based primer. Most of the things I read online recommended this because you don’t want any moisture getting into your drywall paper, so a water based paint isn’t a good idea, but you really want something covering your walls and sealing the drywall. So we went with Zinsser’s Cover Stain Primer, which is some really gnarly smelling stuff (aka… this was all Reese’s part of the project!) to seal it up, so now our room was looking like this: (ignore the bottom section which we did just a bit later after the sink was removed).

Next up, it was time for texture. We used this stuff from Home Depot and it took about 3 cans, so definitely not the cheapest option out there, but it took very little skill, covered the uneven bits pretty well and matches the rest of our house.
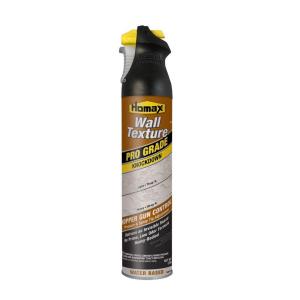

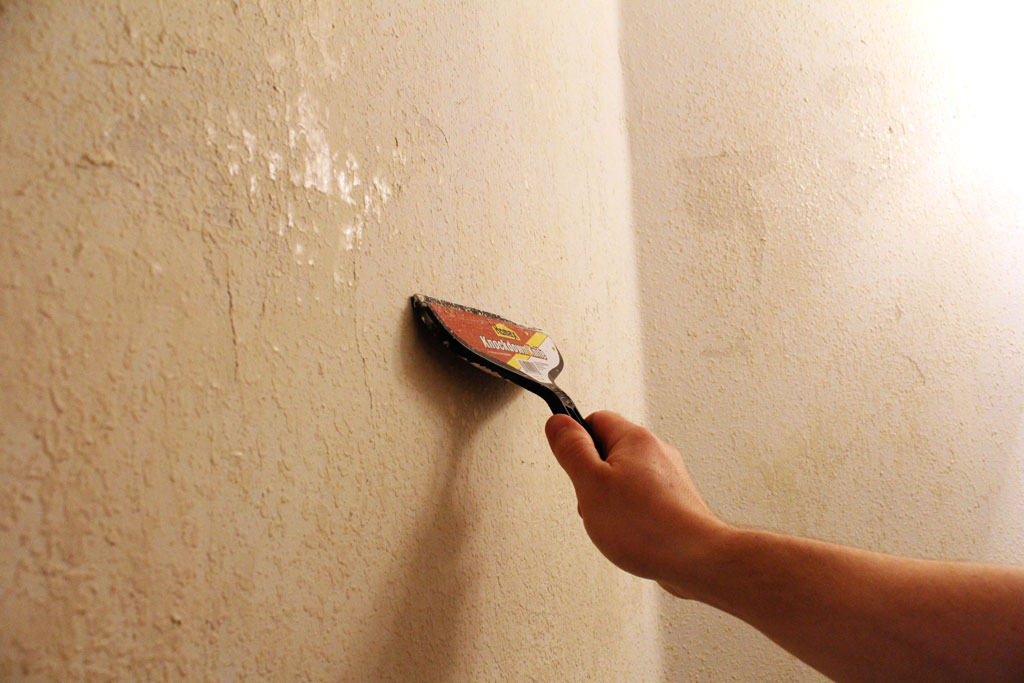
The process is that you spray it on the walls, wait and then take a knockdown knife (see below) to knock it down to look like the rest of your texture. The instructions tell you to wait 2-5 minutes, but we found that it was still way too wet at that point, so we waited close to 20 minutes and that was about perfect. You also need to apply 0 pressure to knock it down. It worked best if you kind of just let the knife fall against it instead of trying to exert any pressure.

But the process really did work and after painting you can hardly tell that it wasn’t textured with the rest of the house! And I am immensely glad that this was the only room in the house with wallpaper!
You’ll have to stay tuned for pictures of the painted bathroom as that happened at 11pm before I left town, so I haven’t had a chance to snap any photos of it! I’ll post the results as soon as I can!


 Hi, I'm MJ! I'm a DIY kind of girl and this is where I share my projects. I'm taking you along for the ride as I learn how to do woodworking, sew, bake, and renovate!


With each post, you and Reese just amaze me more and more.