Archives for July 2013

Where I spend most of my days…

Chillin out, maxin, relaxin… but not really shooting bball.  Anyway… enough old school Will Smith.  It’s just the song that came to mind this morning. The living room is truly where the husband, dog dog, and I spend most of our time.  I’m a pretty big TV junkie (at one point during my single days I had a season pass on my DVR for 18 hour long tv shows… even without commercials that’s a huge chunk of your week!).  Watching a few hours of tv a show is how my husband and I typically wind down our day, and mostly that happens in the living room.  Aside from the kitchen I think it is the most used room in the house. living-room-from-doorway

Part of the whole getting married thing was merging the husband’s stuff from his apartment into the house where I was already living. Fortunately our things seemed to mesh pretty well, and his biggest pieces of furniture were these super comfy (and seriously manly) brown leather couches.  I have never been a huge brown fan, but I love these couches.  They are so comfortable and perfectly sized for my husband and I’s less than giant frames (both of us come in under 5’5″).  It wouldn’t seem like that big of a deal, but there is nothing more irritating than feeling like a 4 year old who’s legs don’t reach the ground when you sit on a couch built for NBA players.  PS both my brothers and my dad are 6’+, so I’ve sat on a few giant sized couches in my life. Anyway… I’ve gotten sidetracked. The living room. living-room-from-corner1

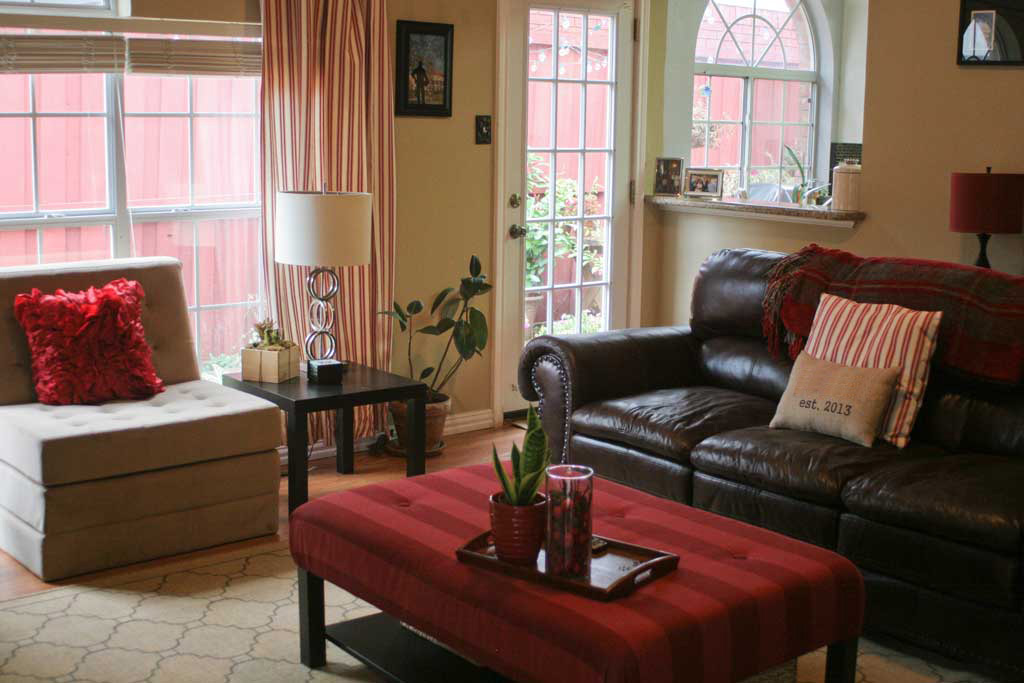
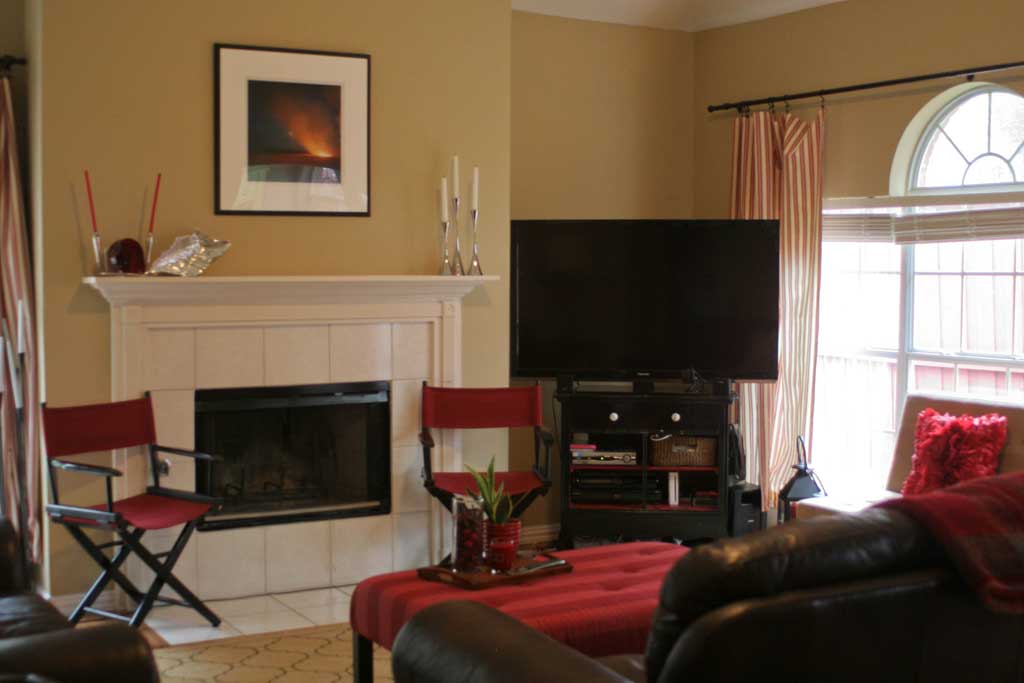
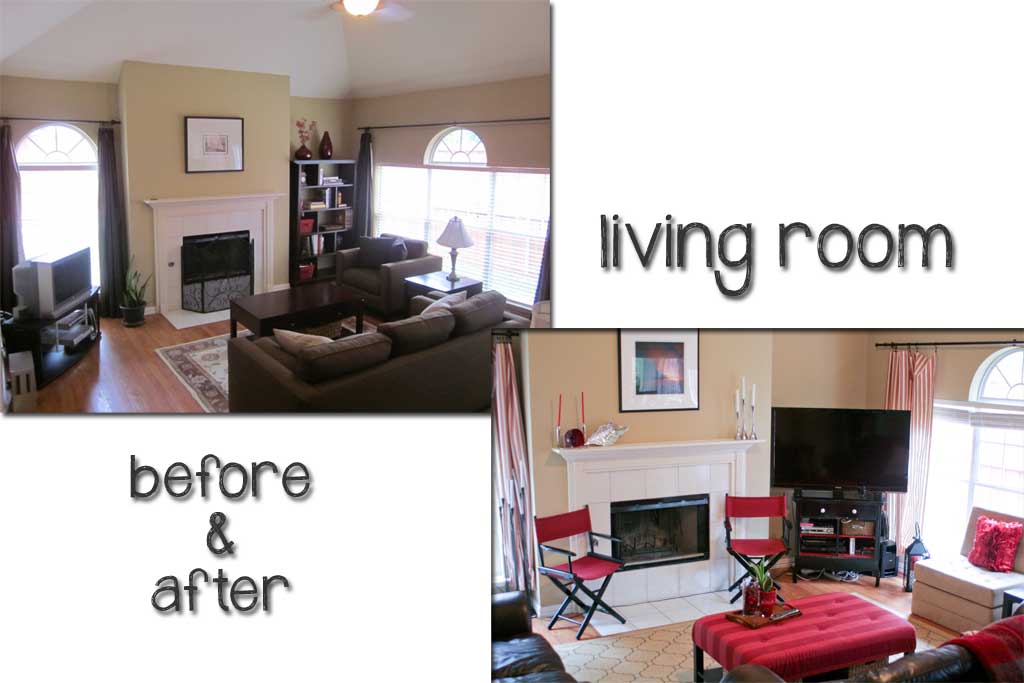
Situated at the back of the house, our living room has a window to the backyard and a door to the side patio (the backyard wraps from the side of the house with a patio, to the back yard where our lawn is).  I kept most of my red/crimson colored things in the living room because I think they coordinate pretty well with the brown leather.  I know its not the ‘light and bright’ living rooms that are super popular right now, but it feels cozy and home-y to me, and we love relaxing here at the end of the day.

living-room-from-outside-do

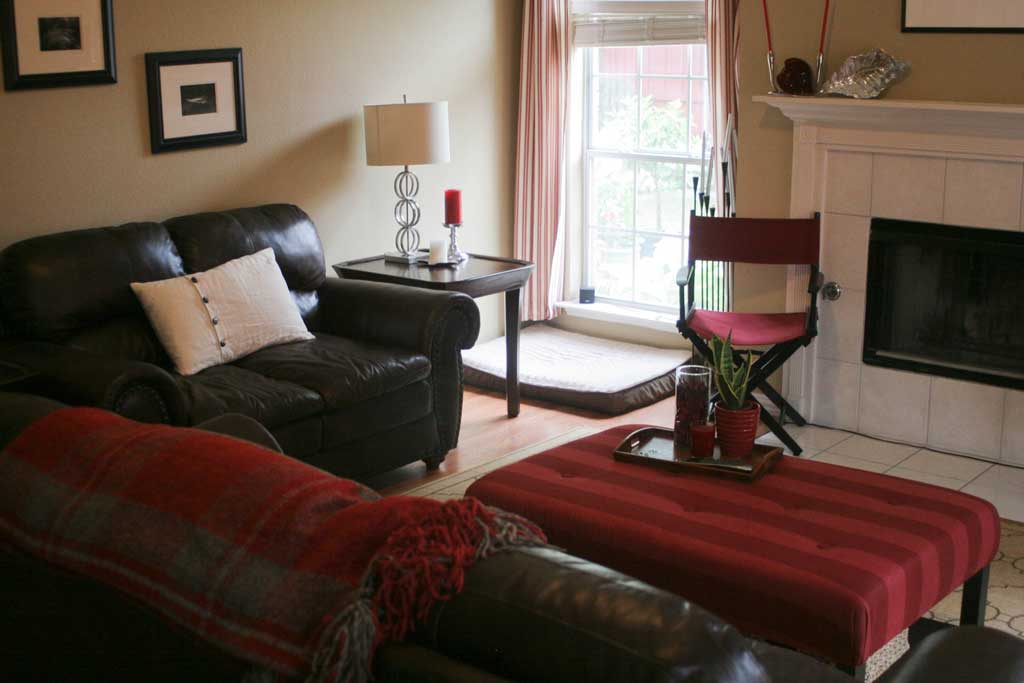
I’m going to post about the DIY Ottoman on Wednesday, but I love its pop of color in the middle of the room.  My grandmother and aunt sewed the curtains for me when I was in my last house, and I haven’t spent the time to make the the right length for this room, apparently they are taller ceilings… that’ll be done at some later date. (see how short the one on the right is? fortunately tables/the media cabinet hide it most of the time!)

living-room-tufted-chair

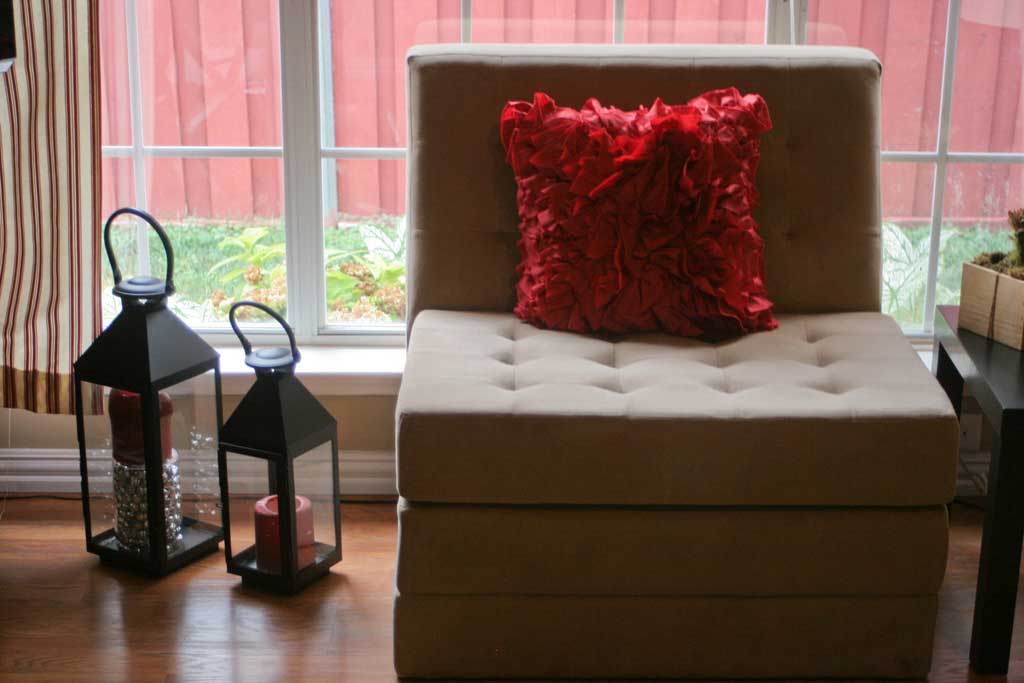
The two director’s chairs and the circular ring lamps are from Pier 1.  I don’t think they sell those lamps anymore, but they have the best director’s chairs and always have fun fabric colors and designs if I ever want to move them to another location. (see picture #1). The tufted chair above was a Homegoods find that I had to stand and ward off other purchasers while my BFF and I figured out how to get it to the checkout counter.  For movienights, it folds out into a bed.  

And just to see where this room came from (the before is the previous people’s furniture):  living-room-before-and-afte

Happy Birthday Husband!

Today is my husband’s birthday… we’re not going to say which one… just suffice it to say he’s a few years younger than me! So I wanted to take this time to just introduce him on the blog.  We’ve been married a little over two months now, so for sure still in the honeymoon phase, but I cannot imagine my life without him.  He makes my life unbelievably more fun and helps me focus on the things that are really important: like spending time with family and helping out others. husband-engagement-pic

He’s a type A personality with a CPA, but he left the accounting world to answer a call to ministry and now serves as a youth director at the church he grew up in and where we were married.  He has a passion for other people, and loves getting to help others grow in faith.  While we won’t get too much into religion here on the DIY Blog, I couldn’t be more proud of his decision to leave the corporate world and get a job that has meaning and purpose and fulfillment. I mean lets be honest… I’m a little jealous he gets to spend his days playing with the youth and taking amazing trips with them.

husband-with-cope

I love that he is a role model to his 3 nephews and a niece. We got to go celebrate his birthday with them last night, and they had a blast decorating the kitchen with balloons and power ranger signs.  It was a casual low-key celebration complete with nerf wars and light saber battles (technically I think it was light saber vs. sword, so i’m not sure how that pans out in the whole sci fi battle world).

husband-wedding-pic

I’m so excited to start on this crazy journey of life together, and can’t imagine a better husband or partner to do it with, I love you!


photos 1 and 3 courtesy of Lauren Guy Photography

Backsplashin’ It Up

One of the biggest projects we undertook in the kitchen of this house was tiling a backsplash.  I found this black hex tile from The Tile Shop and ordered a box (without even measuring… which I don’t recommend since I have a TON of black hex tile leftover…oh well, I’ll just have to find another project to tile!)

It sat in my garage for about 6 months before I got the nerve to start my first tiling project.  But it turns out, tiling is super easy! The hardest part for us was ‘nipping’ the black hex tiles to fit smoothly around the edges and the outlets.  It was a good thing we had lots of leftover because it took a lot of trial and error to figure out how to do it best.  My best recommendation is to follow this tutorial from Young House Love.  That was our go to way of getting them all cut and laid out to fit.  Is it perfect? Nah… but perfect is boring. And I love how fun the backsplash is and definitely ties the black from the granite counter tops in.

kitchen-backsplash-closeup
Since we did this before I started blogging, I don’t have any in process shots for ya, but its pretty straightforward.  We used the already mixed thinset since this project didn’t take more than the one little bucket HD sold, then placed our tile up in its 12×12 sheets.  For the parts that didn’t take a full sheet, we laid it out on the floor to get the layout/cut the sheets prior to slathering them up on the wall.  And for the larger portions we staggered the sheets so that you couldn’t tell where one started and the other ended.  Once they were all up, we took a step back to make sure there weren’t any obvious seams or gaps since the thinset was still soft enough to adjust a little here and a little there.   kitchen-backsplash-stove

And as you can see there aren’t very many places where is looks uneven, so I was pleased with the results and the process. For the edges we just place black bullnosed subway tile from HD.  I think we ended up needing 8 of them, so they weren’t a big added expense and really provided a great way to mark the edges! kitchen-backsplash-mixer