Archives for May 2014

Connection Corner Table Part 2!

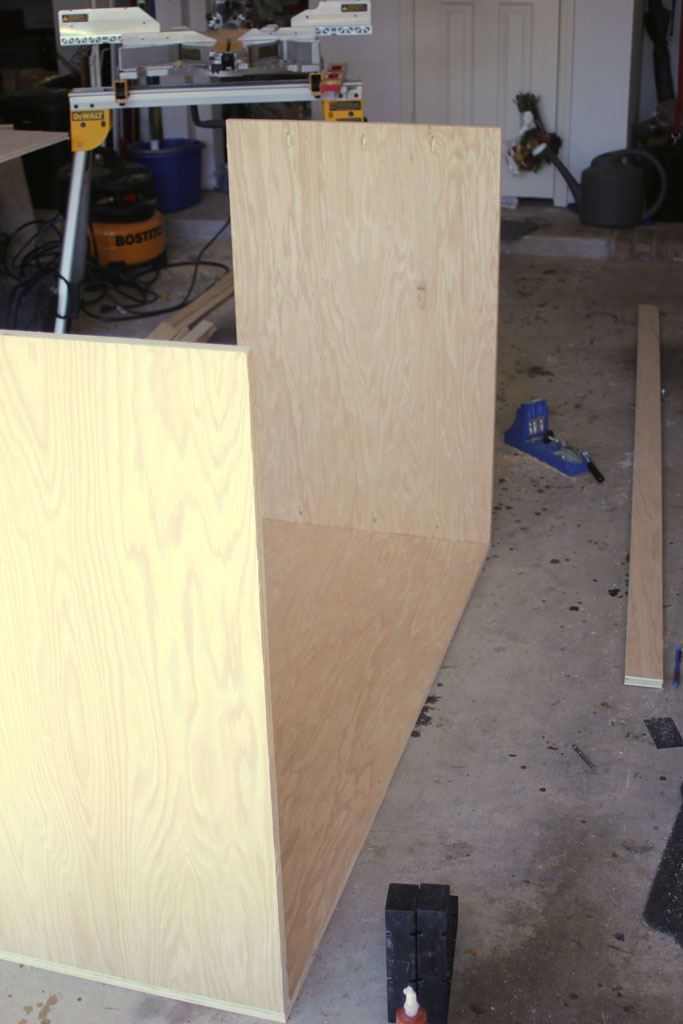
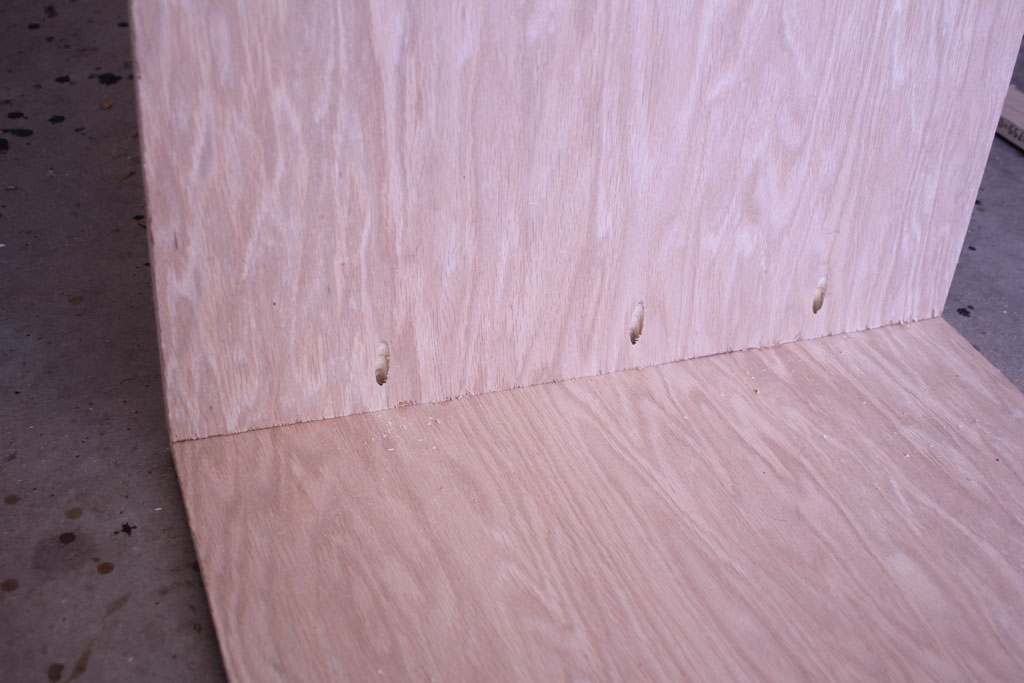
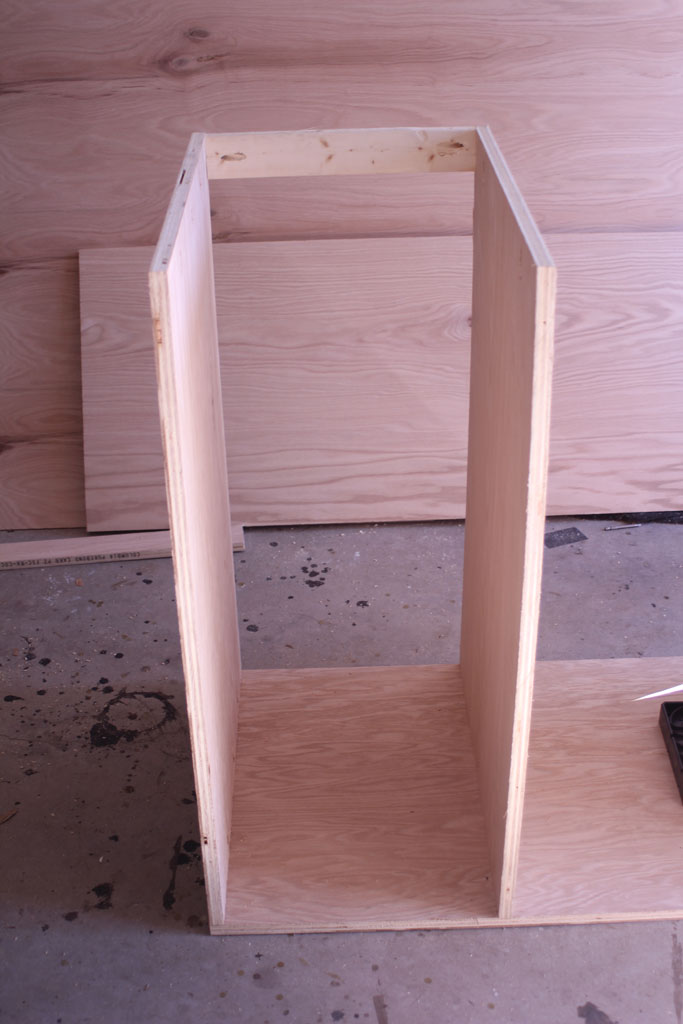
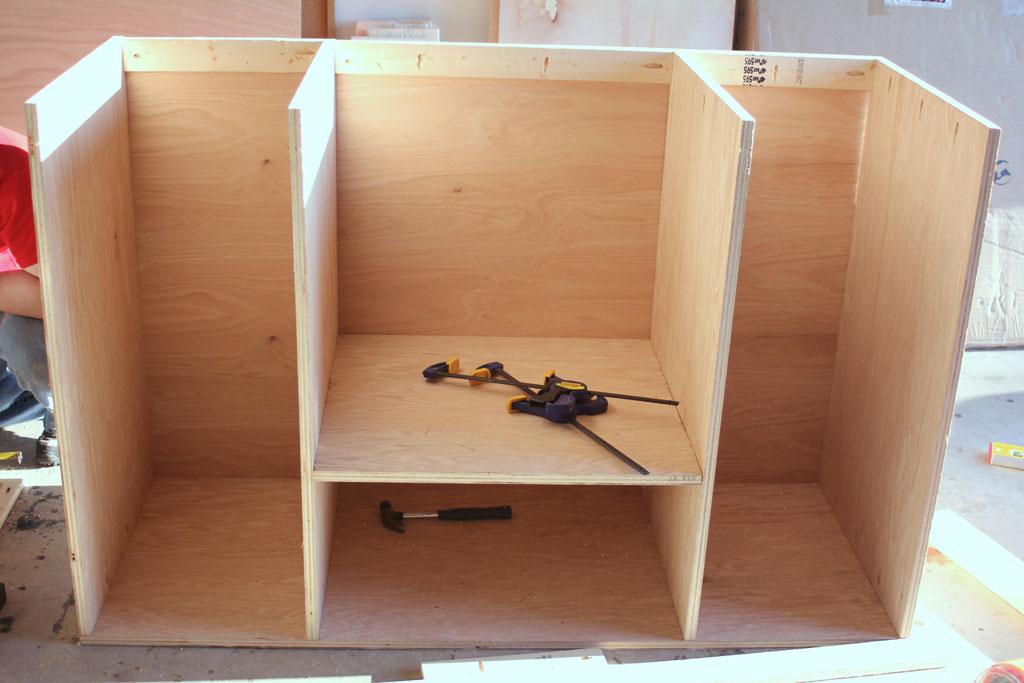
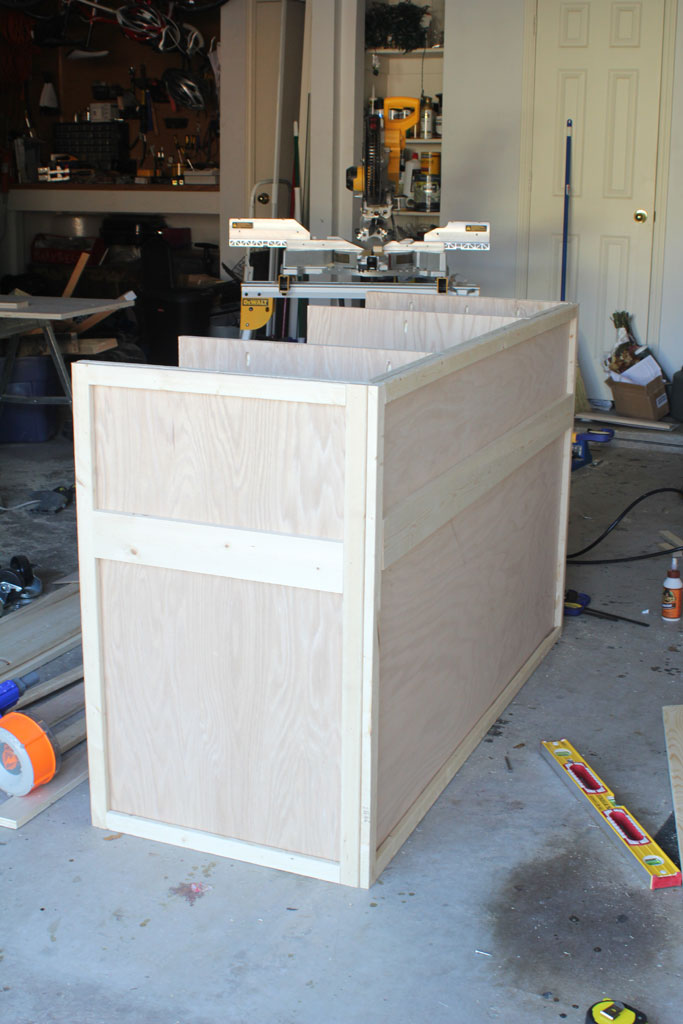
Okay, I left you on the edge of your seats yesterday waiting for the conclusion of our table/kitchen island saga yesterday with this guy:

cctable1


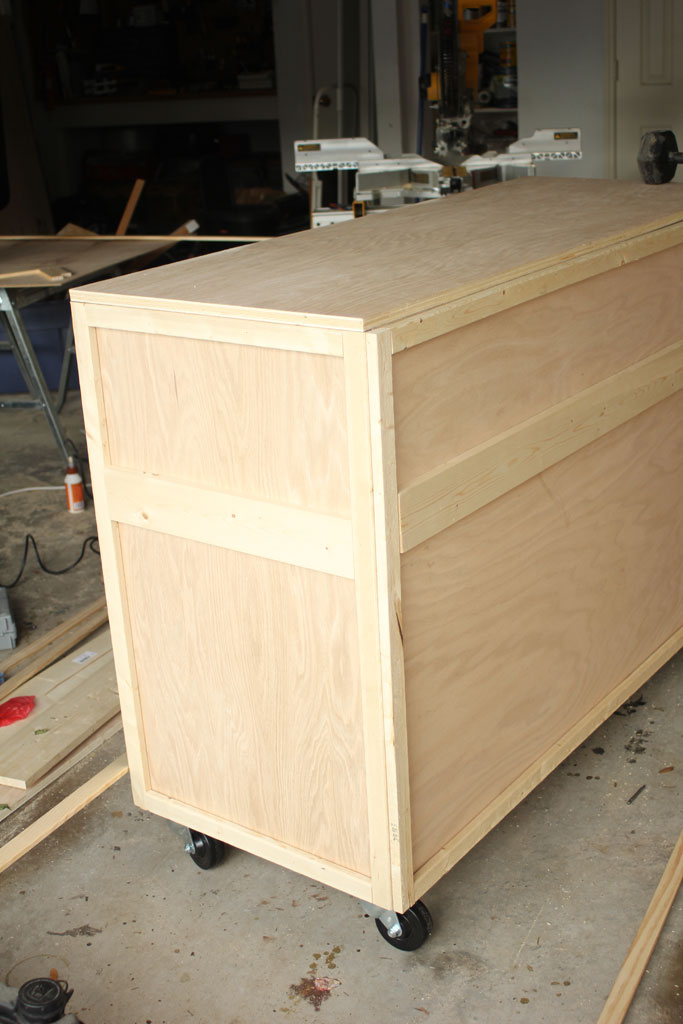
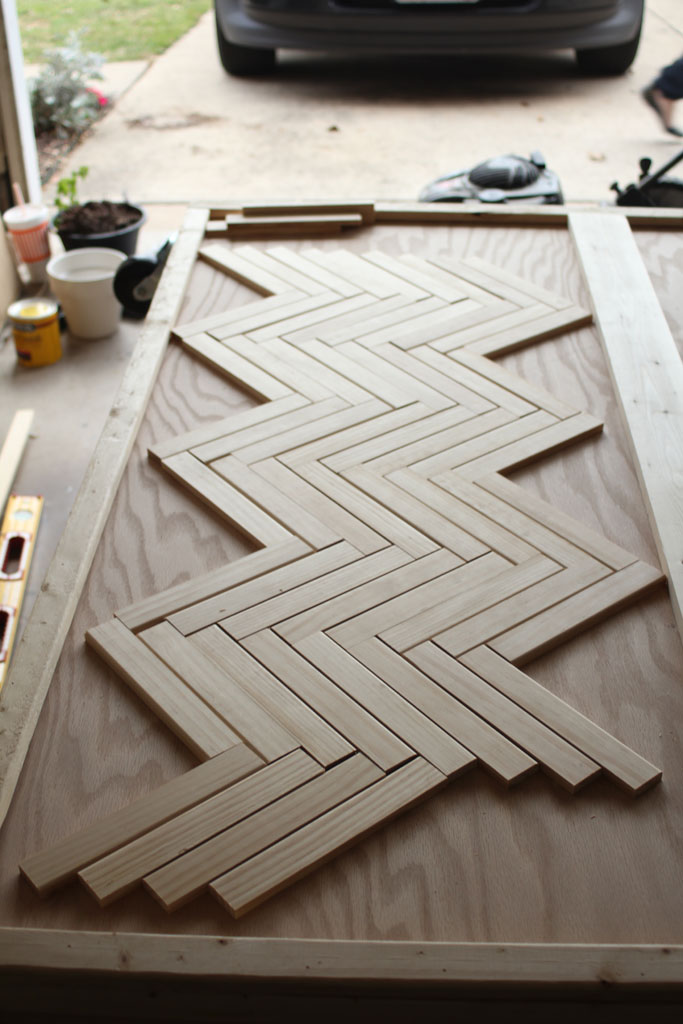
All ready to get stained, but also looking a bit boring.  So we decided to spice things up a bit.  Claire and I had the brilliant idea of using a herringbone pattern on the front of this guy to give him a little pizzazz.  (PS TOTALLY WORTH IT NOW, but partway through this project I was DEFINITELY regretting this idea).  If you’ve been around here for a little while you may remember the stage project that we did for the youth area of the church with different shades of wood stain, so we decided to carry that trend through the church for this project. I used wood molding from Home Depot and just started out cutting 8″ long pieces and laying them out in a herringbone pattern.

cctable9

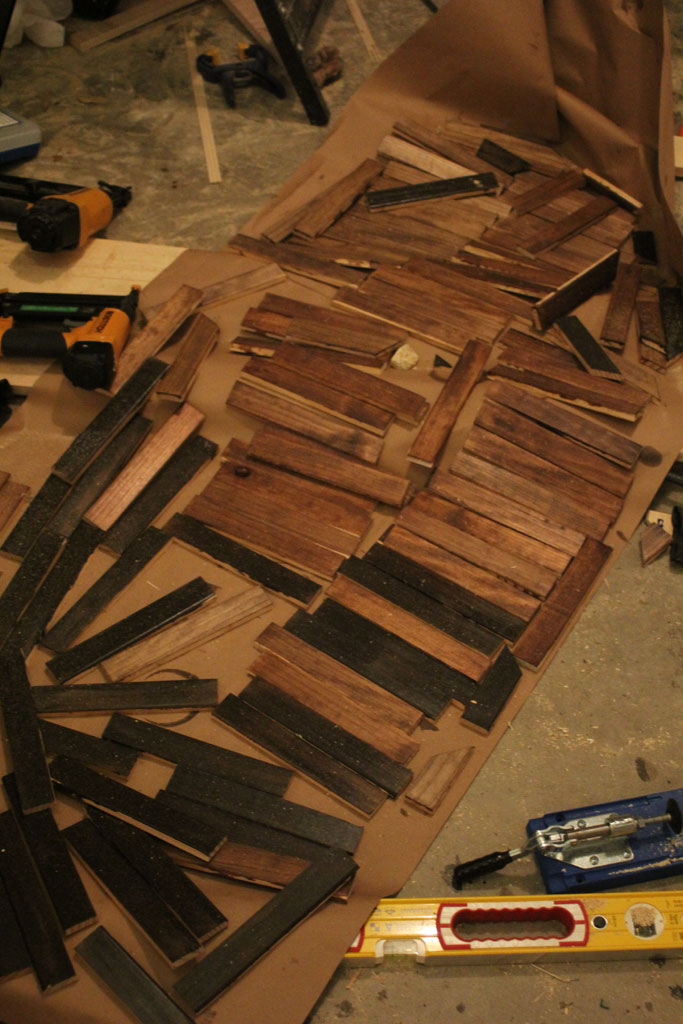
Once we had all of the pieces cut, we stained them in 3 different shades of stain:

cctable12

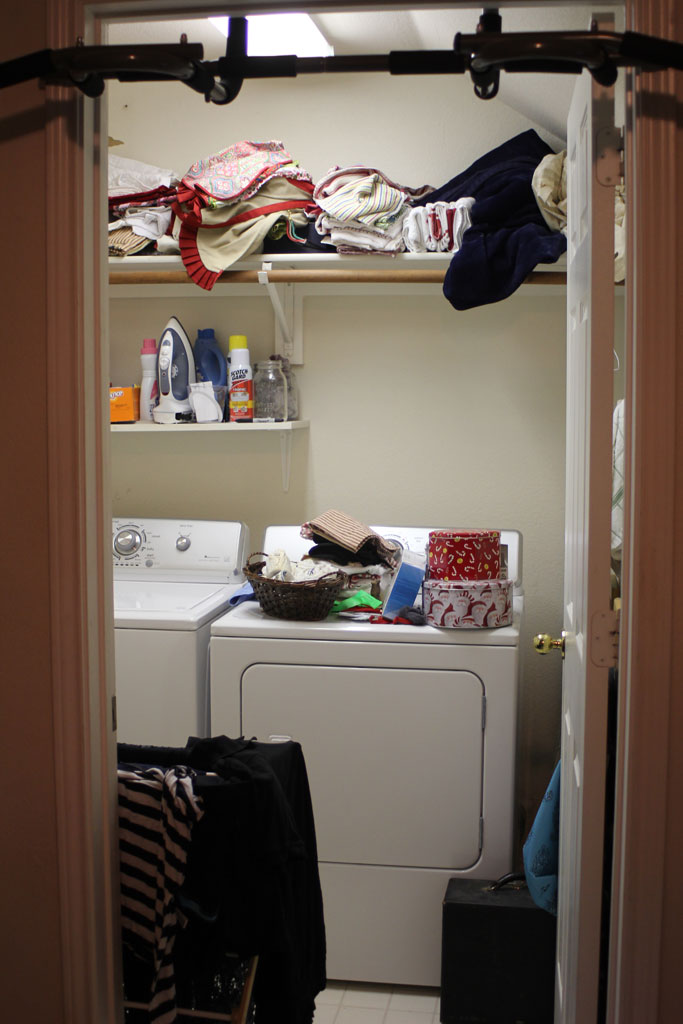
And in case some of you who have known me forever have seen my recent organizing posts and said: That is NOT THE MJ I KNOW! Rest assured, I’m still the same old me… here’s what the rest of the garage looked like during this project:

cctable11 LOVELY.

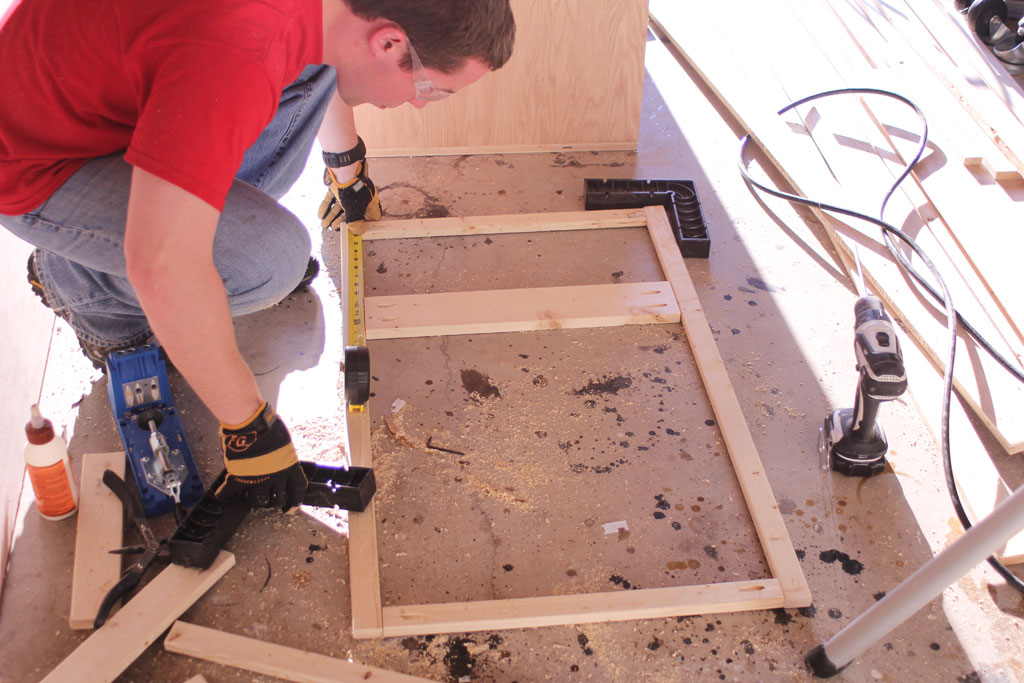
Anyway, the next part was the hardest part of the whole project: painstakingly piecing together all of the smaller pieces of the herringbone pattern.  And here is where I have to say that it is SO IMPORTANT to have good friends and family, I was on a deadline to get this done and I had to go to an event I had promised someone I would attend.  So I left my husband, my brother and his wife to finish up the final steps of this project.  We figured out the easiest way to do it was take the already stained pieces and lay each one over the spot it needed to go, mark it and cut them individually.  So it worked best to have someone marking them and someone cutting them (CAREFULLY) on the miter saw.

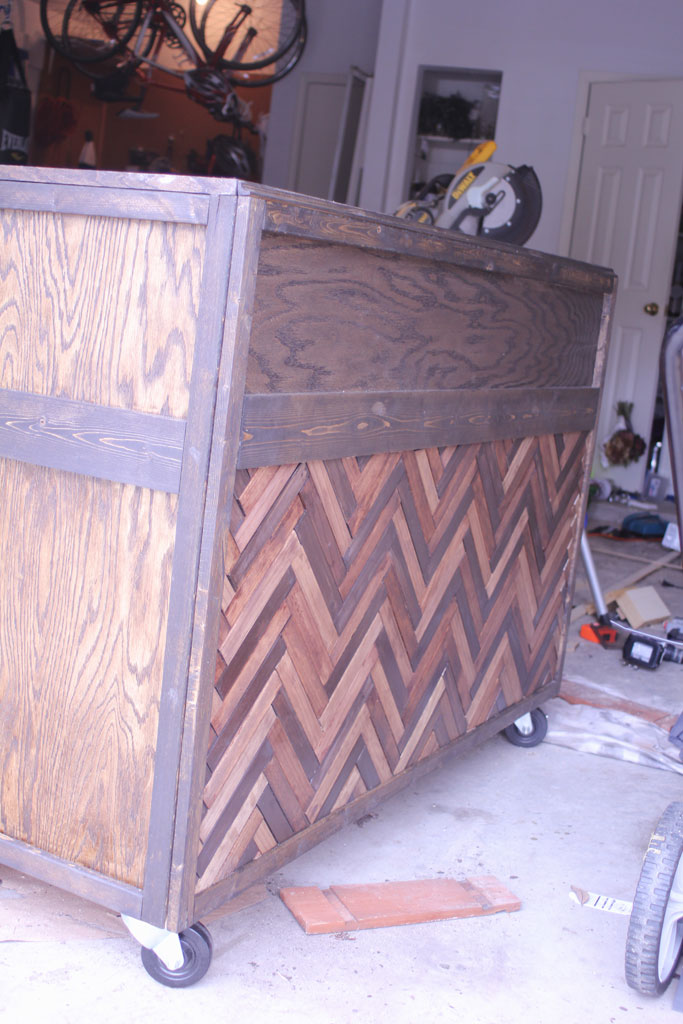
Once they were all cut, we just wood glued them down.  The fit was pretty tight already, so the wood glue was just a little extra insurance.  And this isn’t going to get a lot of wear and tear since it is on the front of the piece.

BUT OHHHHH it was worth it… Check out how cool it looks!!

cctable13

cctable15

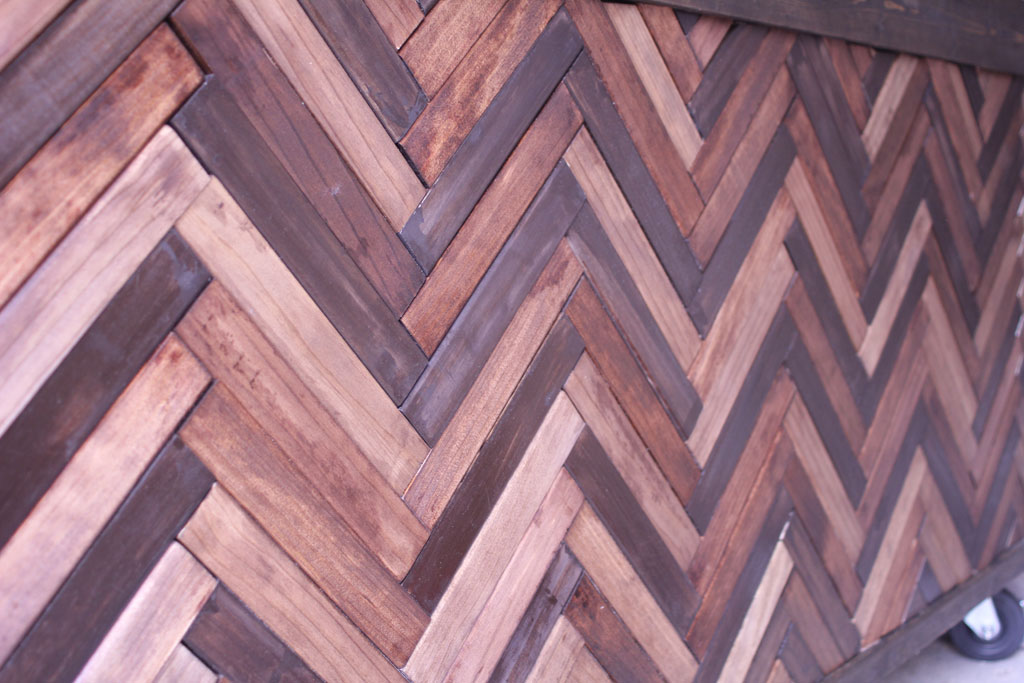
Like any home made piece, it isn’t perfect.  But I love it! And I love seeing it in its home at church:

cctable16


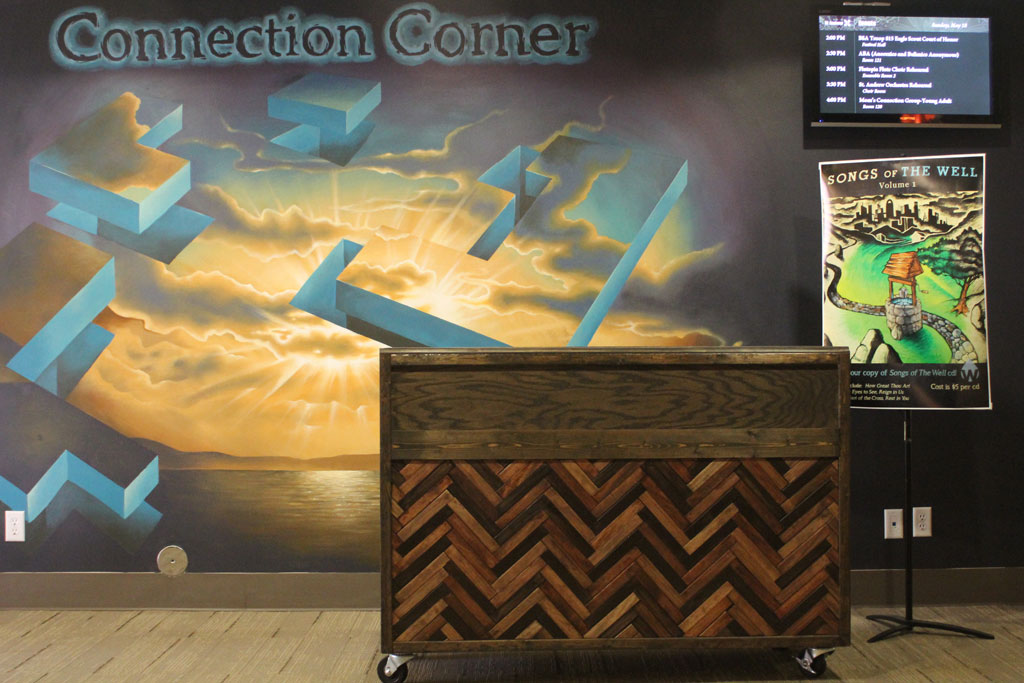
We have an artist who works for the church who painted that mural and hand-drew with chalk the cover to the CD that is displayed on the right.  CRAZY talented.  CRAZY.

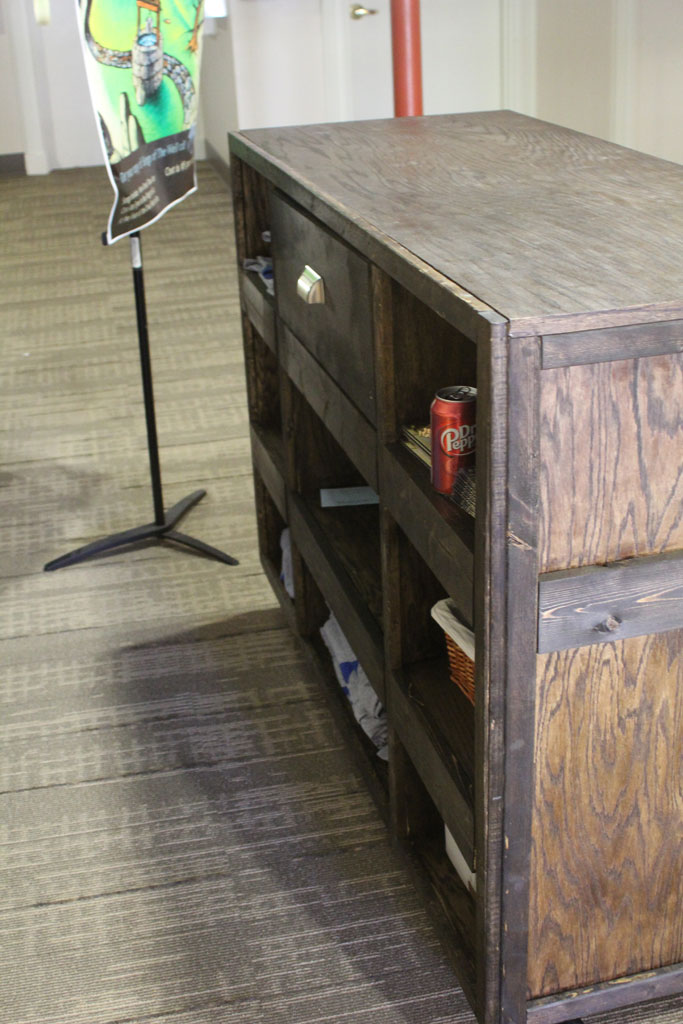
The backside is a little rough, but the drawer works (mostly) and it has enough room for all the things they needed to store, so its perfect! (PS Can you tell I worked connection corner on Sunday and had my Dr. Pepper addiction fulfilled?)

cctable19

Looks pretty good if I do say so myself!!

cctable18


Connection Corner Table

I’m finally posting about the project my friend Claire asked me to take on last fall, but because of scheduling and my brother’s wedding, I didn’t get around to starting it until late March.  It was a multi-weekend project but we finished it up just in time for Easter (I told you I was behind on posts!).  Claire works for our church and had this great idea for a welcome desk that meshed better with the personality of our contemporary service.  So she and I talked through plans and decided that it should be about kitchen island size.  So I went to my normal blog stop for plans and found Ana-White’s plans for this kitchen island.  I’ve used Ana-White plans a few times before, most notably for this dining room table.  I figured I could alter it a bit to make it work for us.  You know, like putting in a shelf instead of the X for wine storage.  (Not that I don’t like a glass of wine, but this maybe not appropriate for the church’s welcome desk).  And we only really needed one drawer and no cabinet fronts, so I only used the plans really as a model for the base of the structure.

Step one is basically constructing the box out of ¾ inch plywood.  We had Home Depot cut two sheets of the plywood in half vertically, and then once we got home we cut two of those halves (so one full sheet) into shelves and the dividers.

cctable10

I used my kreg jig on the inside of each of the dividers to secure it to the base, being sure to go ahead and put in pocket hole locations for assembling the top whenever we got to that point.  Since I was winging it, I wasn’t really sure what I was going to use as a top for the piece yet, but knew I would want to secure it from the bottom, leaving a smooth top.

cctable8

The next step was to add in braces between each section to give the backing something to attach to. IF you are going to be adding in a drawer or drawers, be very very sure everything is square. Otherwise you may have to take apart and reassemble several times… ask me how I know.  Oh and here is where I will stop giving you advice on how to put in a drawer and tell you to find other sources… mine only kind of works. And that was after reassembling 3 times. It probably won’t be the last drawer I ever attempt to build, so I’ll let you know if the next time is successful.  If you want more qualified instructions, I like Sandra’s tutorial about drawer assembly here.  But we’re getting ahead of ourselves we aren’t ready for the drawer yet.

cctable6

The back (front?) piece was a piece of ¼ plywood cut down to size and secured in using wood glue and an 18 gauge nail gun.  From there we assembled face frames using 1x4s and 1x2s to create the pattern.  One for each side and one for on top of the ¼ plywood we’ve just attached.

cctable5

cctable4

cctable3

We knew for size reasons we didn’t want the top of the island extending out any further than the actual island, and I realized that I had a leftover piece of the ¾ inch plywood that would cover the top perfectly except for the top of the face frame that we’ve already cut, assembled, glued and nailed onto the front… that puppy was NOT coming off.  But since plywood like that isn’t cheap, Claire and I came up with a more decorative solution of adding a piece of cove molding to bridge the gap between the top of the face frame and the front of the plywood on the top.  I think it actually adds a lot of character to the piece, so I’m happy with the snafu. This is the point of the project where I started to get pretty rushed for time and somewhat frustrated with how long it was taking, so unfortunately I don’t have great pictures of this step.  (you can see the gap in the picture below)

We did decide to add some heavy duty casters to the bottom of the piece to make it easier to roll out of Each caster has three long screws in it, since the fourth would drill up through the bottom of the piece. But we’ve moved this piece around quite a bit and they have held up very securely.

cctable1

Next up we cut the shelves two for each of the outer sections and one for the inner section and secured those using the kreg jig pocket holes. Then it was time to attach the face frame to the open side and complete the drawer.  Like I mentioned earlier, I’m not going to even begin to tell you how to build a drawer because I messed it up completely, but there are lots of great bloggers out there who have successfully done this, so I highly recommend checking them out if you are adventurous enough to try it!

And because this post has gotten CRAZY long… I’m going to leave you with the dreaded Cliffhanger… tune in tomorrow for the second half of our adventure!  (you’ll want to tune in… it involves an AWESOME herringbone addition!)


Minty Fresh and Clean Laundry Room

This past week when we were updating the living room, I also got an itch to do an overhaul on our laundry room too.  If you read my post a few weeks ago about things I would do the same and differently if I were house shopping again, you know that I have an upstairs laundry room and that I LOVE it.  For someone who despises laundry as much as I do, it gives me the opportunity to not have to fold my laundry ever, hide my dirty laundry… nope there is no good way to say that… I just like being able to hide my laundry if people come over.  Oh AND I showed y’all an awesome picture of the constant state of our laundry room.

laundryroom YIKES.

Now you see why I had an itch to redo it? Want another before picture?

laundryroom2 Yes that picture is about a month old, and yes that means I had Christmas cookie tins on my dryer at the end of March.  As I tell my husband… BECAUSE I AM AWESOME.

First step in a complete overhaul of a junked up room like this? Cleaning it out.

laundryroom7


What I really wanted in here were a few cabinets so that I could store a few things that wouldn’t be out in the open: extra kitchen towels, aprons and just some random things that didn’t really have a home. Since this is a kinda funny shaped room we figured out that we could put two cabinets from HD on the left hand side of the room before the ceiling started sloping down.  Which had the added benefit of me not having to patch that hole leftover from an old alarm system box.  So my next step was to tear out the shelves

laundryroom6


These definitely left a few rough patches on the wall, but fortunately for me, most of those would be covered by the cabinets, but for the ones that weren’t I spread some patch-n-paint over the top of it so it wouldn’t show once it was painted.

Then I chose a lovely mint green color Celtic Gray  from Behr paint.  Its definitely green and not gray.  I’m not usually a huge green fan, but decided we could be a bit adventurous in the laundry room.  And I wanted it to be very calming and clean. Then the husband and I hung the cabinets as per the instructions on the cabinet box.

laundryroom5

Do you see the bottom of the cabinets? The cabinets that we bought because they are supposed to hang like that? WHY DO CABINET MAKERS NOT PAINT THAT SPACE THE SAME COLOR AS THE CABINET?!?! Seriously?!  I cut a piece of plywood and painted it white to match the cabinets and then nailed it up, but still… THAT IS DUMB.

We also switched out the florescent light for the Declan Light from Crate and Barrel.  Brief sidenote… I LOVE new and unusual light fixtures, I DESPISE installing them, but I despise paying an electrician to do it for me even more, so…. I suffer. POOOOOOOR MJ.

laundryroom3

I plan on painting the hanging bar white, but haven’t gotten around to that yet, and our laundry was piling up, so I’m living with the brown for now. I built the floating shelf myself, which I’ll post about next week.

laundryroom1

The wire baskets came from One King’s Lane, but they don’t have them anymore (at least that I could find)

laundryroom9

I don’t have a trash can in my laundry room, so we collect lint in a jar until it fills up and then throw it away.  I had the jar on hand, but added the cute chalkboard tag which is a sticker (I bought those from Target on clearance for my brother’s shower, they came in packs of 6 and I LOVE them… I wish I’d bought more!).
laundryroom10

And I love these little metal chalkboard tags that I picked up at the Frisco Mercantile, which is a local warehouse where people have booths.  If you live in Dallas and haven’t been, they have a ton of cute things!

laundryroom8

And just because I love them so much, here is a before and after shot for you!

laundrybeforeandafter