Half Bath Part Deux

So when we left off in Wendesday’s post the husband had torn out the sink (and the two floor tiles surrounding it) and I had spur of the moment painted it a lovely shade of blue.  Meanwhile in the garage I was taking an old record stand from my grandmother’s basement  and was trying to figure out how to turn it into a working sink.  The top of the stand had been pretty badly water damaged, so I took it off and cut a piece of MDF board (similar to plywood but smoother) to fit the top of the piece.  To add a little spark I took my router (not the wireless kind) and cut in decorative edges around the top.  I’m still new at the whole routing business but it definitely fancies up the edge quite a bit! Once I’d gotten the edges done, I set the sink on top and drew a pencil line around the whole where the drain would go (the glass bowl that makes the sink comes as just a bowl with a hole in the bottom, so when it is placed on top it makes it easy to trace the hole!).  Then I took a jigsaw and cut out my circle…. good thing you can’t see it when the bowl is on… its less than a perfect circle. Then I glued the top onto the boards below and let it sit overnight. The next day I spray painted it white putting about 3 thin coats of spray paint on it.  Then it was time for the scary part… assembly.  guest-bath-sink1 
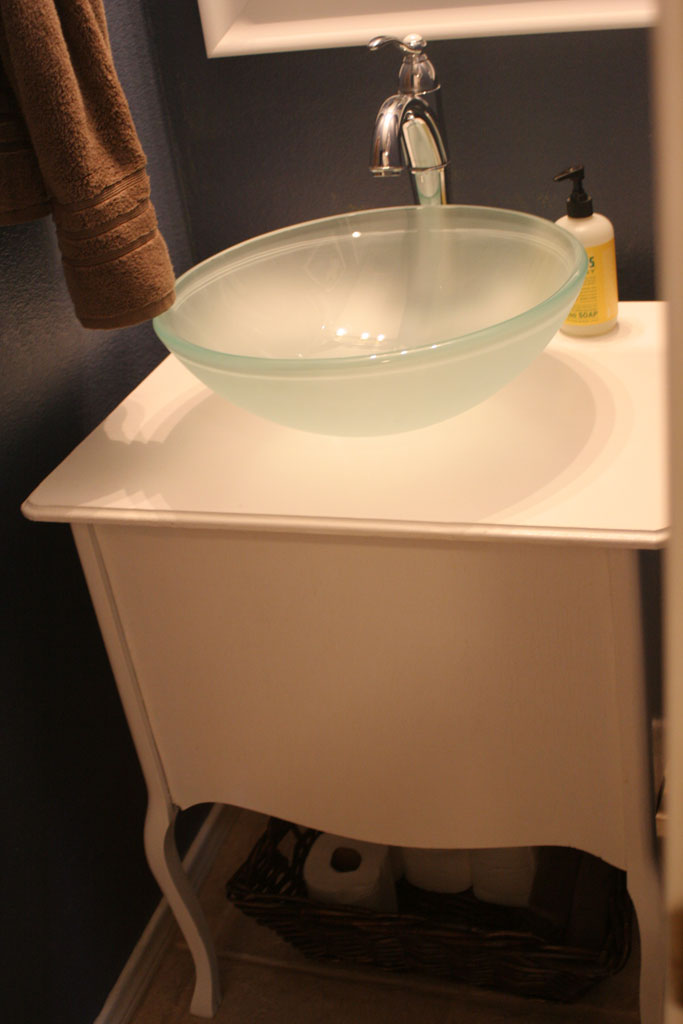
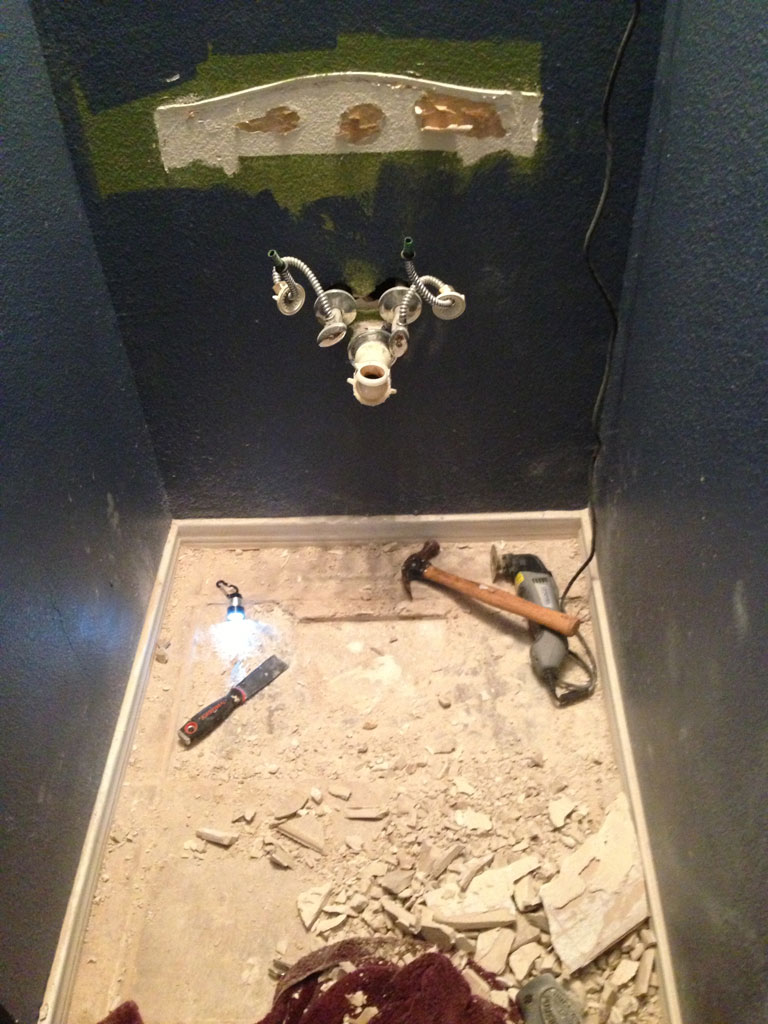
The husband and I carefully put all the pieces together like the diagram that came with the faucet showed… and man… screwing together pipes in very tight spaces is NOT EASY.  We did have to cut out a piece of the bottom to accommodate the J pipe from the bottom of the sink, and you should also know the part you see above is actually the ‘back’ of the piece.  It originally had a hinged door that we took off in order to slide it back over the plumbing  (and because clearly no one is going to see the side facing the wall).

Then the worst part EVER… turning the water back on. And what to do you know… drip. drip. drip. UGH.

This is how the rest of the night went: a late night run to HD to buy some plumbing tape. Back home. Google how to put on plumbing tape.  Husband and I both trying to fit in TINY LITTLE SPACE with a flashlight and plumbing tape and still need about 4 more hands.  Try a few times unsuccessfully to apply the tape before finally getting both hot and cold water tubes attached with the tape.  Turn the water back on… SUCCESS!!  Wait. Was that a drip? AWWWW MANNNNN!

But this drip was very very slow… so we put a towel underneath it, turned off the water and called it a night. The next evening, we turned the water on just to see… and no leak! And several months later it has never leaked again (don’t worry… I’ve checked).  I don’t know if the plumbing tape needed to ‘expand’ or it just molded to the threads better after the overnight, but it worked and has worked beautifully the remainder of the time!

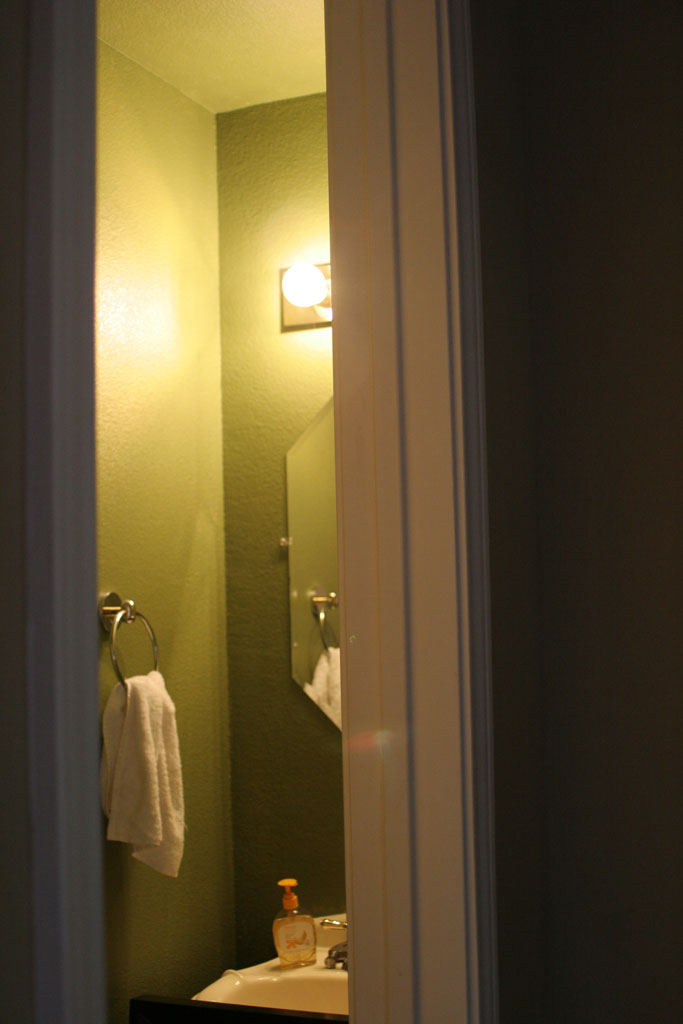
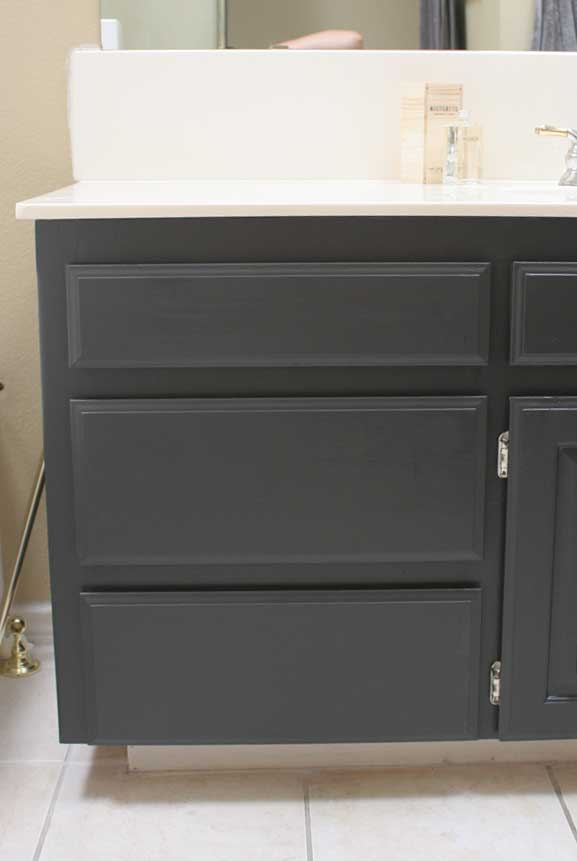
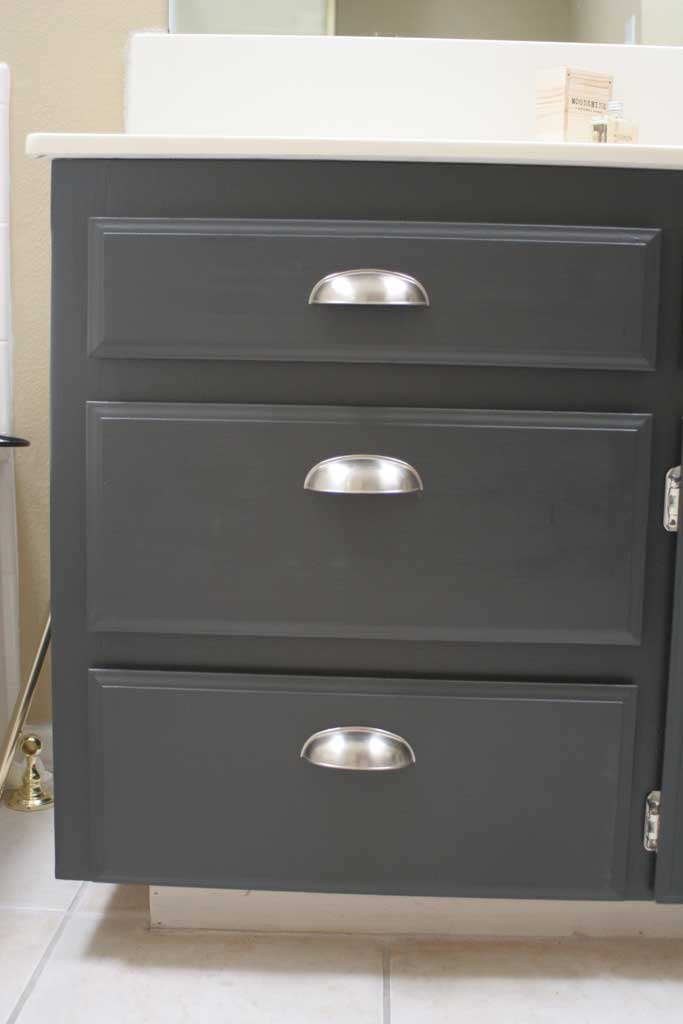
And for approximately the next week and a half the husband and I would periodically walk in to that bathroom just to turn the water on and marvel at our handiwork! And now just for fun a few more pictures of our handiwork!!  guest-bath-after guest-bath-mirror 
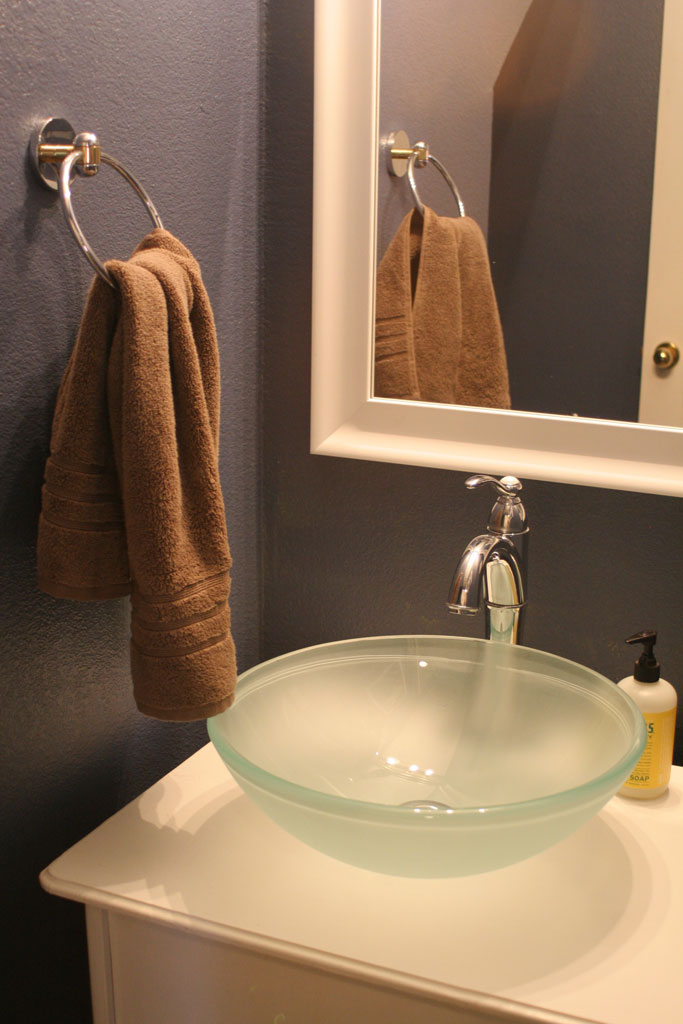
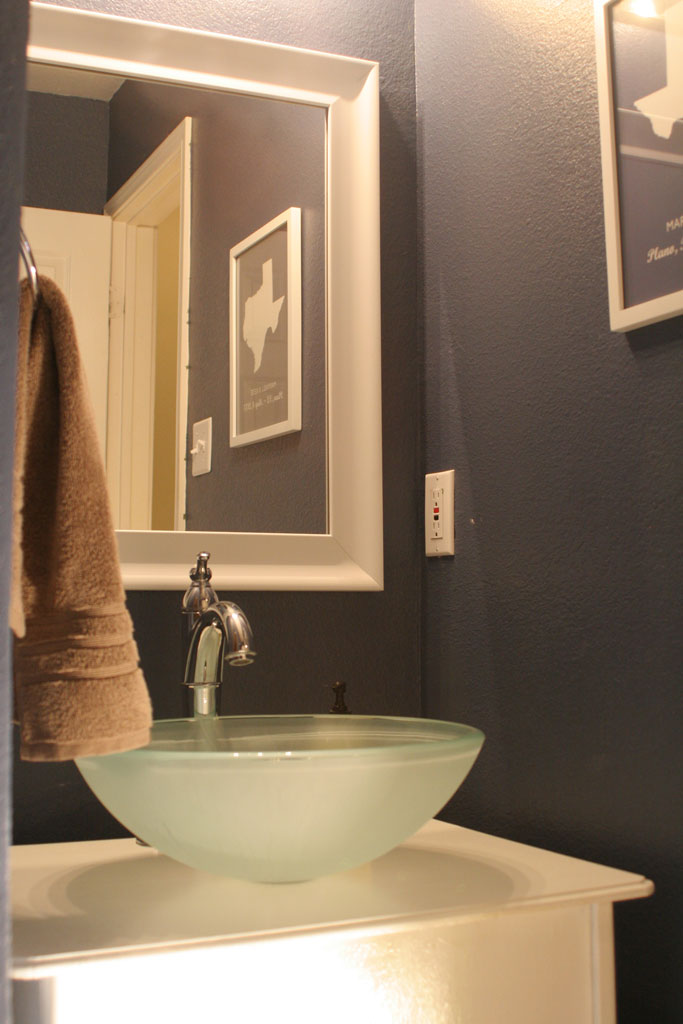
I won’t be rushing out to start any new plumbing projects any time soon, but I will say the hardest part of DIY is definitely being brave enough to start! And I love walking in my tiny little bathroom and seeing the cute little bowl sink.


Half Bath

Just off of the living room and kitchen is a small ‘half bath’ guest bathroom.  And if you can picture the space underneath a stairway… then you will know how TINY this room is (and therefore impossible to photograph!).  And to top it all off the previous owners had chosen a color that was a very unattractive shade of green (it might also be that i’m not a huge fan of green… and I was a bit biased against their other green choices in the house) and painted THE WHOLE ROOM… ceiling and all.  Doing so made this tiny little room feel even tinier!

guest-bath-before And with a builder grade octogon shaped mirror, I knew a little bit could go a long way in this room.  And this was definitely a room I did a little bit at a time.  One weekend I got fed up with the mirror… and switched it out.  About 6 months later I decided the ceiling needed to be white.  And somewhere around that time I found a glass bowl for a sink at the Habitat ReStore for about 50$.  Since I’d always wanted an above the counter glass bowl sink, I went ahead and bought it with ABSOLUTELY no idea what the next step in how to actually make it function as a sink.  And so… like the tile in our Backsplashing Project it sat in my garage for a LONG TIME.  But I knew if I could figure out how to convert it into a sink it would look PERFECT in this location.

And then a few other pieces of the puzzle fell into place.  I was perusing faucets on overstock and found one that was perfect at a deep discount and when I looked closer it mentioned it had the sink stopper to go with it! I immediately purchased it and added it to the now growing stack of sink materials in my garage.  The other piece that fell into place was realizing that the old record holder which was sitting in my garage awaiting its furniture destiny was the exact right size to fit in that little corner of the bathroom AND the sink and faucet could comfortably sit on top.  You would think with all the pieces I would jump right in… but life has a tendency to get in the way and all these pieces sat in my garage.  Party because I didn’t have any time… and partly because I was scared to start, I mean lets be real… if this goes wrong it means I have a leaky sink and plumbers ARE NOT CHEAP.

And this is when I know I married the right guy (or at that point was going to marry the right guy).  One Saturday afternoon the guy who isn’t a big fan of projects says to me… do you want to go to a movie tonight… or do you want to rip out the old sink and start the bathroom renovation? (I might have accidentally kickstarted it by randomly deciding I couldn’t live with the green anymore and needed to paint the walls…oops) So I immediately answered yes and got in the car to go get all our supplies before he changed his mind.  So we jumped right in and started to remove the pedestal sink.  I knew it would be kinda tricky because the tile had been laid after the sink and so along with the sink needed to come out two other pieces of tile (fortunately the previous owners had left several spares in the garage).  So I did what any good DIYer does… and googled how to remove a pedestal sink.  I followed instructions… cut the caulk around the back and gently pull away from the wall.  HA… easier said than done. We ended up having to take the Dremel with a grout removal attachment and cut all the way through all the grout and break up the pieces before that sink would even budge an inch.  But thanks to the husband’s perseverance… it finally came out. The ‘progress’:

guest-bath-progress

I like the picture above because it gives a very good picture of the old paint color vs the new paint color.  I decided to paint so spur of the moment that I just mixed my own paint using leftovers from the kitchen, living room and office paint jobs to find a happy medium.  Which is a little sad because I LOVE this color and wish I could use it in more places! I might have to get it color matched sometime!!

Since this post is getting a bit long and unwieldy I’ll save talking about how we converted the old record holder into a bathroom sink for Friday’s post.  And I’ll leave you with the before and after of the paint job in this tiny little bathroom.

guest-bath-before1 guest-bath-after1 I think the biggest difference in the painting was turning the ceiling back to white.  It definitely made the room feel bigger.  (again… sorry for the blurry pic!)

Stay tuned for Friday’s post about the sink!

Feeling Gray… or at least my cabinets are

Our Master Bath was one of the things that I loved most about my house when I first bought it.  When I lived down near my graduate school I lived in a small old house in a super nice neighborhood… its what you might call a ‘tear down’ but I loved almost every part of that crazy old house.  EXCEPT for the tiny bathroom with only a pedestal sink. Seriously… have you tried to blow dry and straighten your hair with absolutely NO counter space? Anyway… this bathroom was a dream come true when looking for a house, I loved the skylights and the fact that it had a TON of counter space (and multiple outlets… YESSSS!) What I didn’t love? That it was very builder basic.  Nothing fun or splashy (see what I did there?? bath pun.) about the beige walls and white-ish cabinets.   master-bath-before So I decided I wanted to spruce up the cabinets and paint the walls a bright white color. I decided I wanted to paint the cabinets with a dark gray color and settled on Behr’s Evening Hush.  I got it in an oil based paint since I hear that’s the way to go with cabinets.  And can I tell you, I’m just not a huge fan of having to use oil based paint.  I feel like it gets everywhere and is so hard to clean up.  But helpful hint: If you use oil based paint or stain vegetable oil will take the paint off your hands… but then of course you have to use dish soap to get the vegetable oil off.  But hey… vegetable oil smells WAY better than mineral spirits and doesn’t make your hands dry out.

Anyway… back on topic.  Evening Hush.  WAIT, I skipped a step, first I used a liquid deglosser to take the gloss off the cabinets.  Its a super easy product to use, just wipe on and then wait 10 minutes.  I skipped the primer step, I probably shouldn’t have, but it turned out okay.  BUT DON’T SKIP THE DEGLOSSING STEP! (that’s a later blog post… oops!) Anyway, two coats of paint on every door and drawer front later, I had beautiful new dark gray cabinets

master-bath-cabinets-after1 master-bath-cabinets-after2 I chose not to paint the toe kick (see that white part peeking out under the picture above?) Partly because a. who’s going to notice b. who wants to paint down there? and c. (and the reason i’m sticking to… ) I think it makes the cabinets look a little like they are floating cabinets and look pretty classy.  BUT they were still missing something… HARDWARE. The drawers are very easy to pull out from underneath, but hardware makes everything look a bit more polished off. So I journeyed off to HD and found some beautiful cup pulls.  They came in almost $5 a pop, so they definitely weren’t cheap, but I only needed 4 for this project.  (famous last words since I ended up buying matching ones for a new dresser going in the master bedroom adjacent to it that needed 8 just a few days later… yowza that’s a lot of money for drawer pulls). But it makes it all better because look how classy those drawers look now!

master-bath-cabinets-after

Anyway, drawer pulls are easy to add, just use a 3/16 bit and I used a cheap plastic guide that was in the same aisle as the drawer pulls which helped me make all of the handles the same distance down from the top.  I did have a momentary conundrum trying to decide with three different height drawers (REALLY BUILDERS… REALLY?) whether or not the handles should be centered from top to bottom or the same distance from the top.  After a quick survey of pinterest… (I mean seriously, what did we do before pinterest?) I found that most drawers have them the same distance from the top. And turns out the majority was right… they look good. I’ll show you the rest of the bathroom as soon as I’ve got the second coat of paint up!