You want to learn to sew, but never picked up a machine (although they definitely work better if you leave them sitting on the table…)? Well pull up a chair and I’ll show you how. Let me start with a disclaimer… I am NOT AN EXPERT SEAMSTRESS. However, I am very good at being a novice sewer. I picked up sewing a few years ago and am still pretty new at the whole shebang. But that gives me a distinct advantage… I know exactly where the “I’ve never sewn a thing but think maybe I want to learn” sewer is coming from. (yes I know the word is supposed to be seamstress… but seriously? that is way too formal for what I do!)
Anyway, here’s the secret… you can do a lot of cool sewing things with just a few minor skills. BUT first you have to know how to run a machine. I have this one and it has worked PERFECTLY for the two years I’ve been playing with it. Its easy to use and pretty dummy proof… perfect for a beginner. I’m sure there are cheaper options out there that work just fine if $100 feels like a pretty big commitment to you. I’m also sure you can spend a small fortune on fancy schmancy ones, but this has just about all you’ll need.
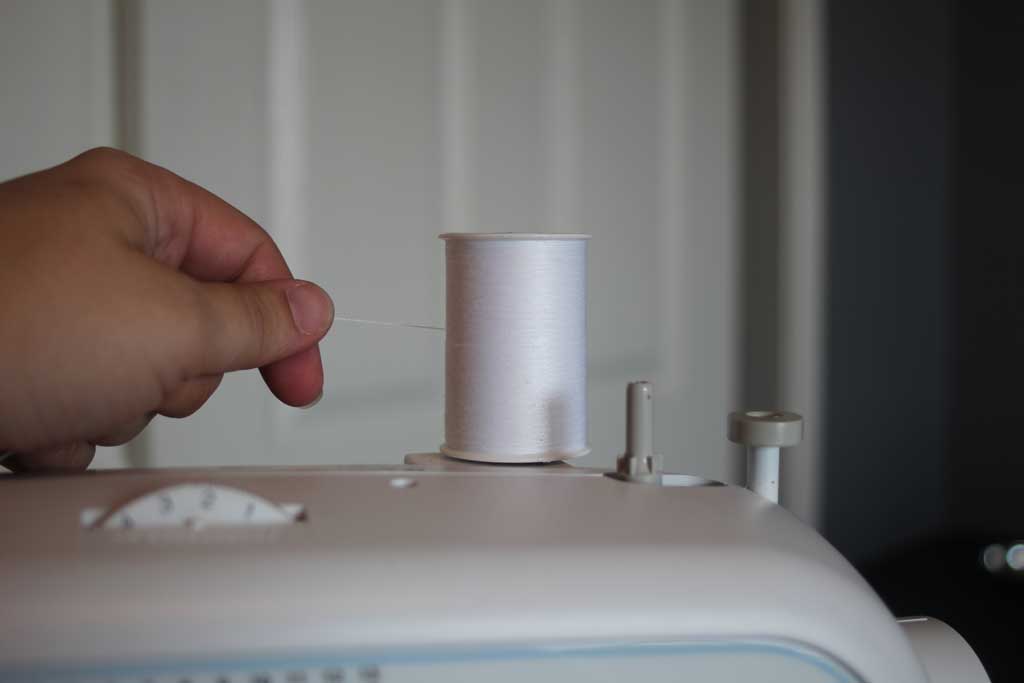
First things first you’ll have to wind your bobbin (the little round plastic piece that comes with your machine), which I’ll show you how to do tomorrow! (A little backwards, but hey… that’s how I roll). Once you’ve done that, take your thing of thread and stick it on the metal rod on the top of your machine. Mine always seems to work better when I have the thread coming out the back of the spool like this:

Each machine is going to be a little different, but mine has pretty simple instructions for how to thread it. The solid line is for sewing and the dotted line is for winding your bobbin. So since we are setting up the thread here, follow the picture 1 with your thread and put it through the metal U and pull it down towards the machine (mine has a little tiny metal spring that holds the thread in it’s little U.
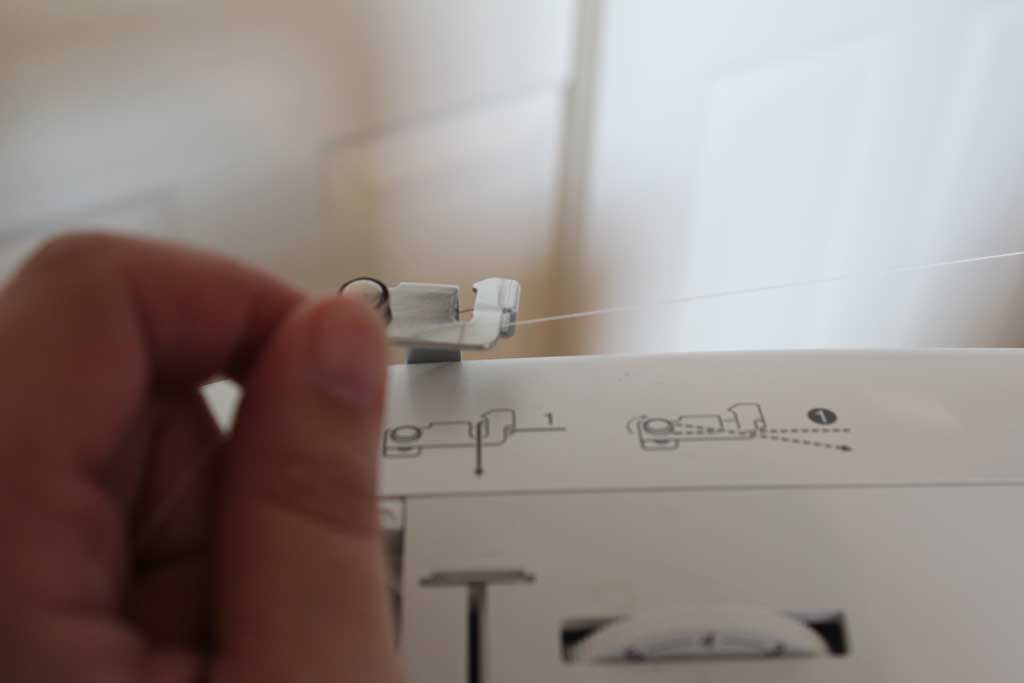

Next pull it down through the slit on the right (see the number 2?)


Then 3 and 4 kind of happen at the same time, loop it down around the bottom and up to the metal piece you see at the top of the picture below. If your metal piece isn’t at the top of that slit turn the wheel on the right side of your machine until it gets to the top.


Make sure your thread goes over the metal piece from right to left and then pull it back down to where your needle is.

When you bring it down thread it through the eye of the needle… if you are struggling with this I find it helps to trim off the edge of your thread to give you a clean edge.

Now its time to drop your bobbin in. This machine has a super simple drop in slot. Release the plastic cover to your bobbin slot (on mine its that little gray square you see in the picture above and then the cover just slides out. From there just follow the picture to make sure your thread is coming out the right way from the bobbin. (FYI this is really important… if you don’t do it right it will all get tangled and you’ll get frustrated, not that I would know anything about that…)

The thread comes out from the top of the bobbin to the left and then hooks around the plastic piece and then comes out on the left side of the bobbin holder. Ignore the pieces of thread in the picture below that I am not holding. The one on the top is coming through the needle and is attached to your spool of thread, the other one coming out of the bobbin is because I didn’t trim the other end of the bobbin… my bad!

Then put the cover back on your bobbin and now comes the hardest part (but its not that hard… you can do it!) Hold the end of the thread that is coming through your needle taught to the left of the machine. Now with your right hand turn the wheel on the right of your machine towards you until the needle drops down into the hole and comes back up with the second thread. It should look like this:

From here I always swipe a pair of scissors underneath the presser foot (the flat metal thing) so that both my threads are coming out to the left of the machine like so:

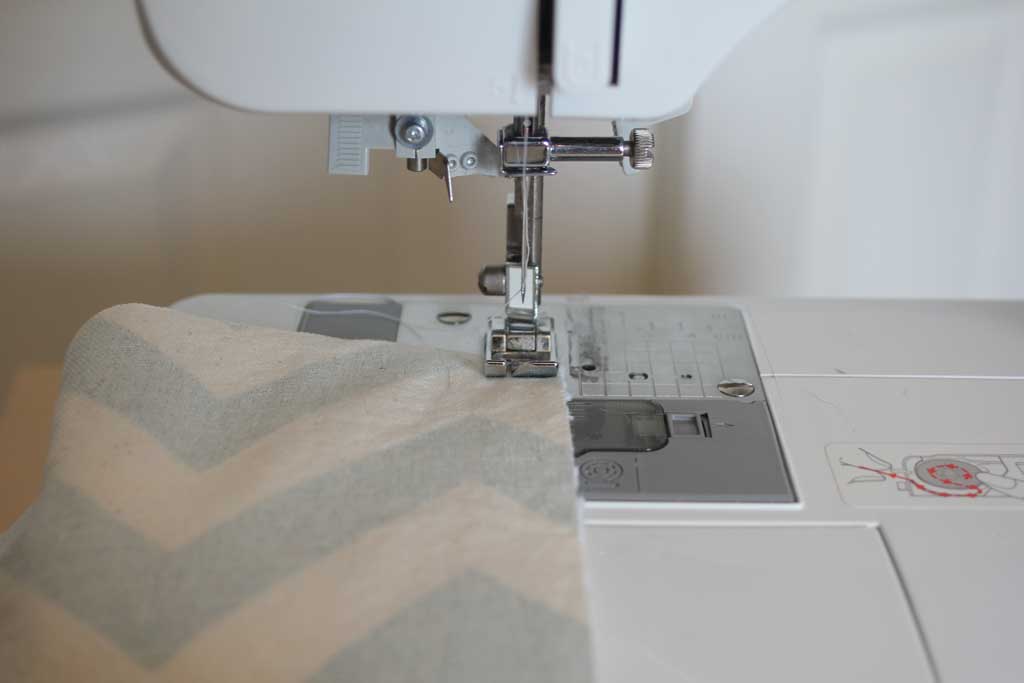
Make sure you have plenty of spare thread pulled out so that your needle doesn’t un-thread itself (it is one of the more frustrating things when you realize you’ve sewn a few inches without the thread…) Now its time to start sewing! Line your fabric up with the right hand side being however long you want your “seam allowance”. Your seam allowance is however much space you want between your line of thread and the edge of your fabric. I usually line mine up like you see below with the edge of my fabric at the edge of the presser foot or I line it up on the left hand side of that grid they printed there for you.
 Stick with me this week…
 Friday I’ll show you (I posted it here!) what I’m making in the picture above… its a super easy project that is great for beginners!


 Hi, I'm MJ! I'm a DIY kind of girl and this is where I share my projects. I'm taking you along for the ride as I learn how to do woodworking, sew, bake, and renovate!


Speak Your Mind