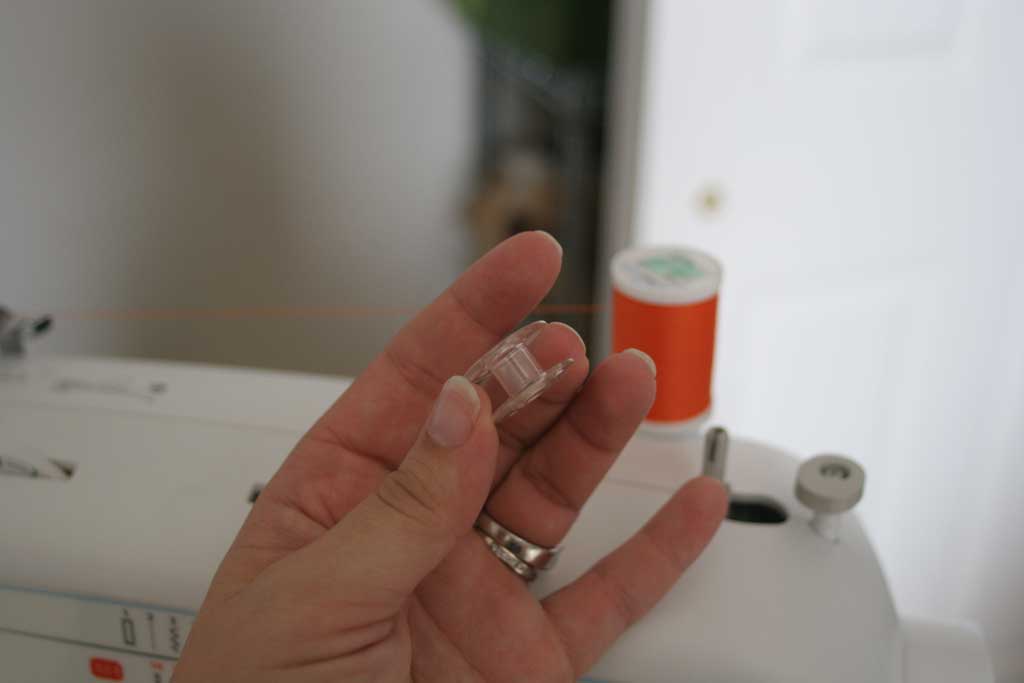
Bobbins… that word always reminds me of bobbin’ for apples, but low and behold a bobbin is actually a crucial part of sewing. Most bobbins look like short and stumpy spools for thread and are either plastic or metal. The ones for my machine are plastic. When a sewing machine sews it uses two different threads to wind through the fabric… one that goes on the top of the fabric and one that goes on the bottom. The machine takes the thread for the top off of the spool of thread you purchase from your craft/fabric store. The bottom thread though has to be wound onto the “bobbin” from the same spool.

So the first thing you need to do is to pick your fabric and a thread color for your project and wind your bobbin from the spool of thread. The tradition is to find a thread color similar to your fabric color (or just white if it won’t show) but sometimes it is fun to pick a contrasting color to spice it up a bit. But whatever color you pick you’ll need to wind thread onto a bobbin. One of my secrets? Buy a package of extra bobbins that fit your machine (AND YES you have to check to make sure they are the right ones… the wrong ones either won’t fit or won’t work right… they are usually listed by model number). It is almost impossible to guess correctly the right amount of thread for your piece and if you have extra bobbins you don’t have to unwind and waste thread if you want a new color, you can just grab a new empty bobbin. Since all my extra bobbins were rolling around my sewing cart and getting all tangled up, I decided I needed some way to contain them so I bought an extra little plastic container where I leave my bobbins that have thread in them.
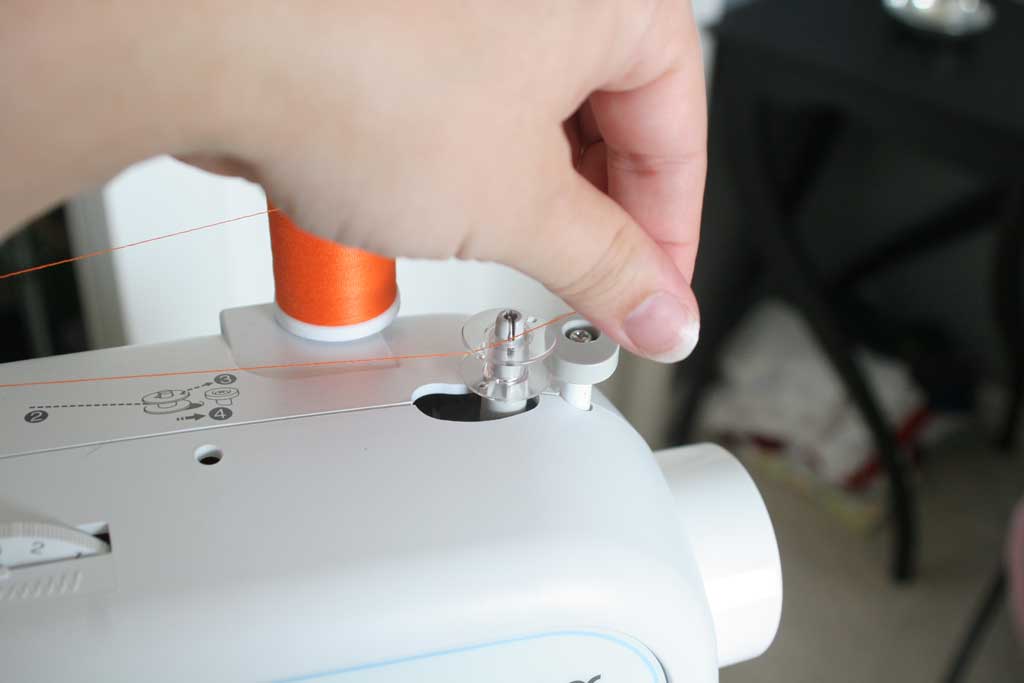
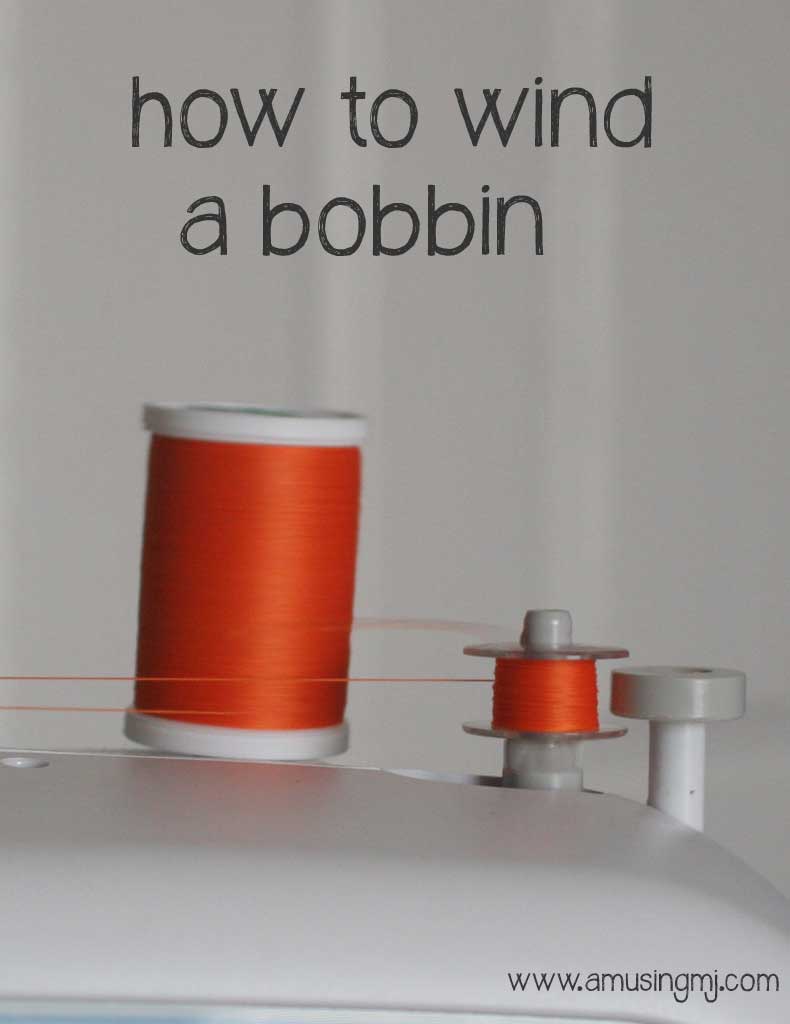
Okay so to wind your bobbin, first put your spool of thread on the top of the machine on the metal rod. Then take the thread and wrap it around the little circle in the same direction as the picture with the dotted line shows you, mine goes on the bottom side of the circle and then winds around it clockwise coming out at about 4 o’clock just like in the picture below:

Now wind your thread through the tiny little hole on the top of the bobbin and then drop your bobbin onto the plastic piece on top of your machine. Slide the bobbin to the right, which tells your machine its winding the bobbin not sewing a piece of fabric.

From here hold the edge of that piece of thread while pushing down on your pedal and you’ll see the thread start to stack up on your bobbin. Once it has been wrapped a couple of times you can let go of the thread and just let it wind up on its own. Once it is done, cut your thread, remove your bobbin and slide that little plastic piece back over to the left for sewing your project.
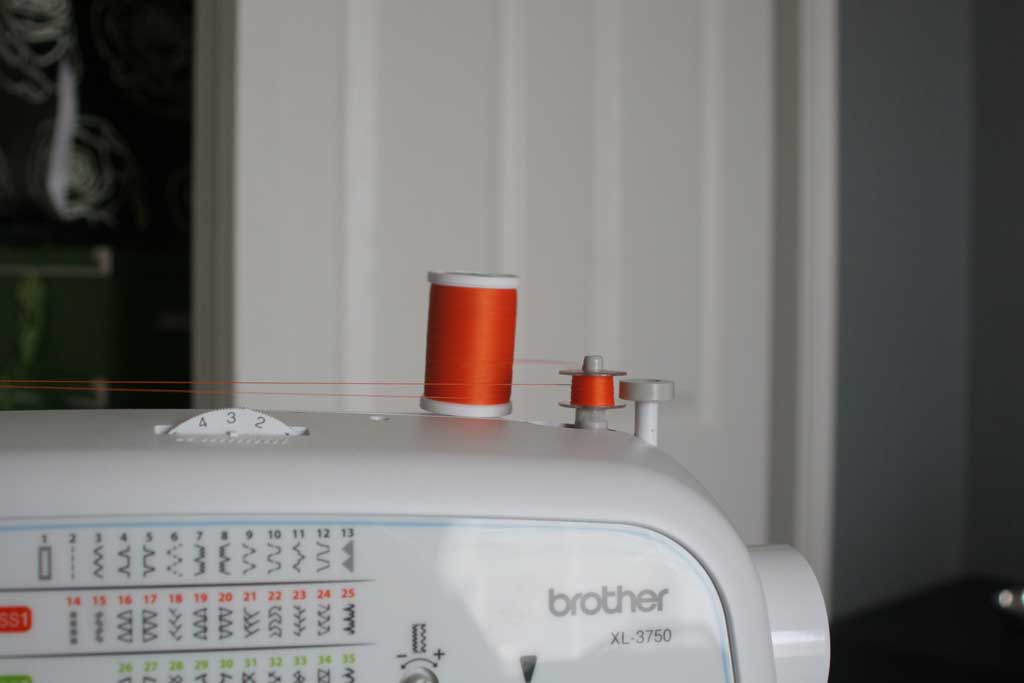

If I’m using a common thread color like white, black or even navy I will fill up the bobbin most of the way, but if I’m doing a specialty project with something like hot pink or teal, I’ll just wind it up half or 3/4s of the way. One of the lessons my mom taught me though is that thread is cheap… so don’t worry if you waste a little here and there.
Now that your bobbin is wound… go here if you missed yesterday’s post on how to thread the rest of your machine and stay tuned for tomorrow to see a very easy beginner project that I love to make!


 Hi, I'm MJ! I'm a DIY kind of girl and this is where I share my projects. I'm taking you along for the ride as I learn how to do woodworking, sew, bake, and renovate!


Speak Your Mind