Archives for April 2015

My Baby Shower!!

This past weekend my BFF threw me a book-themed baby shower.  Because she lives on the other side of Dallas from me and the majority of the invitees we decided to have the shower at my house, and it was PERFECT.  People loved getting a sneak peek at the nursery, and when it was all said and done all we had to do was carry the gifts upstairs! But enough of that logic and on to the amazing shower!

WARNING: this post is going to be total picture overload… bear with me!

When I got back to the house (I had been banished so they could transform it), a wreath they had made greeted us at the door:

Baby Shower wreath | www.amusingmj.com

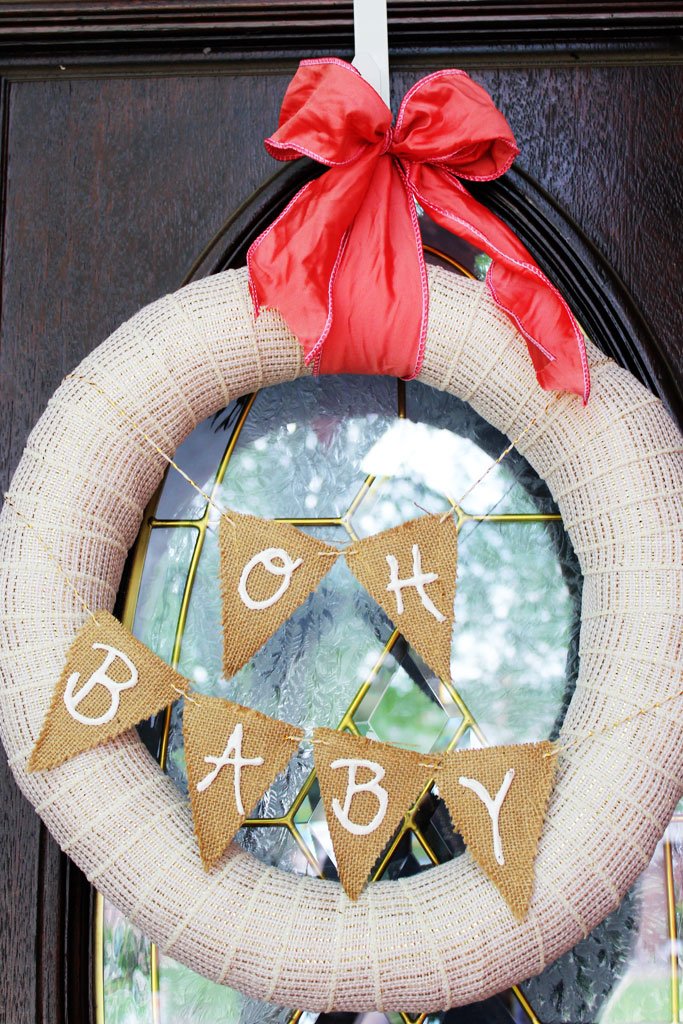
I think I’m going to add a letter to it and take it to the hospital to hang on our door when baby girl is born! It is so cute! I arrived at the house with my mom about 10 minutes before everyone else, so I got to wander around and check out the decor.  It was a child’s book themed party, so there were nod’s to kid’s books everywhere!

Baby Shower | www.amusingmj.com

I get to keep most of the decor, so you’ll see some of these things hung on baby girl’s walls in the nursery very soon! The picture below on the left has book spines printed out, as well as copies of Mother Goose and some other kid’s books lying around on tables.

Book Themed Baby Shower | www.amusingmj.com


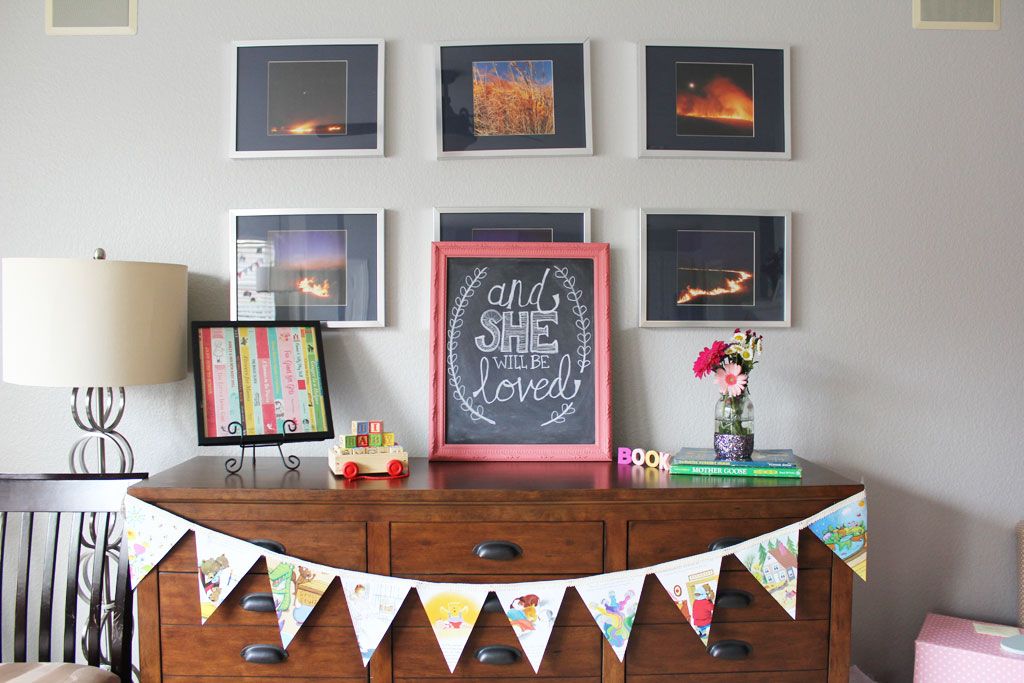
The pennant bunting was a DIY project made from pictures from children’s books, which was precious!  The whole room was ready for guests, I loved the attention to detail everywhere and how much thought was put into the whole party!

Book Themed Baby Shower | www.amusingmj.com

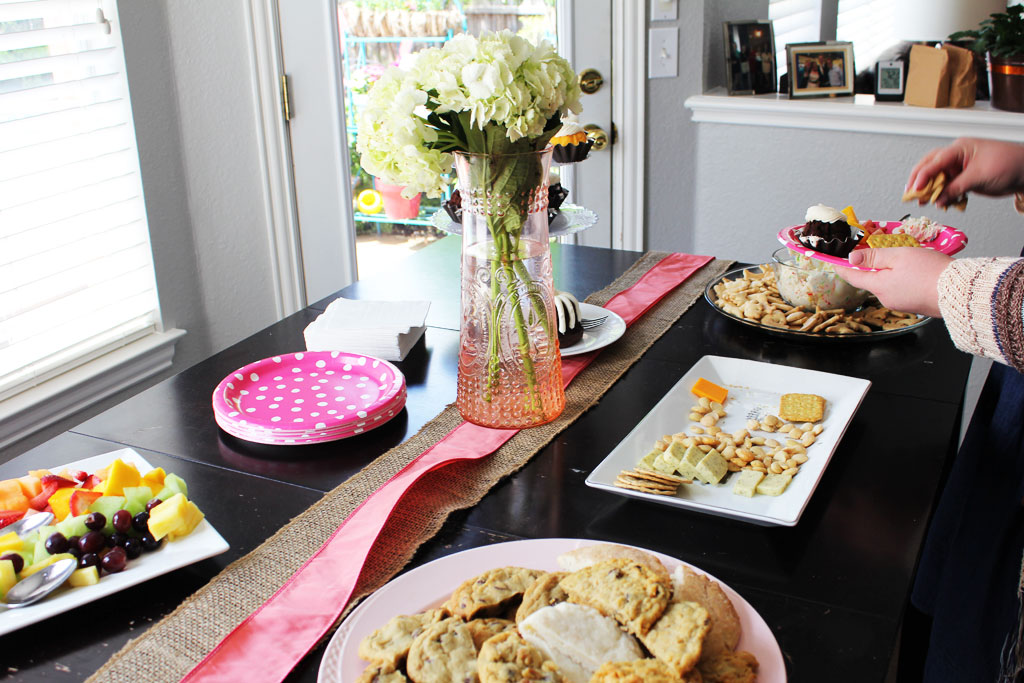
For food we had lots of my favorites: fruit, cheese & crackers, Paradise Bakery cookies, animal crackers and funfetti dip, and Nothing Bundt Cakes.  (if you aren’t familiar with Nothing Bundt Cakes… you should become familiar… they are A-MAZING).
Baby Shower | www.amusingmj.com

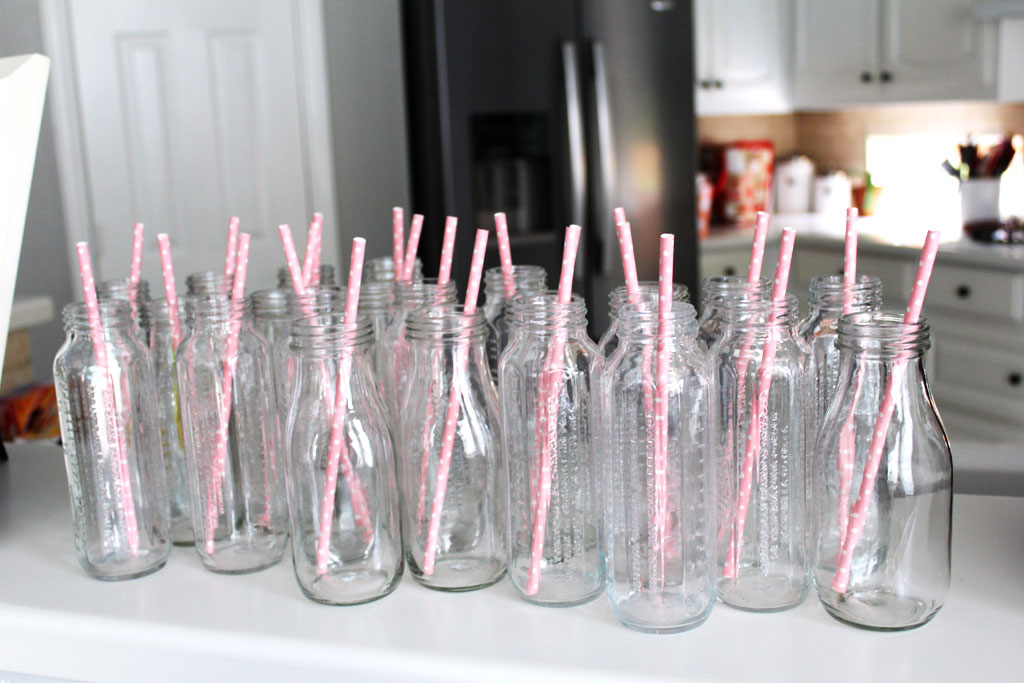
And to drink we had cute baby bottles with straws and tea or strawberry lemonade to go in them:

babyshower17

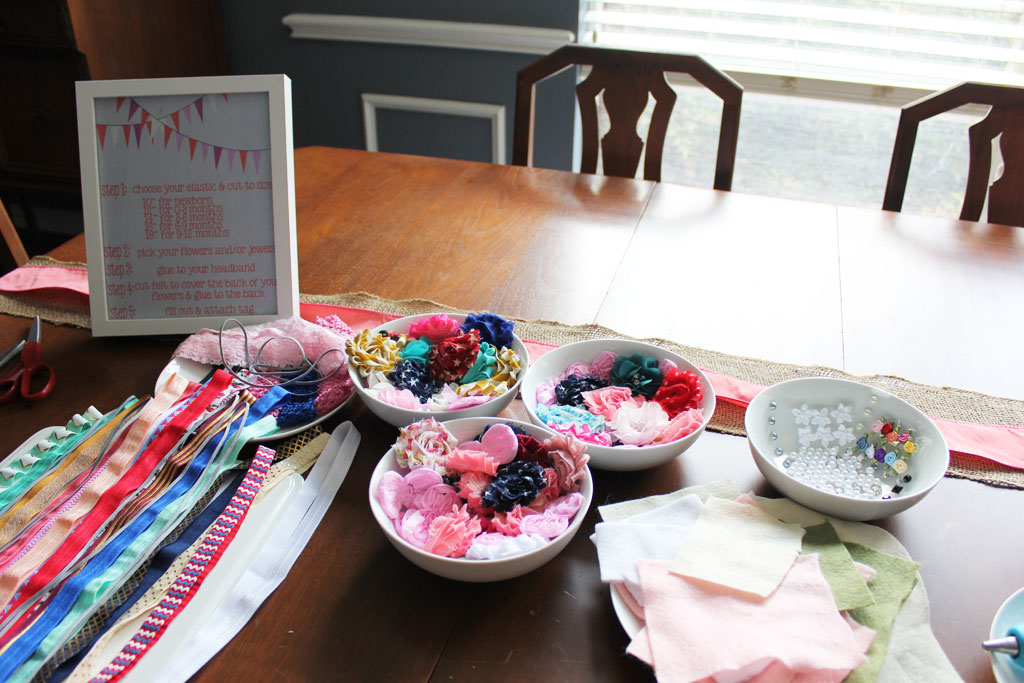
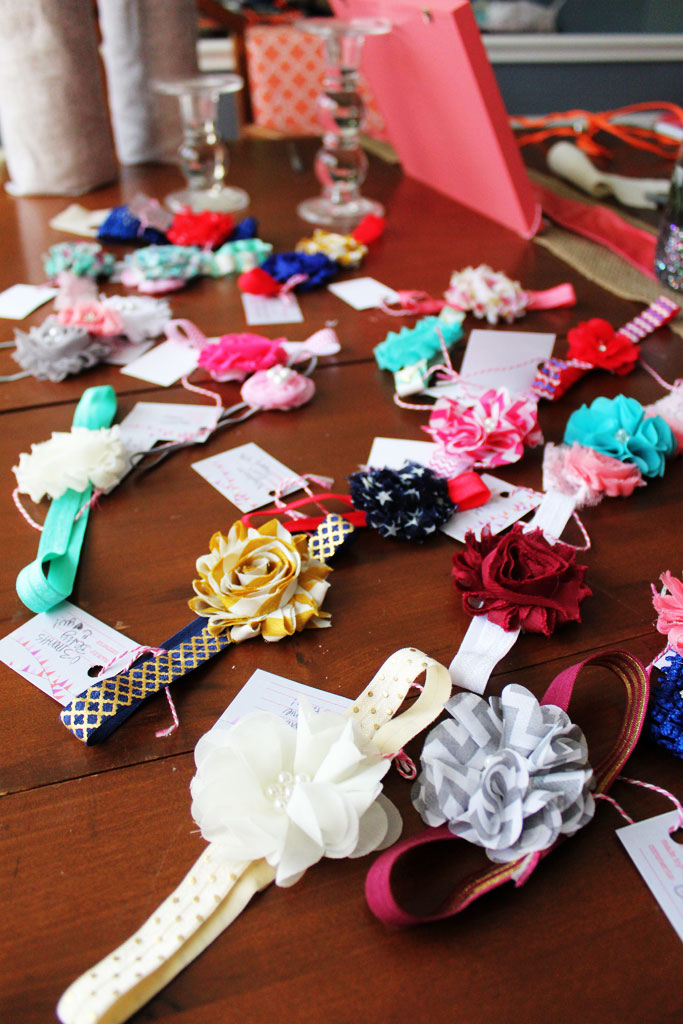
And because baby girl is going to need TONS of hairbands, we had a crafting station where everyone got to make a headband or two for baby girl.  I’ve previously blogged about this idea for a shower and I still LOVE it! I first saw it at my friend Lauren’s shower in Little Rock, and was so excited that this little treat made it into my shower! Baby girl has some pretty amazing headbands after this weekend!

Here was the setup:

DIY Headband Station | www.amusingmj.com

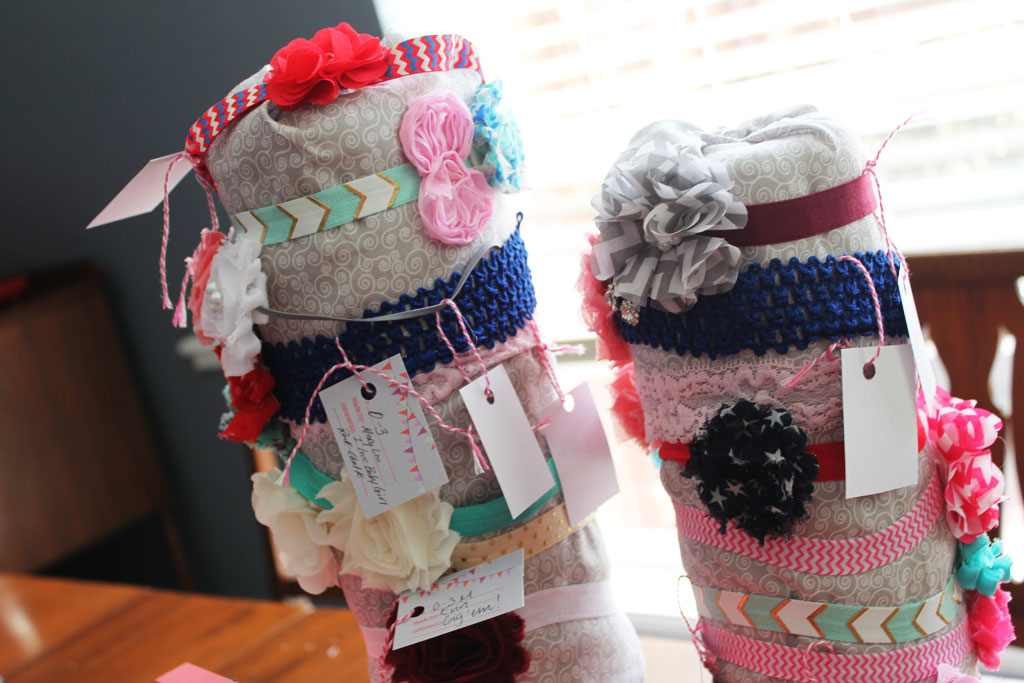
And some of the final results:

DIY Headband Station | www.amusingmj.com

She made two display towers to put them on when complete (and even had tags so I know who made them and for what age!).  The display towers are just paper towel rolls wrapped in fabric and put on wide candle holders, but they were SUCH a cute way to display them!!

Can you tell I had both Jayhawks and Aggies at the party?? Baby girl is going to have good headbands for both football and basketball season!

DIY Headband Station | www.amusingmj.com

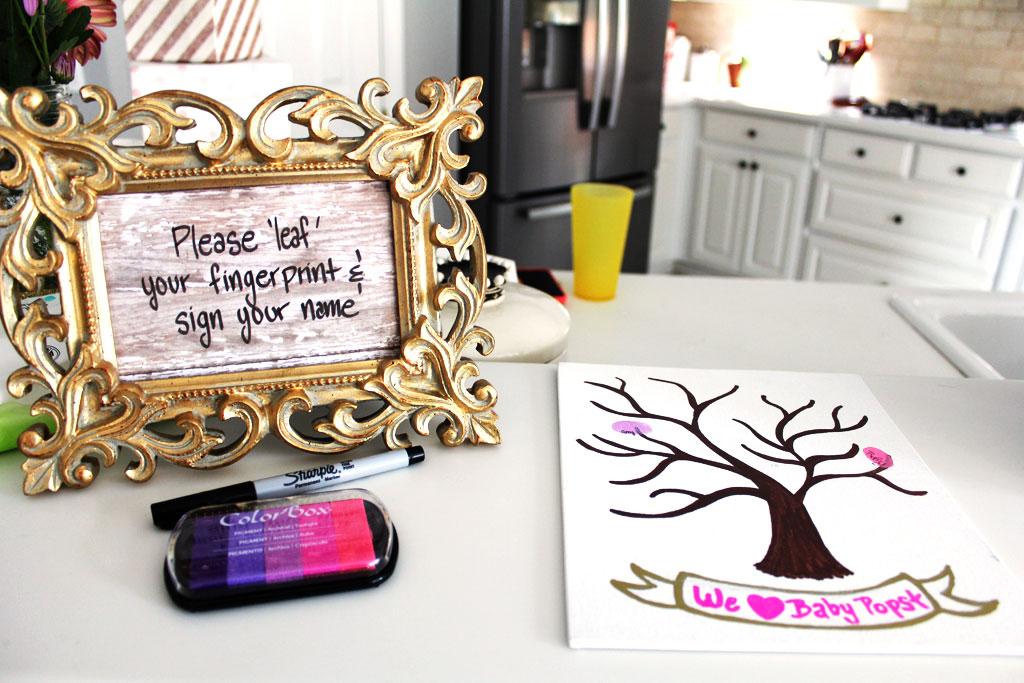
The other crafting activity was to put your finger print on her tree so she can have a tree of all of the people who came to her shower!

babyshower2

The only game (I made her promise no cheesy baby shower games!) we played was a game to see if you could come up with the alternate title of the children’s book.  So “Pretty Girl Slumbering” was Sleeping Beauty and so on…

Such a fun game and you’d be surprised how hard they are to figure out! Then of course we opened presents:

babyshower6

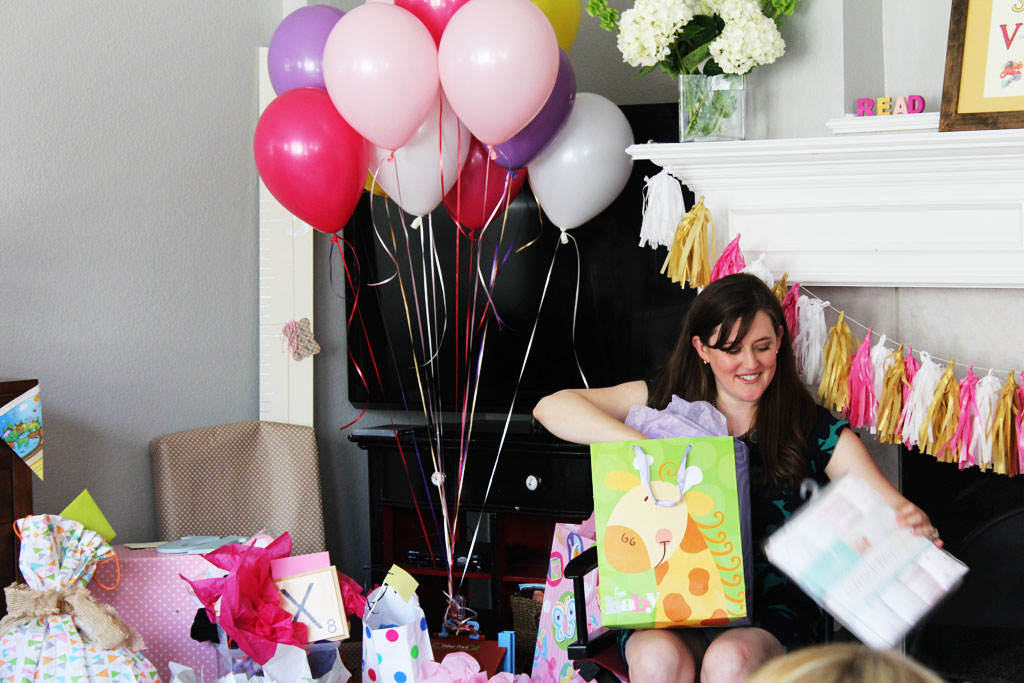
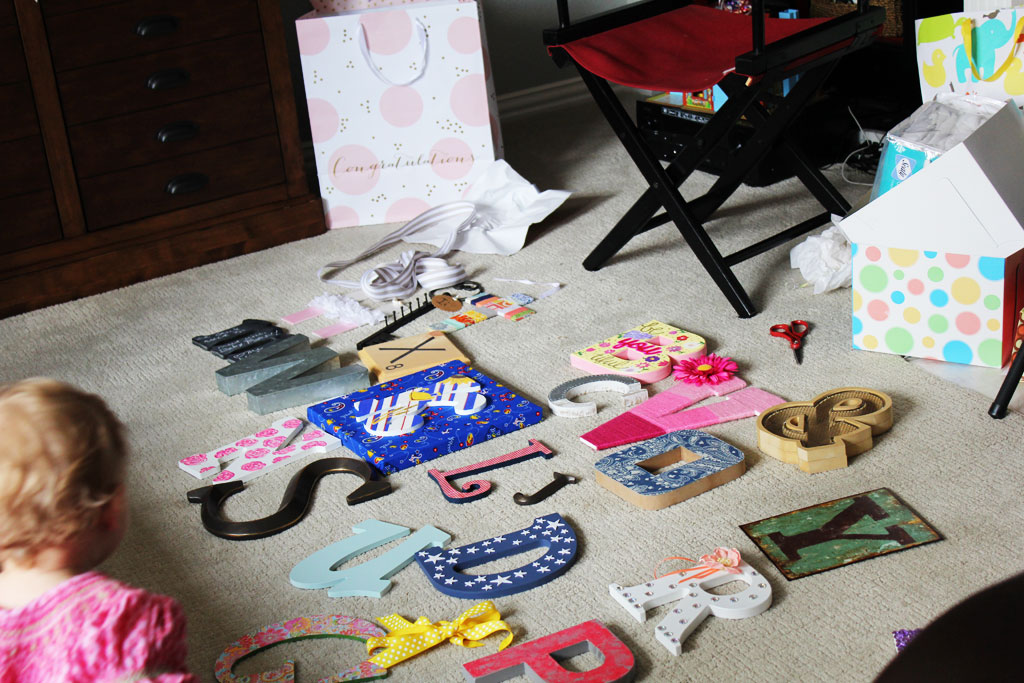
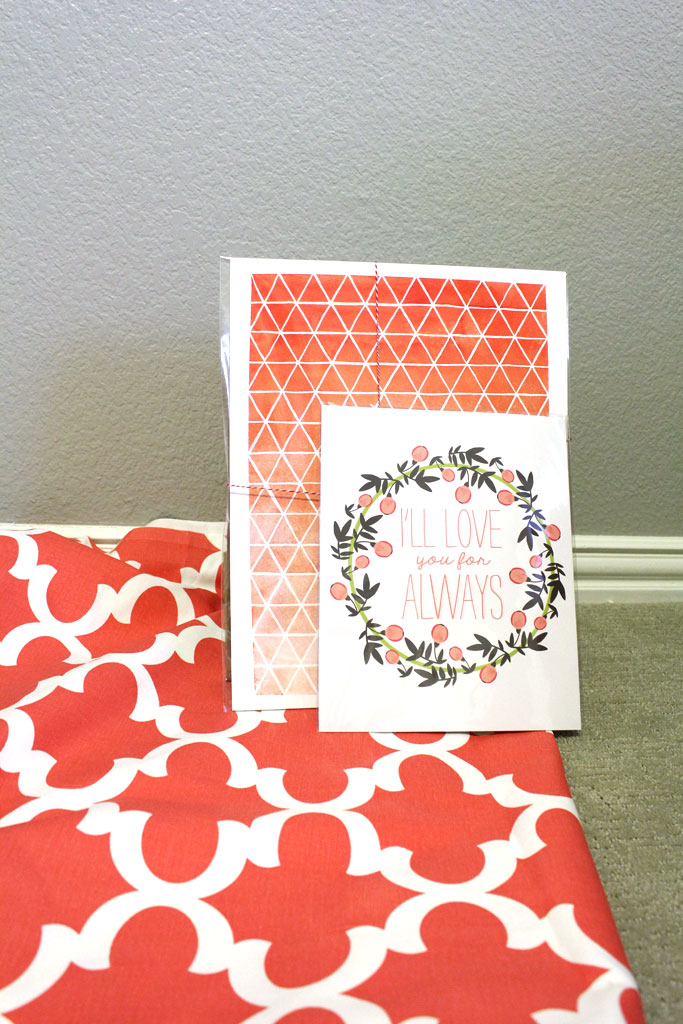
Instead of a card all my friends and family had a craft assignment to do! (Careful it is dangerous to be my friend!!)  They each picked/were assigned a letter to craft/purchase to create an alphabet wall for baby girl’s nursery! One of the things I had seen on pinterest and loved was the wall of letters, so Amy had everyone craft a letter to create her little wall of love! I am so excited that baby girl will have a piece of so many of my friends and family in her nursery and I can’t wait to get it all hung up.  Here are the letters (in no particular order!):

babyshower13

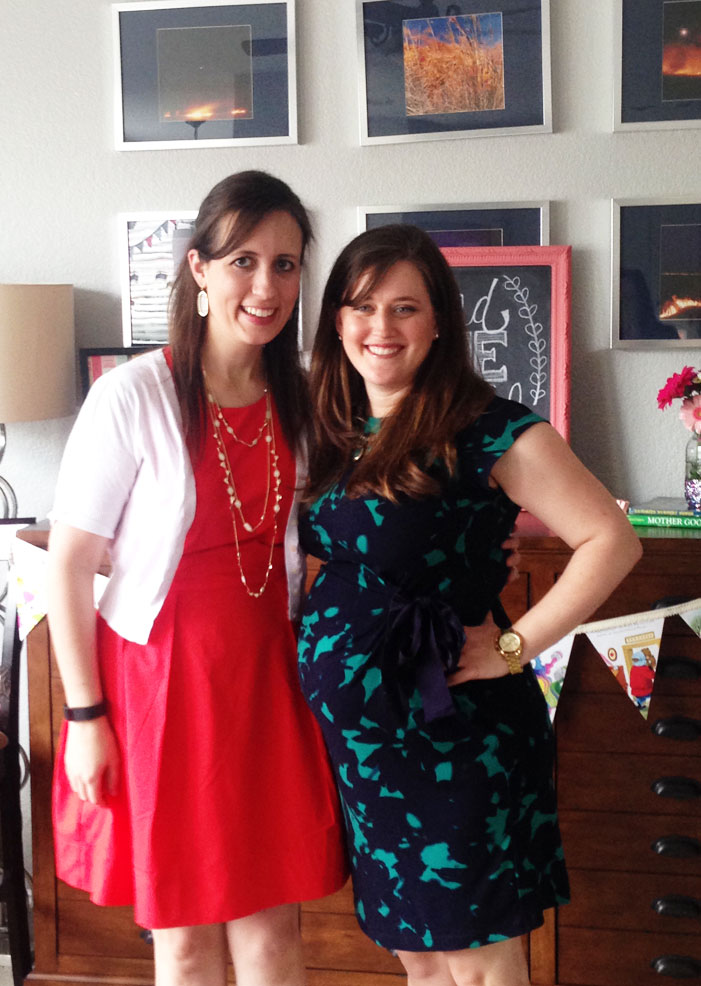
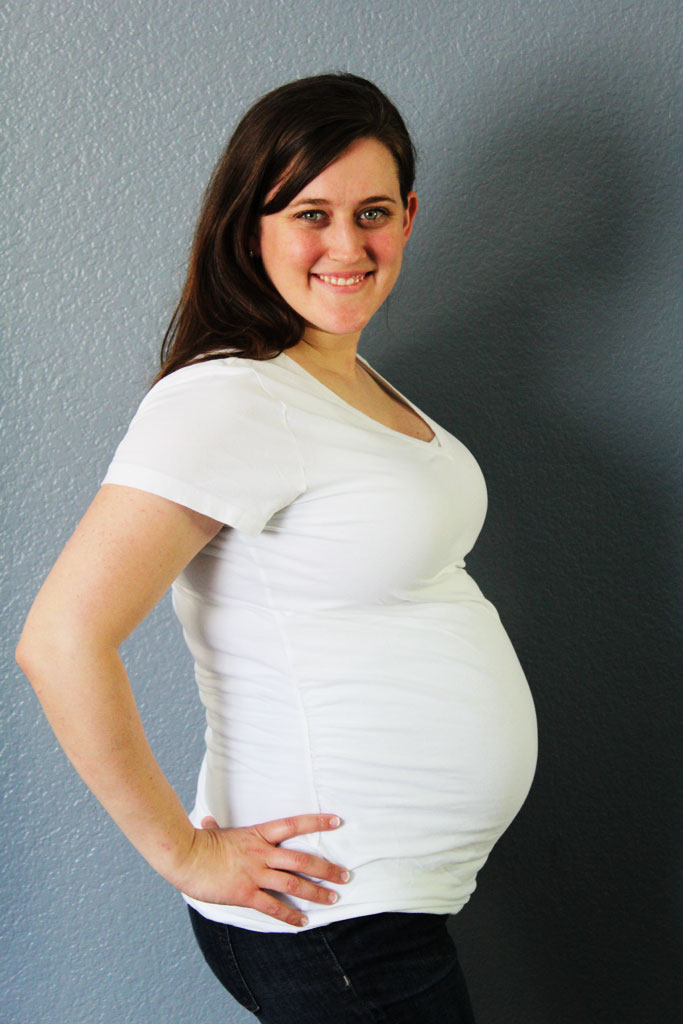
Somehow we only snagged this iPhone photo of me and Amy, but I am so grateful for her friendship and guidance through this whole ‘pregnancy’ thing, since she has kids of her own and has been through the experience!

babyshower4

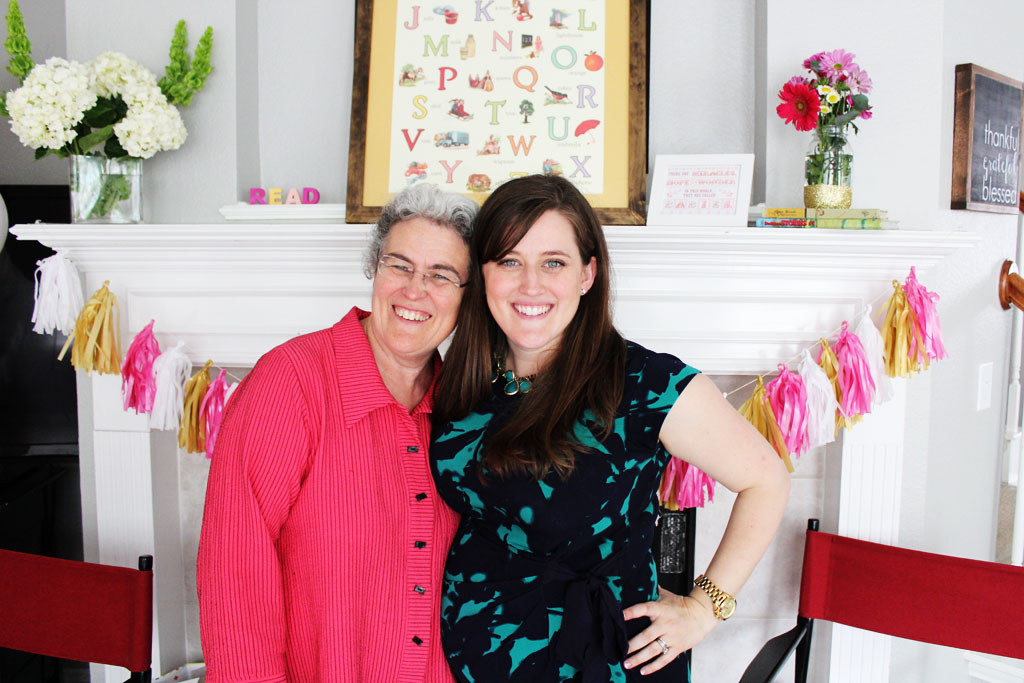
But I did manage to snag a pic with my mom who flew in for the weekend!

babyshower7

Baby girl is definitely feeling the love after the weekend shower and I am so blessed to have such great friends and family!!

Box Valance for Baby Girl’s Room

I knew from the very beginning that I wanted to introduce a lot of color into baby girl’s room because the gray walls and white furniture I wanted to go with would be very pretty and classy, but maybe a little bland.  So I knew that I would need some accessories and fabric to spice up the room.

I added the cushions for the chairs which have a little color in them and my mom was able to snag quite a few coral accessories at Nebraska Furniture Mart to add in some color (which you can see in the photos below or the cushion post).  But I also knew I wanted a bold statement on the window side of the room, and a box valance was just the trick! These are sometimes called pelmet boxes… not sure if there is a technical difference in them, but I call it a box valance.  So I showed you the fabric I bought from Fabric.com in the nursery progress post and it was time to do something with it.  Here it is along with a few prints I’ve purchased along the way to hang on the wall:

DIY Box Valance

This is a SUPER easy project (all up until the hanging part…) and all it requires is some wood, batting, fabric and a staple gun.  Then we also used some L-Brackets to secure it to the wall.

I promised my husband I would work on using the scrap wood we have stored in our garage before I started buying more, so I measured my window and then went to the scrap pile to see what I had that would work. I had a long piece of scrap 3/4 plywood that was about the right width and then we used another scrap piece of 1/2 plywood for the ends.  It wasn’t quite as wide as the 3/4 inch for the front, but since I promised to use scrap and I knew we would be upholstering it AND that those pieces would only be seen from the side… we just decided to make do.  IF you are doing this yourself and not trying to use up wood scraps, make them the same width as your front board.

DIY Box Valance | www.amusingmj.com

We then used our trusty kreg jig and secured each end at a 90 degree angle on either side.  If you don’t own a kreg jig you could also screw these in the old fashioned way from the front.  You’ll be covering it with batting and fabric, so it doesn’t really matter what it looks like underneath, just make sure you secure the end pieces.  We are covering the existing curtain rod, so when we measured our window we gave it some breathing room on either side as well as measuring out from the wall far enough that it would cover the entire curtain rod.  These measurements will depend entirely on your space and the width of your window.  Our front board is approximately 8 feet long and 1 foot tall.

Next up I had the husband carry that inside for me 🙂 then went to work on the upholstering part.  My fabric was not wide enough to go the entire length of my box, so I needed to sew two pieces together.  I mostly just winged this part to get the two pieces to line up.  You can see the crease in the picture below where I had matched it to the piece next to it and then pinned it carefully to keep it together.  I then stitched along my crease where I knew the designs lined up.

DIY Box Valance | www.amusingmj.com

Next up I laid my fabric wrong side up on the ground and then layered two layers of batting over the top:

header7

You can see I staggered the two places where I would have a seam in the batting so that I wouldn’t have a seam show anywhere on the valance.  Then I laid my piece of wood over the top, centered it on my design, and started stapling. I started at the center of the valance and just stapled every few inches until I got to the ends.  I tried two methods of folding the fabric at the corners, and definitely liked doing it like a present better (the one on the left) it didn’t bunch quite as much.

header5

As I was stapling I would lift it up to make sure my fabric was straight across Here it is all wrapped up from the front, what looks like a seam in the middle is actually just a wrinkle even though I SWEAR I ironed my fabric–oh well, it seems to have straightened itself out after hanging on the wall for a few days.  The seam of the fabric is actually about a quarter way in on the left side of the valance, but its hard to see in the picture!

header6

Hanging this guy was the hardest part.  Not seriously hard, but harder than the rest.  And we hung it late at night, so forgive the bad pictures.  To hang this guy, we attached L-Brackets to the wall where we wanted it to hang, and then screwed the L-Brackets into the header.  Our logic for this was that we wanted it to be strongly secured to the wall and knew that we would want drywall anchors to hold it, but with the valance in place, it would be impossible to get a drill in to secure the screws.  So we attached the L Brackets first:

DIY Box Valance | www.amusingmj.com

Here is what they look like installed:

DIY Box Valance | www.amusingmj.com

And then once we had that done, we put the valance up and then screwed the side of the L-Bracket into the valance (right through the fabric and batting).  We tested it out and it is pretty secure.

header10

Here the husband is attaching the last screw which was still a trick to get around the window frame and the brackets for the curtains.

DIY Box Valance | www.amusingmj.com

I love the finished product!!
DIY Box Valance | www.amusingmj.com

I think it adds exactly that balance of color that I was looking for!

DIY Box Valance | www.amusingmj.com


So left on the list for her nursery:

  • her crib (actually already painted and put in the room… I’ll post on that later this week)
  • hang artwork- I have most of it, just need to hang it
  • replace the top of the bookshelf with a wider piece (long story… stay tuned)
  • figure out some sort of closet organization

So the first two items on this list are mostly on their way to being completed, the third is the next project on my to do list, and the third is a: I hope I get to this before baby girl is born kind of project! But I absolutely love where this room is going and what it looks like now! It makes me so happy to walk by it and think about how much baby girl will love it!


Have you missed a nursery post?

Here is my inspiration, here’s a little more of the planning, here’s a dresser update, here are the chair cushions.

Week 29 Bump Recap

It is crazy to me that we essentially have 10 weeks left of this pregnancy.  We are right at 3/4 of the way through!  That feels like no time at all and an eternity all at the same time… which I think is pretty much the definition of pregnancy! I definitely feel like the bump grew a LOT this week!

week29 Baby’s Size: Baby girl is the size of a head of cabbage–roughly 16 inches long and 3 lbs.

Baby’s Progress: She is still just getting bigger and developing more– her eyesight is improving and her brain is developing, she is also beginning to regulate her own body temperature (which might explain why I seem to be hot all the time now).

Weight Gain: I gained another half a pound last week, so I’m at around 11 lbs up total.

Sleep: It hasn’t gotten any worse, and I’m still getting some pretty good sleep a night, so I’m not going to complain.

Milestones: We finished off most of the big pieces of the nursery (I’ll post about those later this week!) and I had an amazing baby shower this past weekend, so baby girl is for sure feeling the love around here! We definitely don’t have everything we will need for her, but if she showed up today (which we are hoping she won’t for 10 more weeks!) we wouldn’t be at a total loss!

We also took some maternity pictures this weekend and the weather ended up beautifully for them, so I can’t wait to see how they turned out!

Favorite clothing item of the week: The dress I wore to my shower was a last minute purchase from A Pea in the Pod (I think it’s actually Ann Taylor designing for them) and looked great, plus since we have a few weddings to attend coming up, I’m sure I’ll get some more use out of it!

Symptoms: My back pain is mostly gone, and thanks to a friend I have a maternity support belt to use when I need it from now on.  I still have trouble standing in certain positions without my back hurting, but I think this is definitely live-able for the next two+ months.  All the pregnancy things seem to think that stomach issues will get worse considering she is going to be pushing all up on my internal organs.  So there is always that to look forward to…

Workout: that didn’t happen.

PS. If you missed any of the updates, you can check them all out here.