The Aliens have left the building

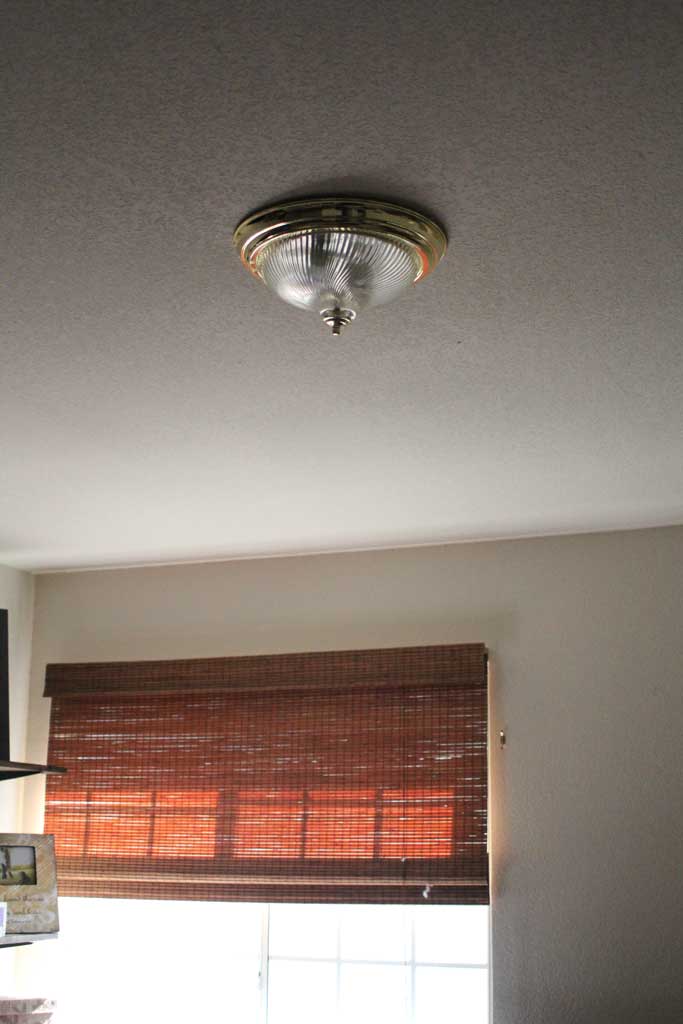
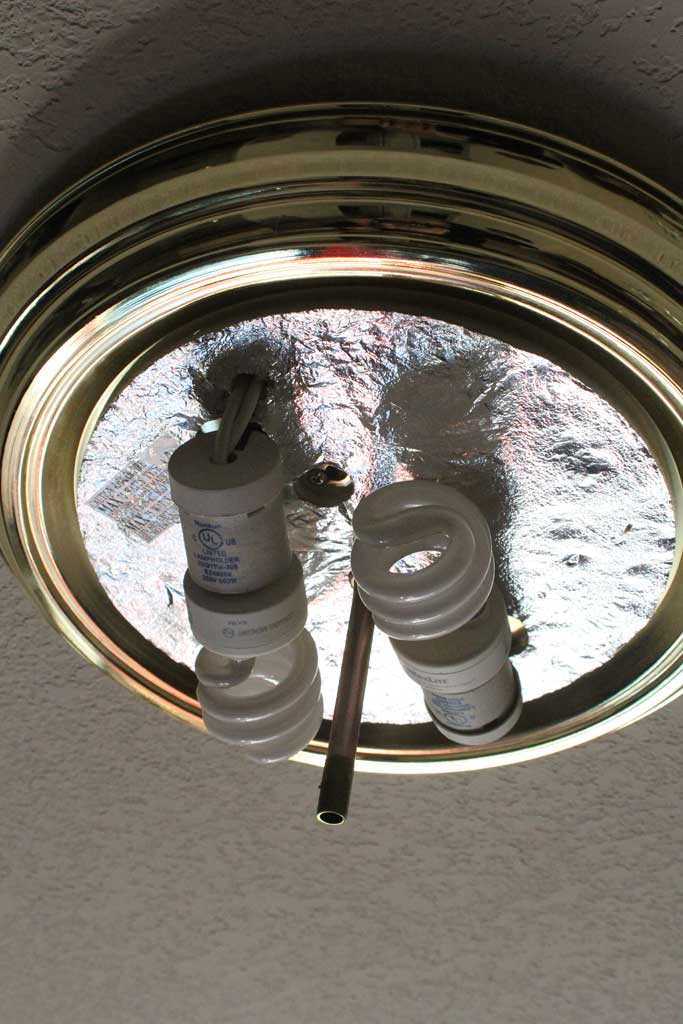
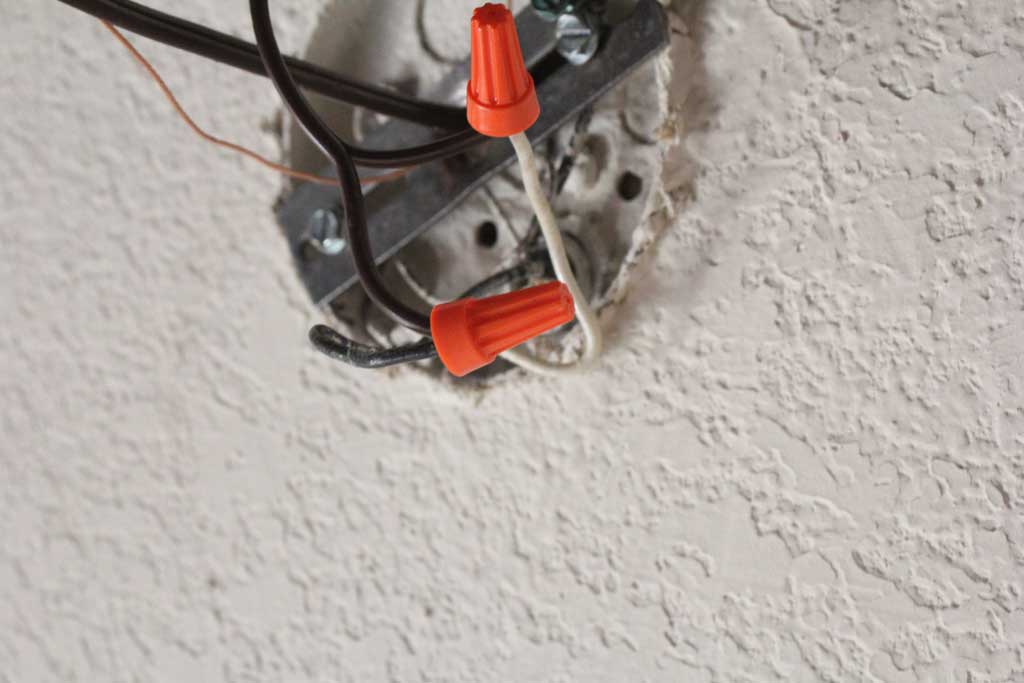
Okay now that I’ve updated you on all my summer travels (here and here), I’ll show you one of the projects I managed to squeeze in!  When I moved into my house 3 years ago one of the things I really didn’t like was the light fixture over the kitchen table, which you can see here:

kitchen-table-and-gallery-w

It may not seem like much of a big deal, but the first thing I thought when I saw this was that the alien ships were landing all over my dinner plate. AND its the first thing you see when you walk in from our garage (how we enter the house 99% of the time).  So it was pretty high on my I WANT TO CHANGE THIS NOW list. (don’t worry… that’s just a mental list, not written down anywhere).  But I also knew that I wanted it to be a night light fixture and much to my chagrin… those things don’t come cheap! So I did what any smart girl did, and asked for it for my birthday.  And by asked for it, I mean sent my husband an email with a link to a picture of it :). Here’s the link in case any of you want to pass that along to someone who loves you.

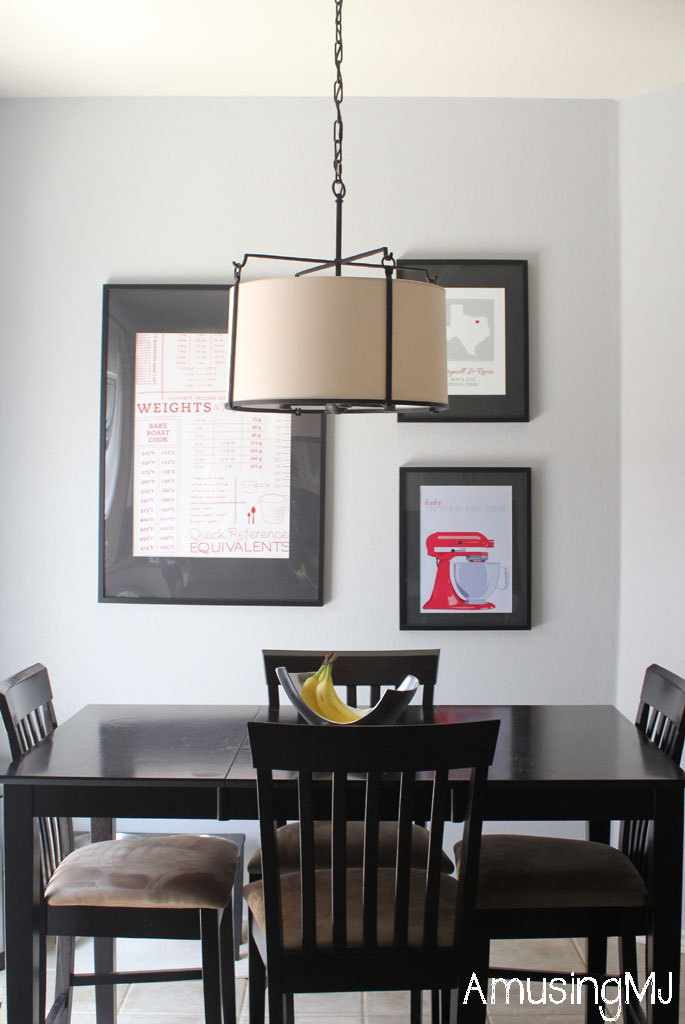
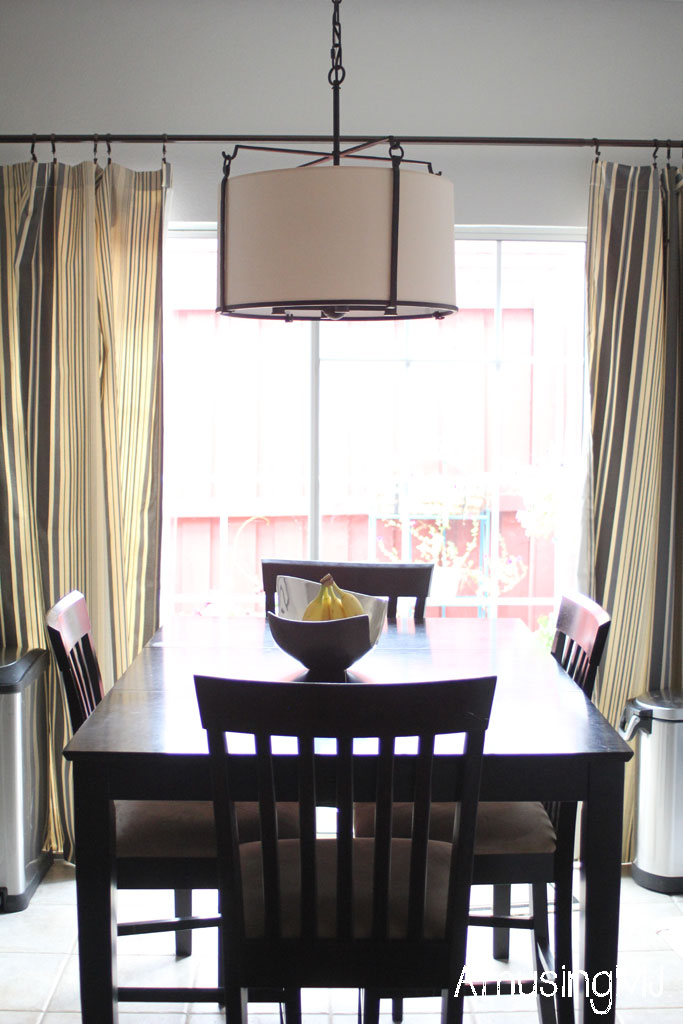
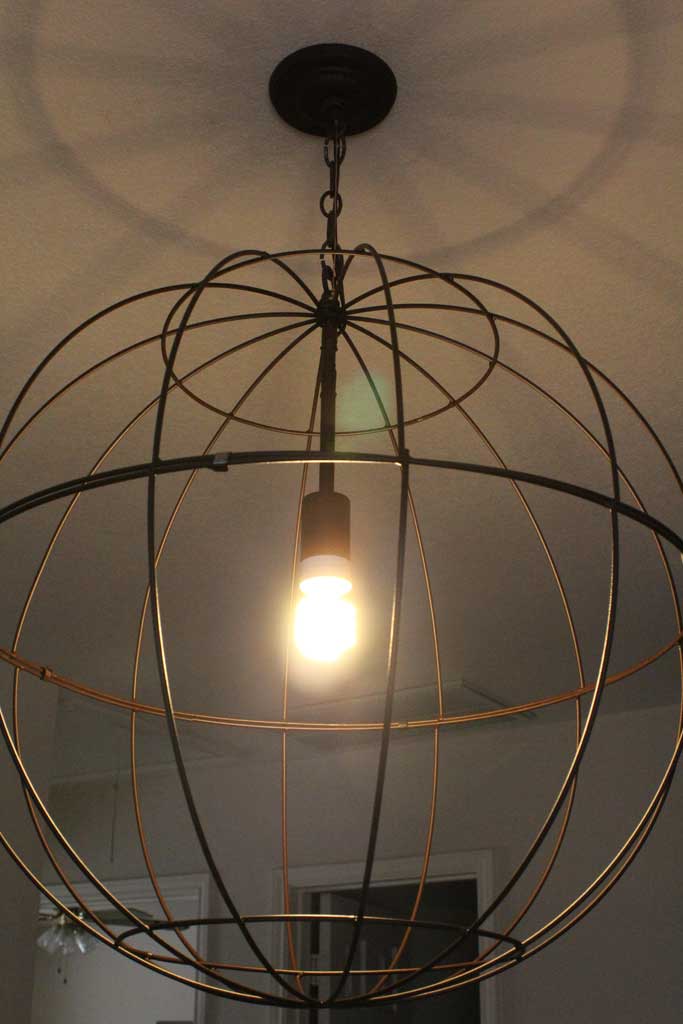
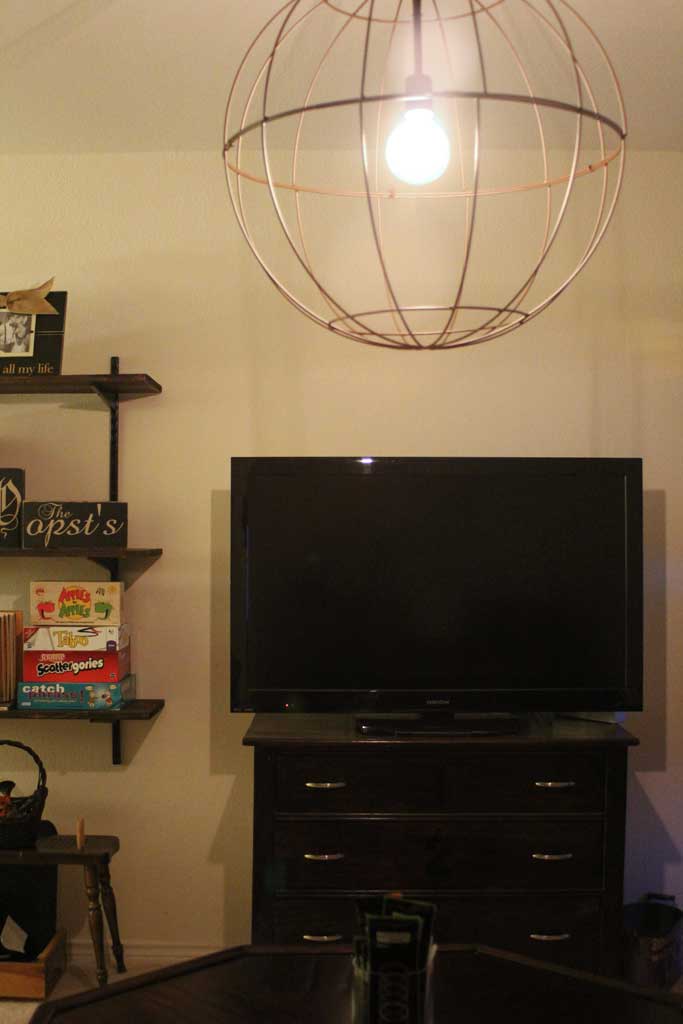
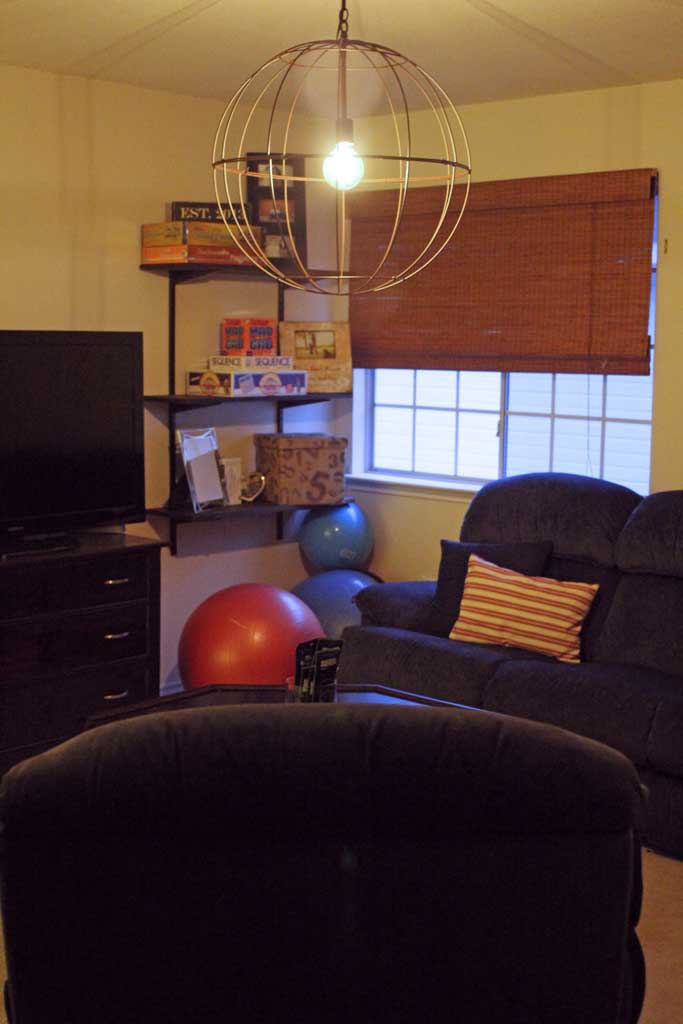
But it was so worth it because look how pretty it is! (PS that’s the same table, just with it’s leaf extended below and not above)

kitchenlight1

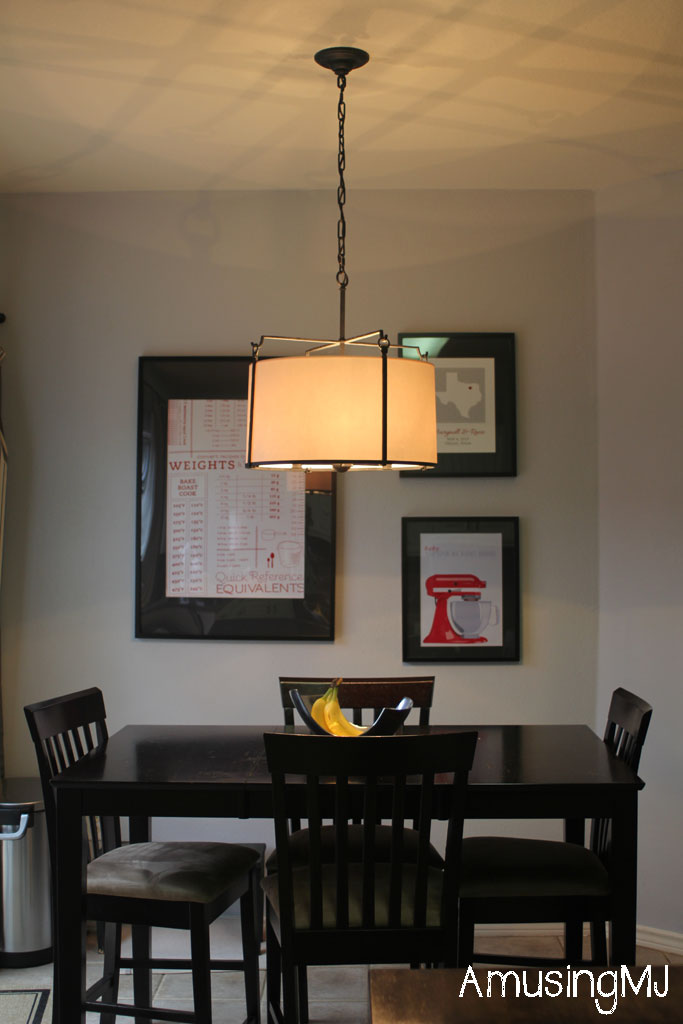
It has 4- 60 Watt bulbs, so it gives off quite a bit of light, especially down onto the table, which is perfect. And I like the fun weave pattern it casts on the ceiling:

kitchenlight3

And now the view as you walk in from the garage is much more appealing and much less 80s spectacular.

kitchenlight2


Let There Be Light

Theoretically, switching out a light fixture is a simple, quick process: unscrew the old light, hook the wires up to the new one, screw the new one into the ceiling and voila… brand new light fixture. The only painful part should be the hit to your wallet (seriously… why are lights so expensive?!).  This project on the other hand… the complete opposite.  We bought a light fixture from Young House Love’s collection at Shades of Light. These lights are designed to be affordable and attractive… mission accomplished.  We ordered the Large Wire Globe Lantern in Rusty Bronze for the Bonus Room.  After it was back-ordered twice… it finally arrived last week.  So this past weekend the husband and I decided to install it.  I was so ready to get rid of this ugly thing:

bonuslight1

Now I’m not a newbie at installing light fixtures, and most of them have gone off without a hitch, but this one was a bit complicated.  The simple instructions for replacing light fixtures are to remove the old fixture and then connect the new one in the same way… is basically match the colors… black to black, white to white and then connect the copper grounding wire to either a grounding screw or to another copper wire.  So we started by unscrewing the cover and then unscrewing this from the ceiling:

bonuslight9

So when we took this cover off, the junction box was TINY. And normally the bolt would be universal and fit into the brace that is already there, but this bolt didn’t fit into the hole, so we had to remove that as well. The new light came with a brace of its own (they normally do), but it was straight across instead of bending out towards the room like this one does:

bonuslight8


So we had to take a hacksaw to the bolt they provided so that it would fit:


bonuslight14

The next step was measuring out the wire and chain to match how long we wanted for the light fixture to hang down.  We cut off the wire with enough extra to strip off the outer plastic coating.

bonuslight7

This light fixture didn’t have separate black and white wires to match up to the ones from the ceiling.  When that happens, usually one has ridges on it and one will be a smooth coating.  The one with the ridges should connect to the WHITE wire.  The smooth one should connect to the black wire.

bonuslight6

Once you have that all set, thread the wires up through the chain and in through the bolt at the top.

bonuslight5

We used pliers to open up the chain links to make it the length we wanted it to be.

bonuslight4

With the junction box being so small, it was a struggle to get everything to connect and fit in through this hole and into the junction box while connecting it, so unfortunately we needed all four hands so I didn’t get any pictures of that process, but basically this is what you want it to look like when it is ready to hang.

bonuslight3

To connect the wires together there should be little orange (or sometimes yellow) plastic knobs that you will put over the ends to both wires (the one from the ceiling and the one from the fixture) and then twist.  Here’s what the connections should look like:

bonuslight15

I took the picture above (seriously check out those photography skills…joke joke joke) before we actually successfully got it attached.  Because our wires were getting twisted and didn’t have enough room above the bracket in the junction box to screw in the bolt, we ACTUALLY got this attached to the ceiling by unscrewing that bracket from the ceiling, screwing the bolt with the wires connected through it, and then screwing the bracket into the ceiling as our last step.  Sorry its a bit confusing… and by this time I was entirely fed up with holding my hands above my head trying to screw in screws so I was just a wee bit grumpy.

But it was so worth it because here is what it looks like now:

bonuslight2

Sorry for the poorly lit photos, with the time change I am home 0 times during the day when it is light outside. I also ordered this light from Amazon which has a cool antique-y vibe to it (but of course that doesn’t translate to pictures or at least not with my limited photography skills).

bonuslight13

And with that project completed, I’m calling this room DONE (for now).  I’d planned to add some curtains around the window that you can see in the picture below, but the fabric I was going to use doesn’t look as great as I thought it would, so I’m holding off on that for now.  As always… I’ll let y’all know if that changes!

bonuslight11


Happy Thursday… The weekend is almost here!