Our Master Bath was one of the things that I loved most about my house when I first bought it. When I lived down near my graduate school I lived in a small old house in a super nice neighborhood… its what you might call a ‘tear down’ but I loved almost every part of that crazy old house. EXCEPT for the tiny bathroom with only a pedestal sink. Seriously… have you tried to blow dry and straighten your hair with absolutely NO counter space? Anyway… this bathroom was a dream come true when looking for a house, I loved the skylights and the fact that it had a TON of counter space (and multiple outlets… YESSSS!) What I didn’t love? That it was very builder basic. Nothing fun or splashy (see what I did there?? bath pun.) about the beige walls and white-ish cabinets.

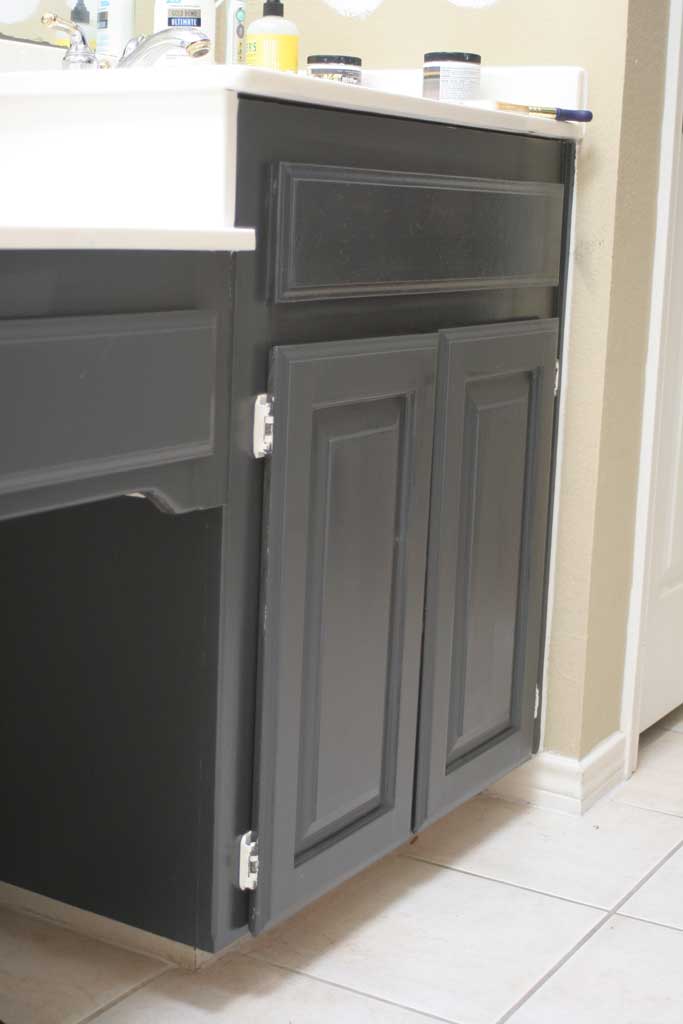
 So I decided I wanted to spruce up the cabinets and paint the walls a bright white color. I decided I wanted to paint the cabinets with a dark gray color and settled on Behr’s Evening Hush. I got it in an oil based paint since I hear that’s the way to go with cabinets. And can I tell you, I’m just not a huge fan of having to use oil based paint. I feel like it gets everywhere and is so hard to clean up. But helpful hint: If you use oil based paint or stain vegetable oil will take the paint off your hands… but then of course you have to use dish soap to get the vegetable oil off. But hey… vegetable oil smells WAY better than mineral spirits and doesn’t make your hands dry out.
Anyway… back on topic. Evening Hush. WAIT, I skipped a step, first I used a liquid deglosser to take the gloss off the cabinets. Its a super easy product to use, just wipe on and then wait 10 minutes. I skipped the primer step, I probably shouldn’t have, but it turned out okay. BUT DON’T SKIP THE DEGLOSSING STEP! (that’s a later blog post… oops!) Anyway, two coats of paint on every door and drawer front later, I had beautiful new dark gray cabinets

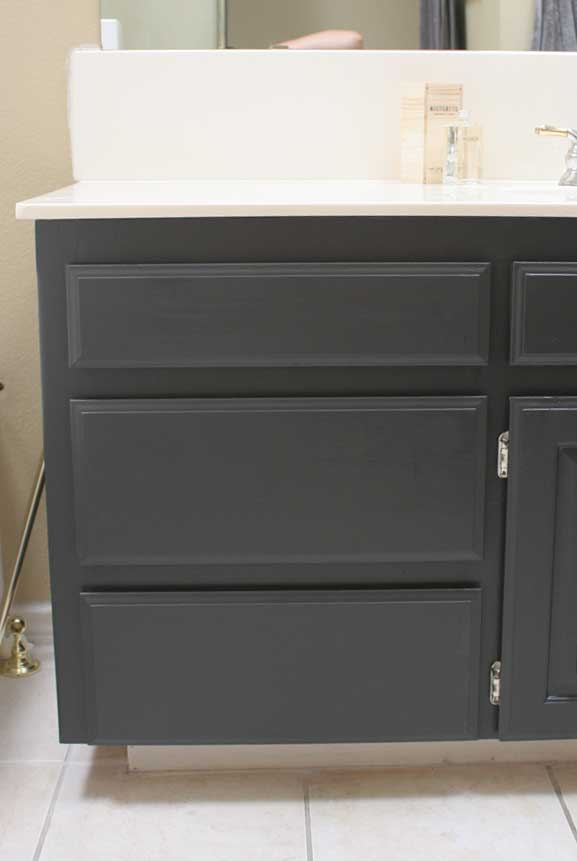
 I chose not to paint the toe kick (see that white part peeking out under the picture above?) Partly because a. who’s going to notice b. who wants to paint down there? and c. (and the reason i’m sticking to… ) I think it makes the cabinets look a little like they are floating cabinets and look pretty classy. BUT they were still missing something… HARDWARE. The drawers are very easy to pull out from underneath, but hardware makes everything look a bit more polished off. So I journeyed off to HD and found some beautiful cup pulls. They came in almost $5 a pop, so they definitely weren’t cheap, but I only needed 4 for this project. (famous last words since I ended up buying matching ones for a new dresser going in the master bedroom adjacent to it that needed 8 just a few days later… yowza that’s a lot of money for drawer pulls). But it makes it all better because look how classy those drawers look now!
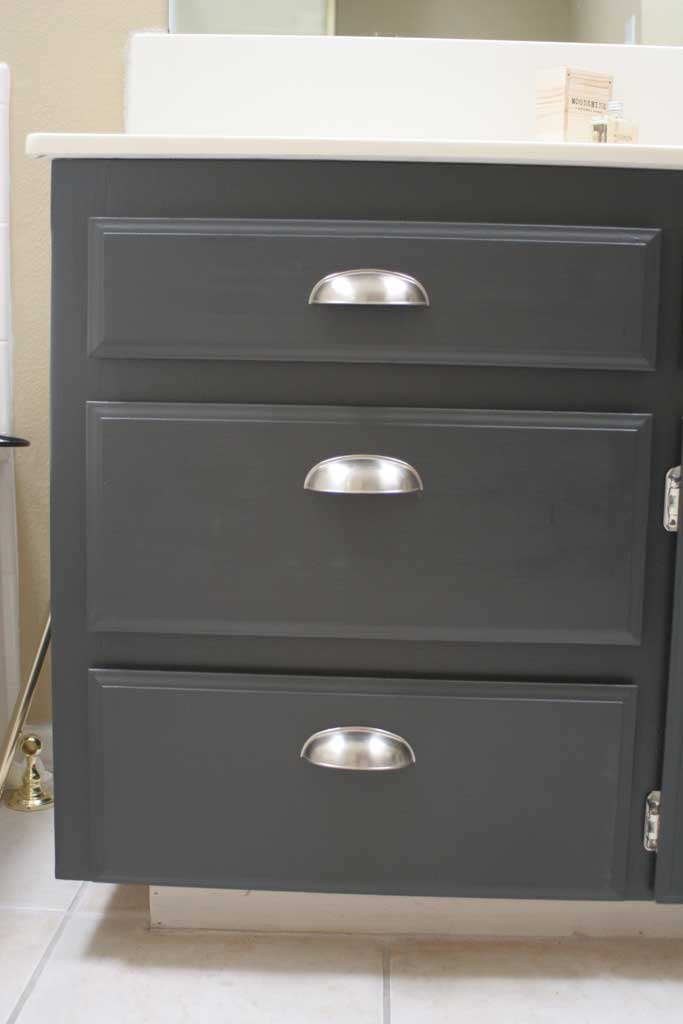

Anyway, drawer pulls are easy to add, just use a 3/16 bit and I used a cheap plastic guide that was in the same aisle as the drawer pulls which helped me make all of the handles the same distance down from the top. I did have a momentary conundrum trying to decide with three different height drawers (REALLY BUILDERS… REALLY?) whether or not the handles should be centered from top to bottom or the same distance from the top. After a quick survey of pinterest… (I mean seriously, what did we do before pinterest?) I found that most drawers have them the same distance from the top. And turns out the majority was right… they look good. I’ll show you the rest of the bathroom as soon as I’ve got the second coat of paint up!


 Hi, I'm MJ! I'm a DIY kind of girl and this is where I share my projects. I'm taking you along for the ride as I learn how to do woodworking, sew, bake, and renovate!


You’re scary good at this stuff! Please come over asap