A Tale of Two Closets

Welcome back to closet week here on the blog!

Monday and Tuesday I showed you AJ’s hardwoods and his newly installed Elfa closet.  That’s what happens when you do all the prepping right… now let me tell you about what happens when you don’t.

First, I have been drooling over Elfa and The Container Store since they invited me (and every other high school senior in Dallas) to their college prep sale where they show you all the cool space-saving dorm room things to buy.  BRILLIANT retail marketing by the way… I definitely tried to talk my mom into buying EVERYTHING that I ABSOLUTELY NEEDED for my dorm room.  True story… I’m the girl that wanted to go to debate camp after my brother got to buy all these awesome new school supplies that were organized into a fabulous file box.  Yep… NERD alert.  Anyway… needless to say, I love all fancily organized things… so I can get lost in The Container Store for hours.

If you have seen my 30 Before 30 list you know that the husband and I had planned on building some built-ins for the master closet to make it more efficient.  I thought that we had done a pretty good job of using our space, but knew that it could use some sprucing up with some drawers and different shelving options.

mjcloset1

But when my about to be sister-in-law got a friends and family coupon for Elfa we jumped at the chance.  We thought about it and weighed our options: Elfa is more expensive but would be installed right away, I wouldn’t learn from the experience of building my own closet… but I wouldn’t make the mistakes either and although I like learning through my mistakes it felt like maybe I should try building other cabinets and drawers first before I jump into a huge project like this without any experience.  With all of that decided we took our measurements to The Container Store and let her design our closet based off of answering a few questions. If you are going to go have them design one for you, here are the things I would know before you go:

  • All the measurements: height, depth, width
  • Where the doors are and what kind they are (bifold, sliding, etc)
  • How much space you need for different things: long hanging, short hanging, drawers, number of shoes, etc.

Once we did that, we put in our order (we actually did two closets at the same time, but the other closet isn’t even close to being put back together… so I’ll show you guys it later) and we arranged a pick up time, an installation time and paid for our Elfa.  Since we had only two racks and two rods on each wall, we decided to let them do the demo.  The installation guy would tear it down, patch and paint the wall all at the same time and that he brings with him flat white paint, so if it is something different than that, we need to provide it.

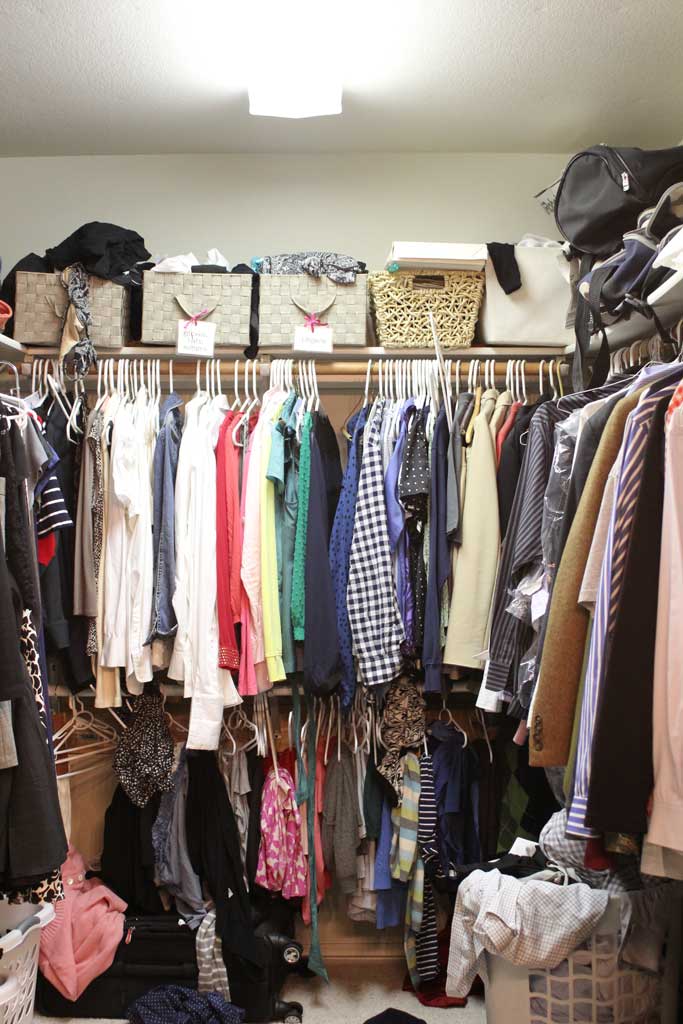
And here is where warning bells should have gone off in my head, but instead I thought… great! our closet is white, that will be perfect. So we cleaned out our closet and got set for our installation date last Friday.  Our closet looked nice and empty…

mjcloset5

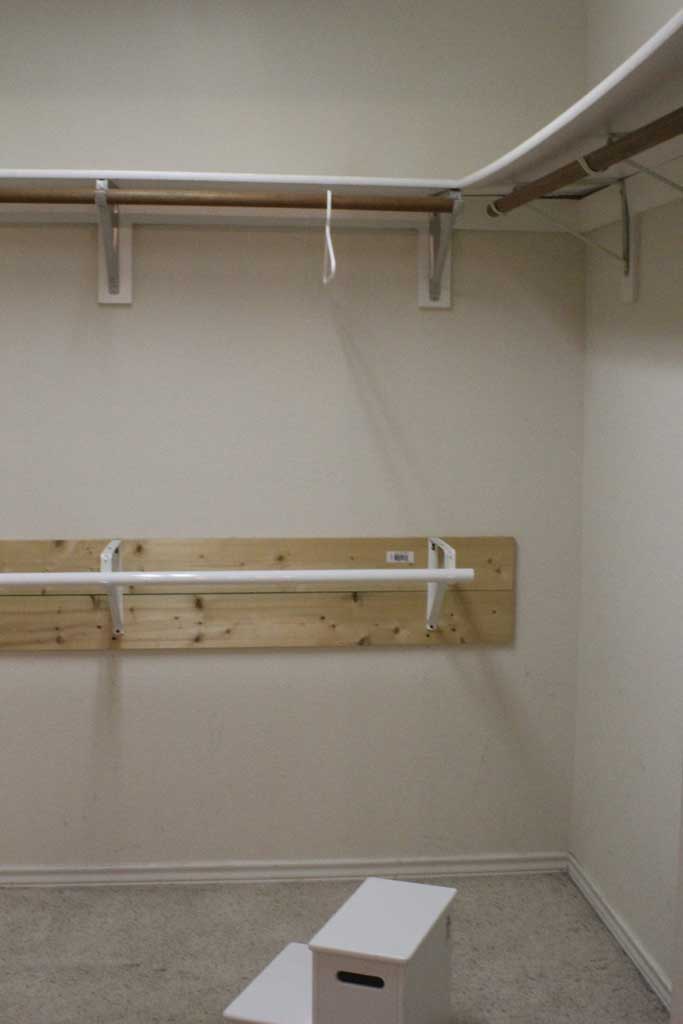
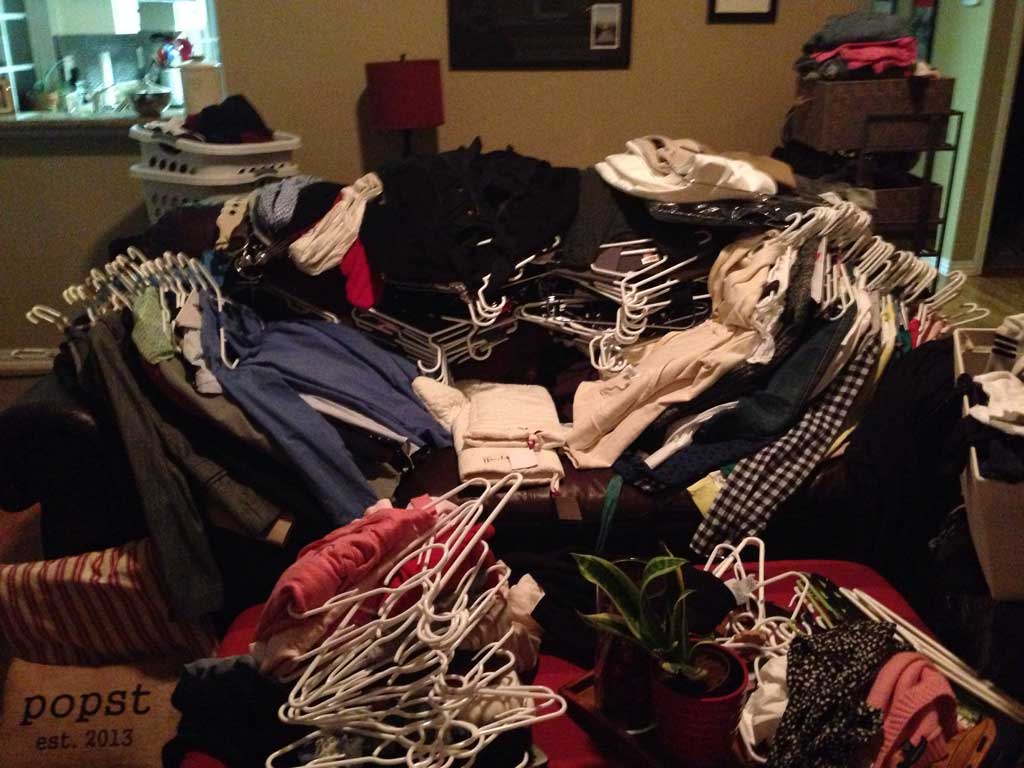
The living room… not so much.

elfa-install

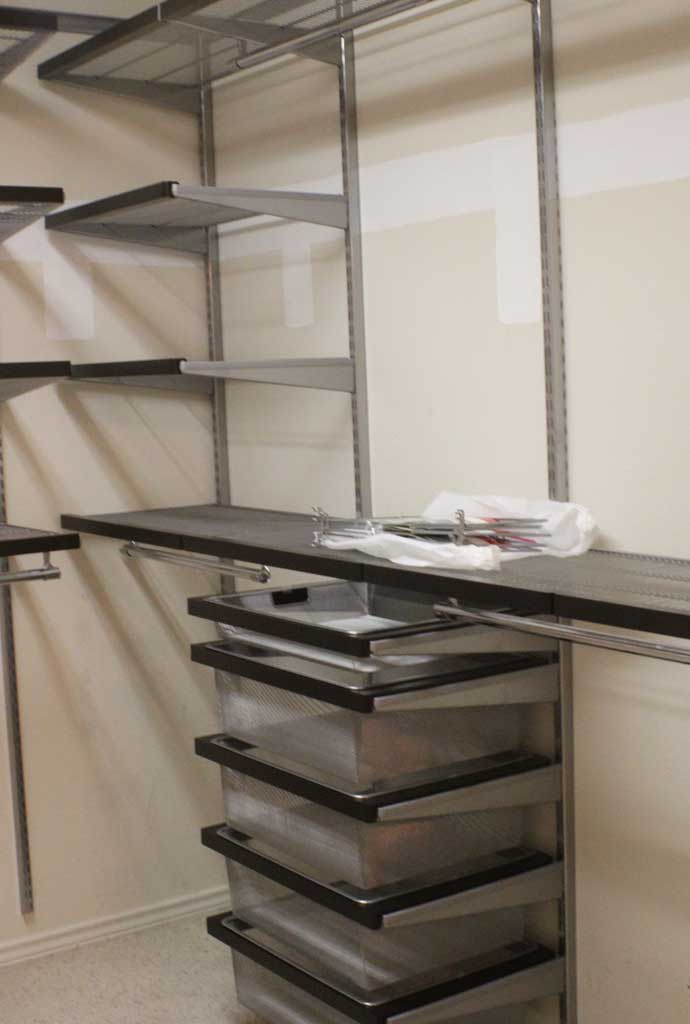
The husband has Fridays off, so he texted me photos while I was at work.  It was going great… except for one problem.  Can you see it?

mjcloset4

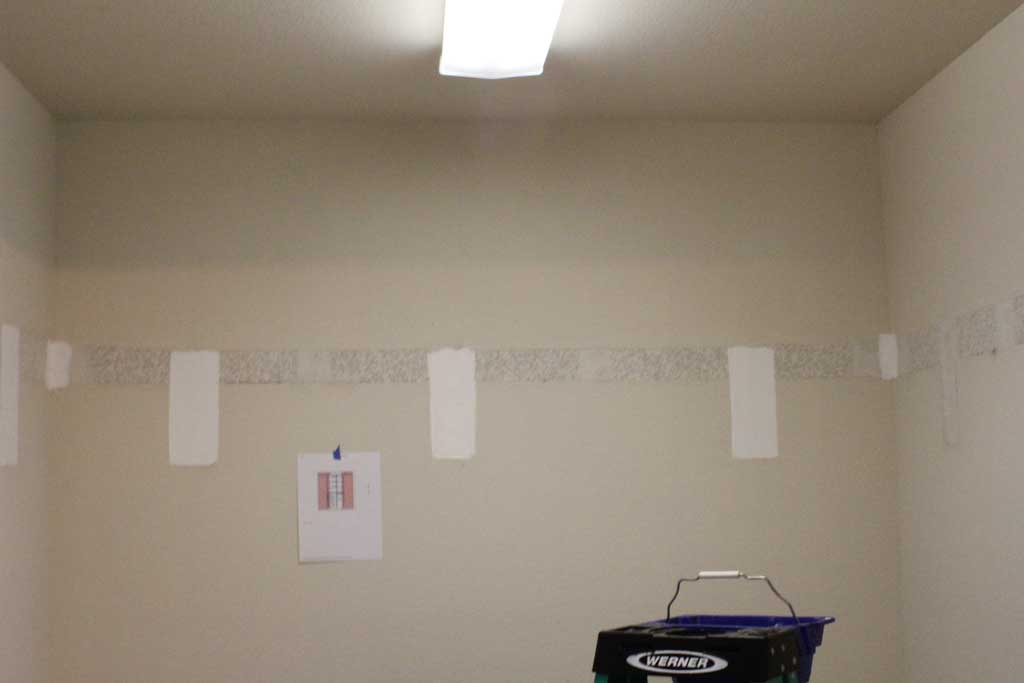
AHHH of course you can see it!! Our closet is glaringly and obviously very NOT true white.  (you’d think I’d have noticed that…) Aaaaannd we didn’t have any paint that matched the closet.  But since the guy was there and already doing the install we just had to go with it.  But I was totally kicking myself for not having done the demo ourselves and painting the closet when it was totally empty.

mjcloset2

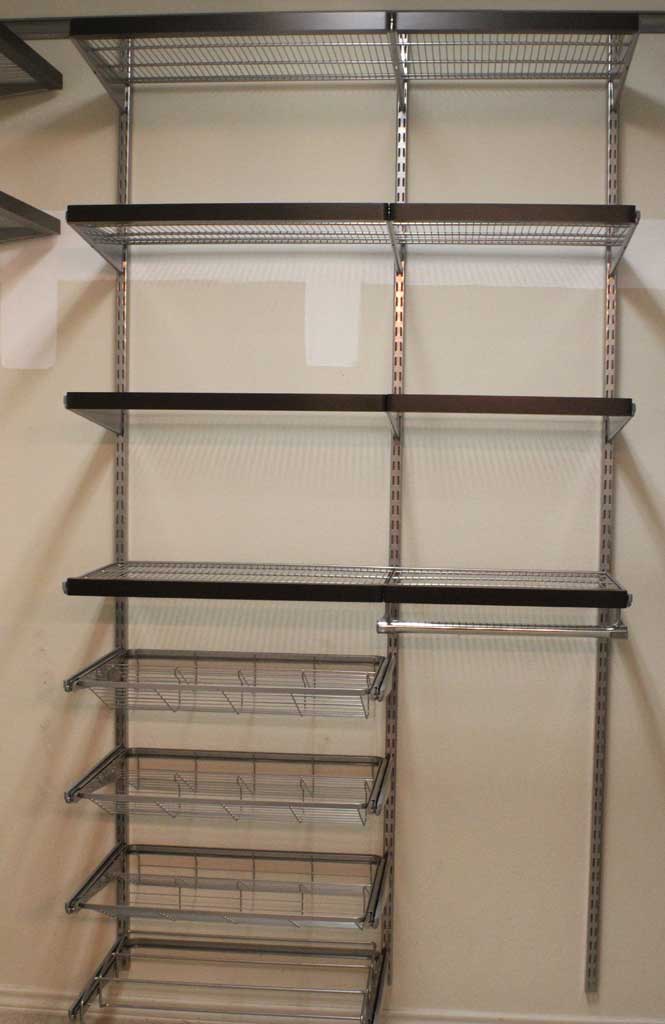
So that meant the husband and I needed to paint the closet AFTER the Elfa was installed.  I know the white paint is crazy distracting, but look how great the Elfa looks! And the great news about Elfa is that it was really easy to take the shelves and drawers down to be able to paint.  I mean don’t get me wrong… painting around all those bars and the top hanging rack definitely made painting 2-3 times harder and NOT how I was picturing spending my Friday night.  But it wasn’t as bad as it could have been.

mjcloset3

So we made a quick run to Home Depot and picked out a light gray color.  Its Behr’s French Silver mixed at 50% intensity.  And this is what I was picturing when I pictured the Elfa in my head.  It just took a few hours of late night painting to get there!

mjcloset7

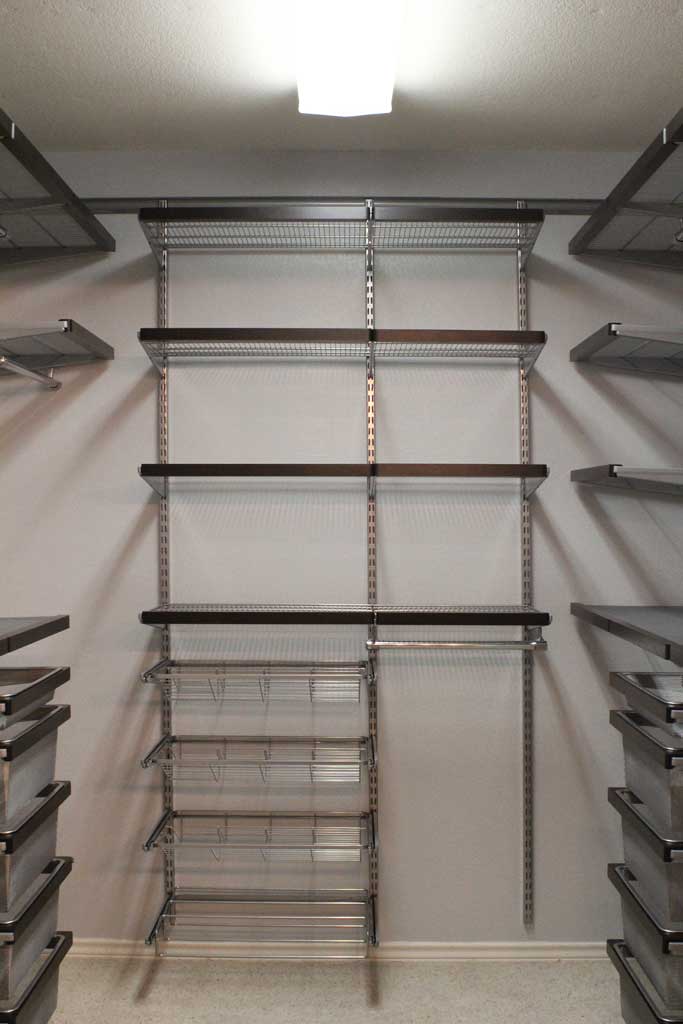
Tomorrow I’ll show you what it looks like with everything put back where it belongs… stay tuned!

By the numbers…

This dresser has been through a few reiterations.  This was another basement find from my grandmother’s house.  This is what it looked like when I got it a few years ago (minus the silver handle on the top right… I was testing out my new handles):

dresser1

The dresser had been in the basement when it flooded and had a few issues.  The broken drawer (you can see the gap at the bottom right where the broken drawer had pushed the frame outwards) was fixed with a little wood glue and some nails.  The top is warped from the moisture, which I never fixed because it is still functional and isn’t overtly obvious (plus its not an easy fix!).

At that time I sanded this guy down and stained it with a Minwax Jacobean stain with a high gloss polyurethane coating.  It stayed in my master bedroom until we got married and needed a little extra clothing storage.  We upgraded this guy for our master bedroom and moved this dresser out into the garage.  Unfortunately I don’t have a good picture of what it looked like stained in the master bedroom (one day I’ll get the hang of this whole ‘taking before pictures’ thing).

I decided this would be a perfect canvas to do a dresser upgrade that I’d seen around the blogosphere, knocking off this Anthropologie Dresser (you can see some here and here).

I didn’t want to make this a big project, so I left the dresser exactly as it was and just bought stencils and some black paint.

First step, we centered the stencils on the drawer and added some painter’s tape, a little wider than the roller.

dresser7

Next we just rolled on the black paint:

dresser3

As soon as we rolled the black paint on we removed the stencils and wiped up with a wet paper towel the one spot that wasn’t as crisp as the rest.


dresser5

I like that the numbers aren’t super obvious, but think it spruces up the dresser quite a bit! And for 15 minutes and less than 20$ (free if you already own the paint and stencils) it was a pretty stellar upgrade!

dresser6

We’ve moved it upstairs already and it looks great in the space, but I can’t show you it without ruining the project I’m working on now, so you’ll just have to live in suspense…


Mirror, Mirror

Some friends of mine had an extra mirror at their house that they weren’t going to use, so offered it to me for F-R-E-E and so I jumped on that opportunity! The gold isn’t really my style, but I loved the shape of it! And I knew that with A LOT of painters tape and some spray paint, this baby would look much more my style. (Ignore the blurry picture… apparently my camera thought I wanted a super in focus picture of my living room upside down and I didn’t notice)

mirror

In order to prep this guy for spray paint I needed to cover all of it’s mirrored surfaces with painters tape, so I put on a good TV show and started the process.

mirror1

I found it most efficient to lay the tape down on 6 or seven at a time, being sure to push it into all the crevices.  Each little hole was a little wider than the wide painters tape, so I added another strip of  thinner tape overlapping.

mirror10

I used my thumb to make sure it was down into the crevice.

mirror3

Then I took a utility knife and cut each piece at both ends to cover just the mirrored part but leave all the gold exposed for painting.

mirror9


After covering the middle with magazine pages and more painter’s tape, this baby was ready for her color change.

mirror8


I took her outside and I used this spray paint in Carbon Mist. If you look really carefully in the picture below you will see that the can says oil rubbed bronze, well…. about one coat in, I realized I was pretty much out of oil rubbed bronze (and my experience with this paint is that when it gets to the end it gets MUCH splotchier).   mirror7

So I made a SUPER FAST trek to HD and decided I’d rather have it a more truer black, so I picked out Carbon mist for the second and third coat of spray paint.  My SUPER FAST trek is because you are supposed to apply the second coat of spray paint within an hour or wait 24. And patience is not a virtue I possess.  1 hour it is! Here is how she looks after one VERY THIN coat of Oil Rubbed Bronze:

mirror6

As with all spray painting, each coat should be VERY thin (the above picture shows what almost all of my first coats look like) and you should keep your spray can moving at a moderate pace. This is what it looked like after the second coat, you can see a few spots that need a little more, but for the most part it looks covered and not splotchy:

mirror4

And as soon as I put the third coat on and it dried enough to barely touch, I started pulling the tape up.  I used the knife to help me scrape the tape up from each corner and pulled it the rest of the way off.  Pulling it up before it has dried hard makes it less likely that you pull up some paint with your tape.  Plus its fun to get immediate results!!

mirror5

And after I let her dry for a day in the garage, the husband and I hung the mirror above the mantle.  I hadn’t changed the mantle decor since I had moved into the house and had decided the picture that hung there before (see the perfectly in focus picture at the top of this post) would go really well in the foyer, so I thought this would look great above the mantle!

Don’t let the dainty gold from her original state fool you, this beast was HEAVY.  We had a few minor obstacles to successfully hanging it above the fireplace, (the husband hammered his thumb pretty good, and scraped my foot when I fell off the stepladder) but once it was hung it looked GREAT! And I better like it because it isn’t going anywhere for a LONG TIME.

mirror12

Excuse the picture with the dog crate in it… this is real life, and since my nice 70 lbs scared-y cat of a dog is afraid of the sprinklers, her crate can’t be against any windows.  Plus she loves this spot where she gets to watch all the goings on at the house, choosing to be in here 99% of the time, even when she isn’t locked in there. And before you dog lovers start thinking I’m a cruel dog mom… she will get a crate pad when she can go a week without eating it.