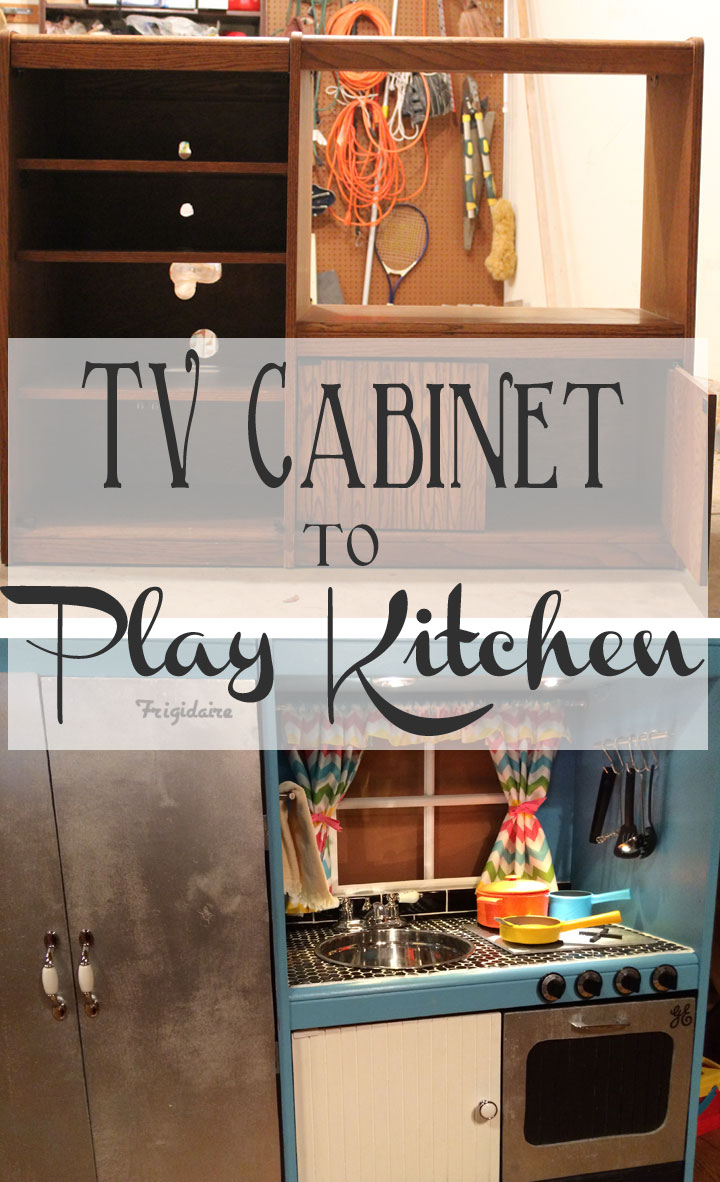
I’m so very excited to show you guys this project!! As you may recall from previous posts (like this one and this one) I have the cutest niece on the planet. Well, sometime in October my mom was surfing through Pinterest (a very dangerous thing to do) and saw a post where someone had turned an old TV stand into a play kitchen for kids. And lo and behold, my parents have been moving this beauty from house to house for 25+ years:
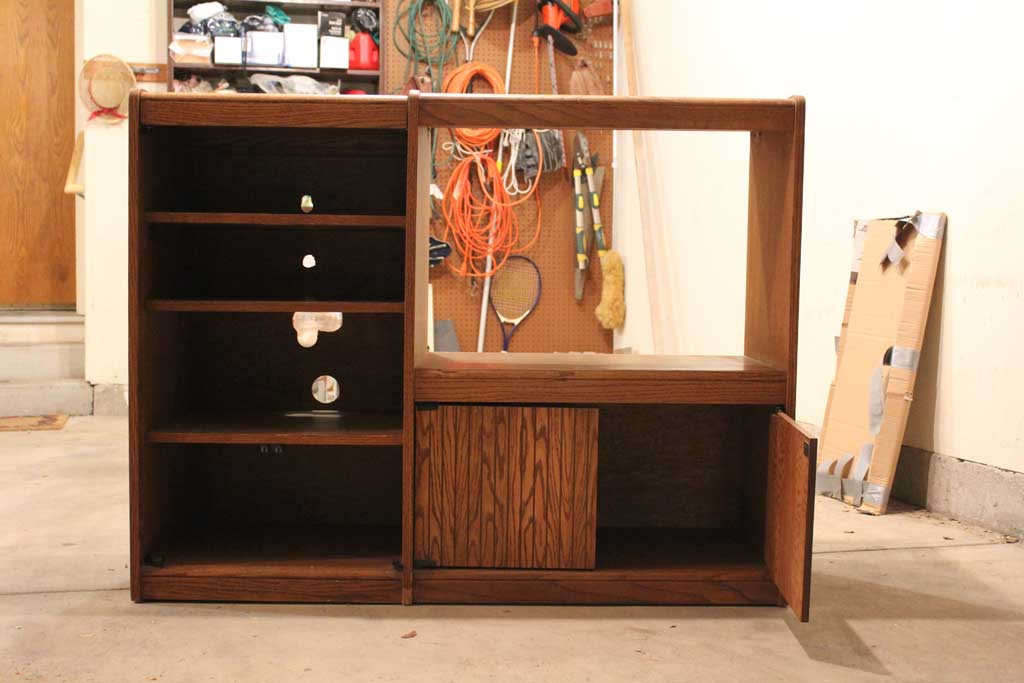

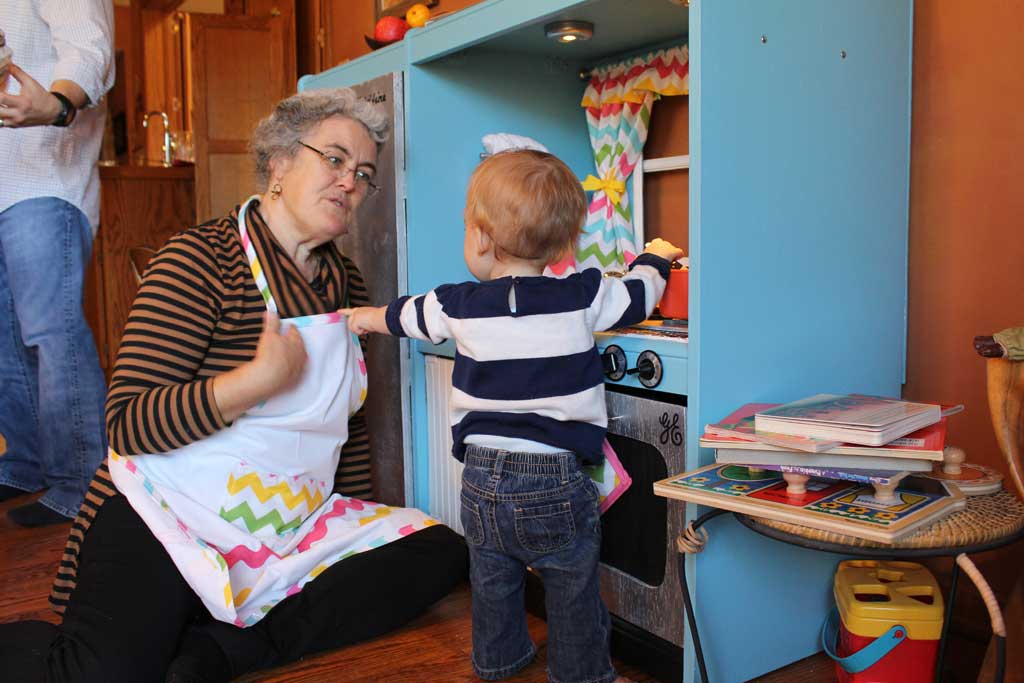
Once upon a time it had glass fronted doors on the left hand section, but they are long gone. And since this guy was just being used for storage in the basement, it made a GREAT candidate for a play kitchen for Juliette. And since she was coming to visit for Thanksgiving, we had a deadline. Fair warning, there are going to be LOTS of pictures in this post, so for those of you who are impatient enough to want to see the final product, here is a teaser of how much Juliette loved her play kitchen!
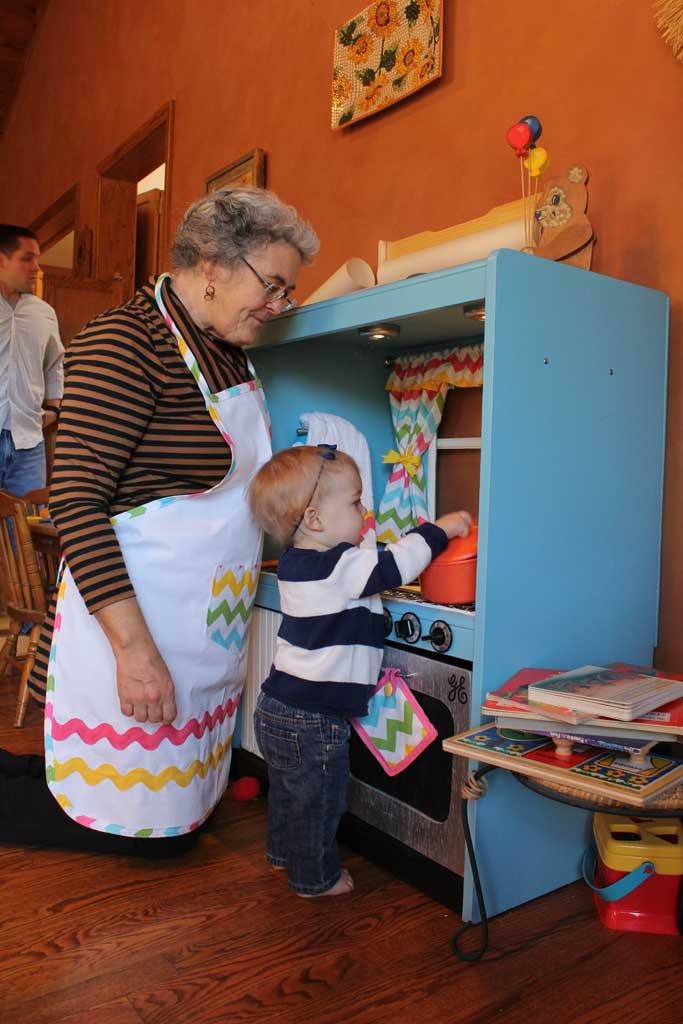

It was a HUGE success, she loved playing with it, especially since it was in Mom’s kitchen, meaning she could play while everyone else gathered around and caught up on life. Perfection.
Now for the nitty gritty, and as a reward for those of you who make it to the end of this post, there are a ton more pictures of my precious niece playing with her kitchen.
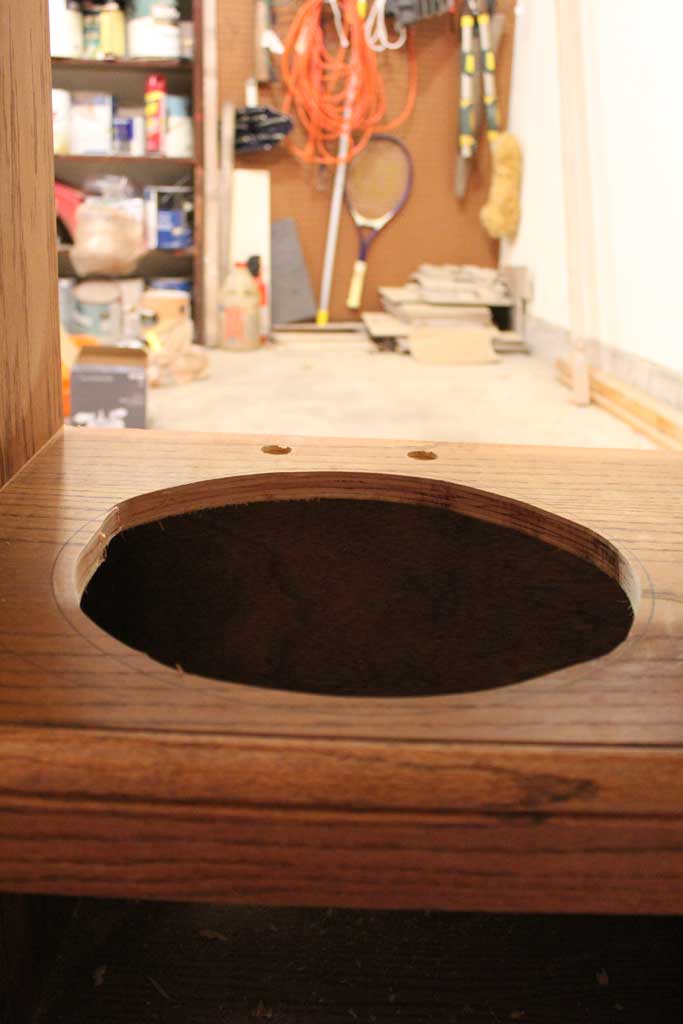
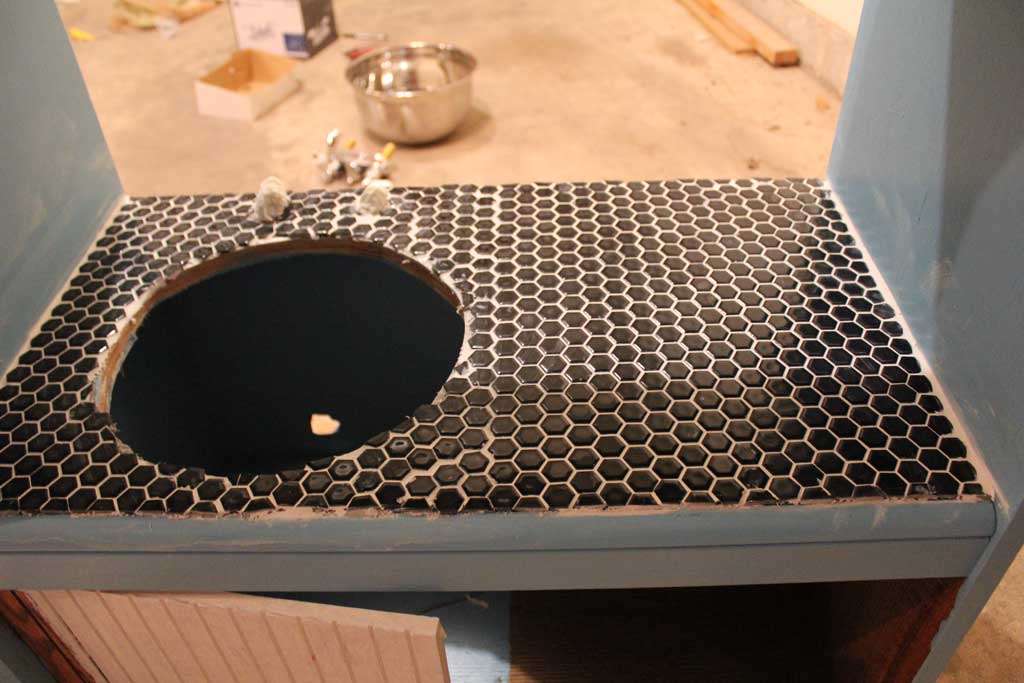
First off we went shopping for supplies, (the first of many trips to Home Depot during this project) but it is an important step! We wanted to make sure we had the bowl for the sink and the faucet so that we could drill the holes for those before we painted. Using my jigsaw we cut a rough circle for the sink and using my drill and bits we cut the right holes for where we wanted the faucet to go.

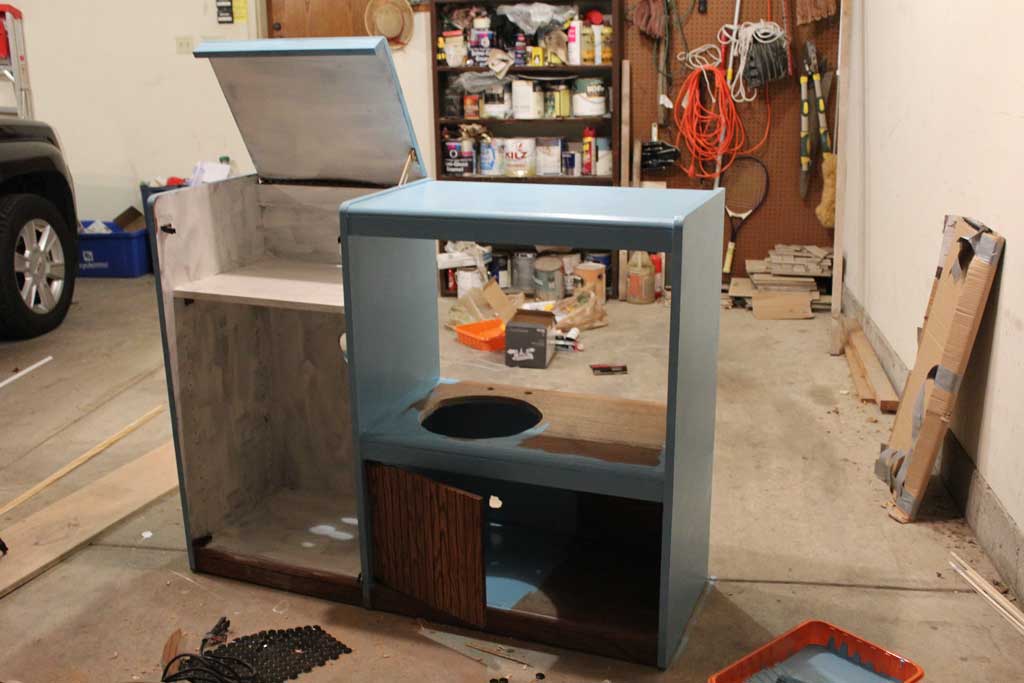
Next up we painted. We decided we wanted most of it to be a robin’s egg blue color, but we wanted the inside of the fridge to be white, and we wanted it to have a black baseboard that ran across the whole project. We also decided we wanted the one cabinet door to be white. It took a couple coats of paint everywhere (especially the white over the dark wood). But we left the ‘countertop’ open because I had extra hex tile (from tiling my backsplash) and we thought it would be fun to have a tiled counter top. But this project also reminded me how much I hate working with tiny little hex tiles. Love the way it looks, hate nipping those little suckers.

For the next step we tiled the counter- if you want a tutorial on tiling see the link above about tiling the backsplash- This was not the smoothest tiling job I have ever done, but the good news is… its a play kitchen, and perfection was not our goal.

At this point we decided the project would be cuter with a piece of wood covering the back and a ‘window’ cut out of it. Which means? Another trip to Home Depot. We decided to just use 1/8th inch plywood stapled to the back of the unit, but used some white trim to create the ‘window’ look. And really, her kitchen wouldn’t be complete without a small backsplash of her own, so we used some more of my leftover tile, and created a small back splash on the back piece.
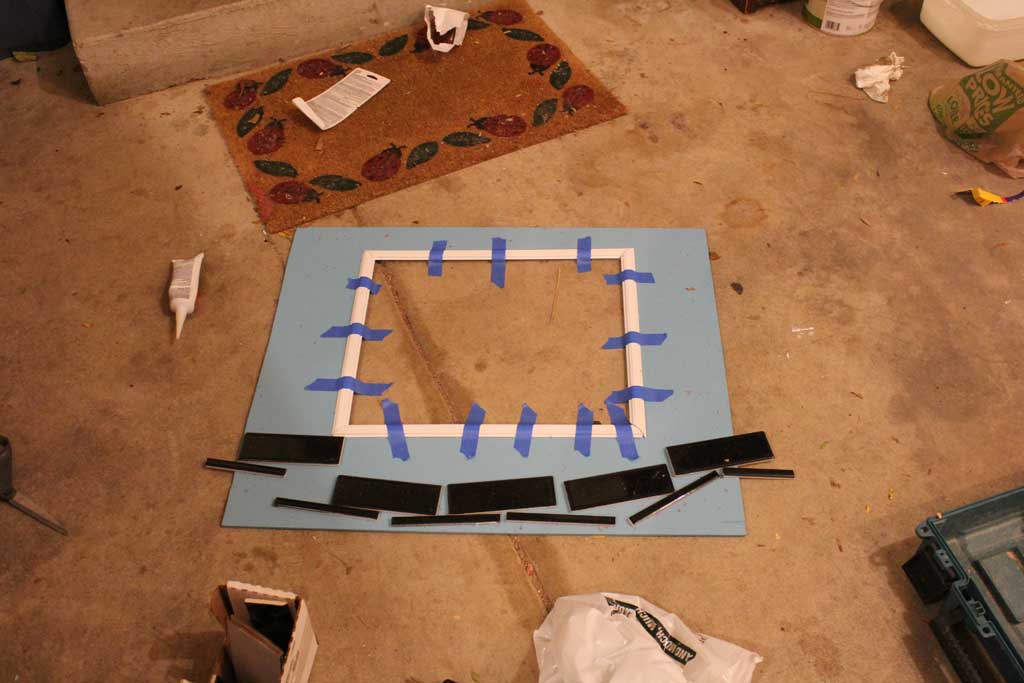

We used liquid nails to hold down the trim, the blue tape is just holding it in place until it dries.
While that was happening, we needed to create doors for the ‘refrigerator’ and make the one cabinet door look like an oven.
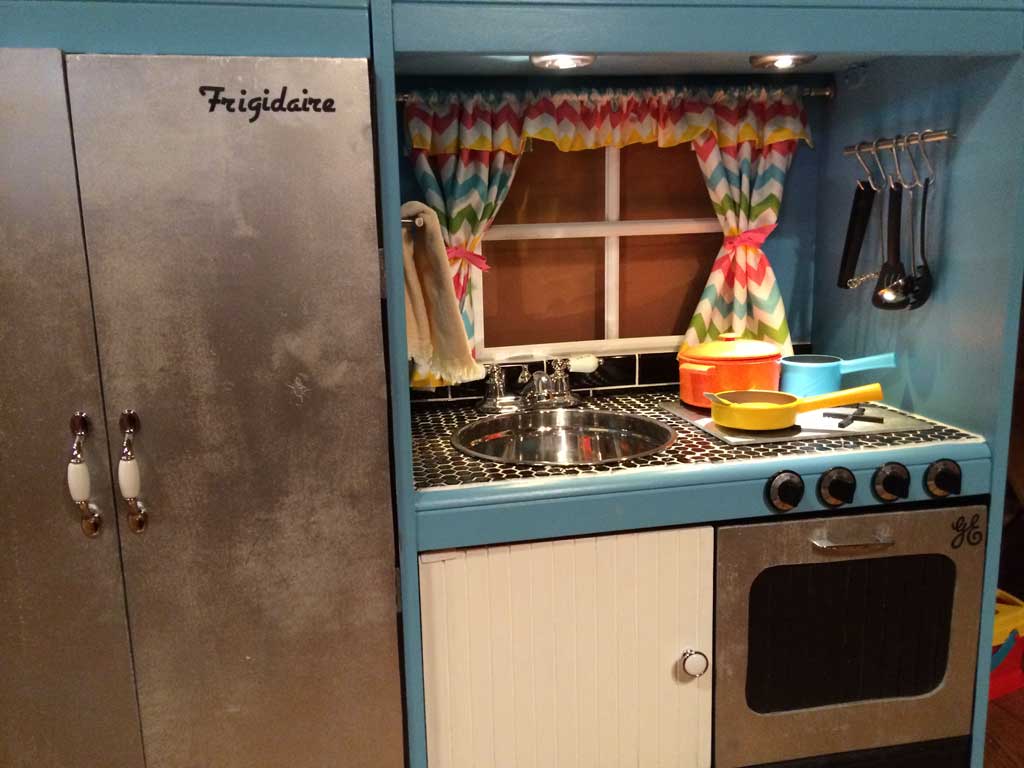
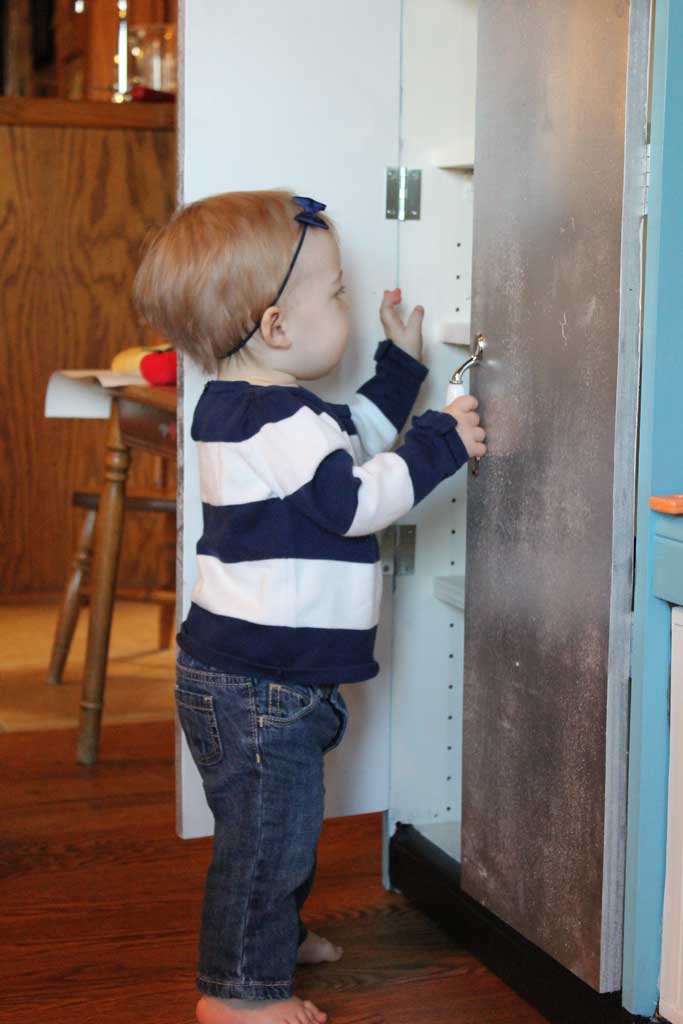
For the fridge doors we just used 1/2 furniture grade plywood cut into two longer strips (measured to fit) and spray painted with a metallic silver spray paint. Once they were dry we added handles and hinges to finish off our fridge.
For the oven, we used the existing cabinet door, painted it black, but added 1/8″ plywood on top (with liquid nails) painted in the same silver as the fridge doors to give the appearance of the stove door with window.
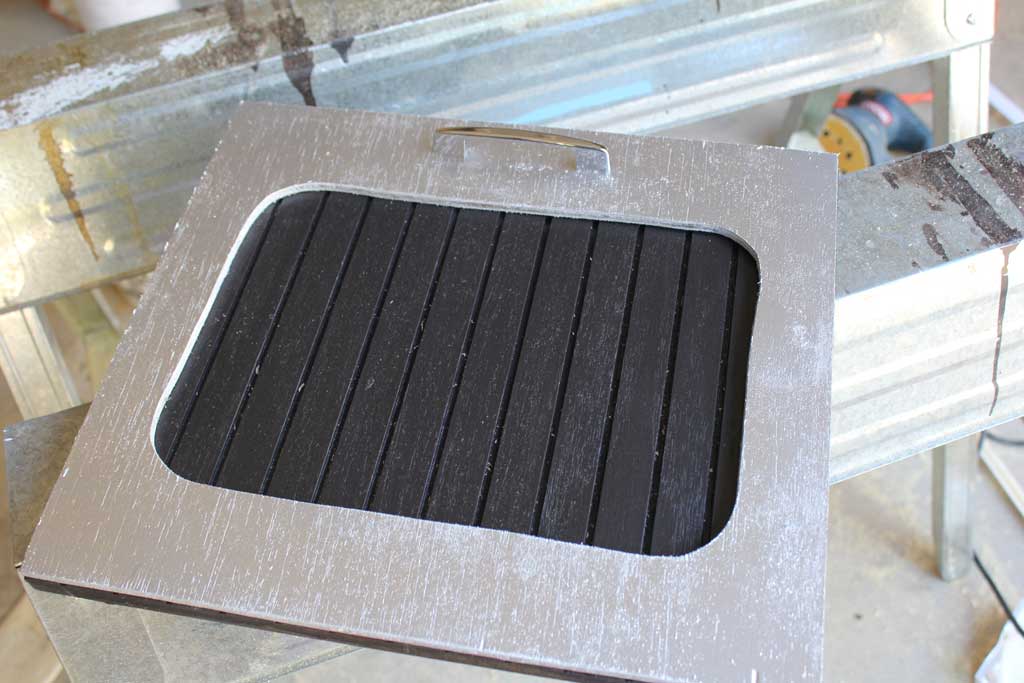

Once we had it painted, we used two cabinet hinges on the inside bottom to allow it to be pulled out like a real oven door.
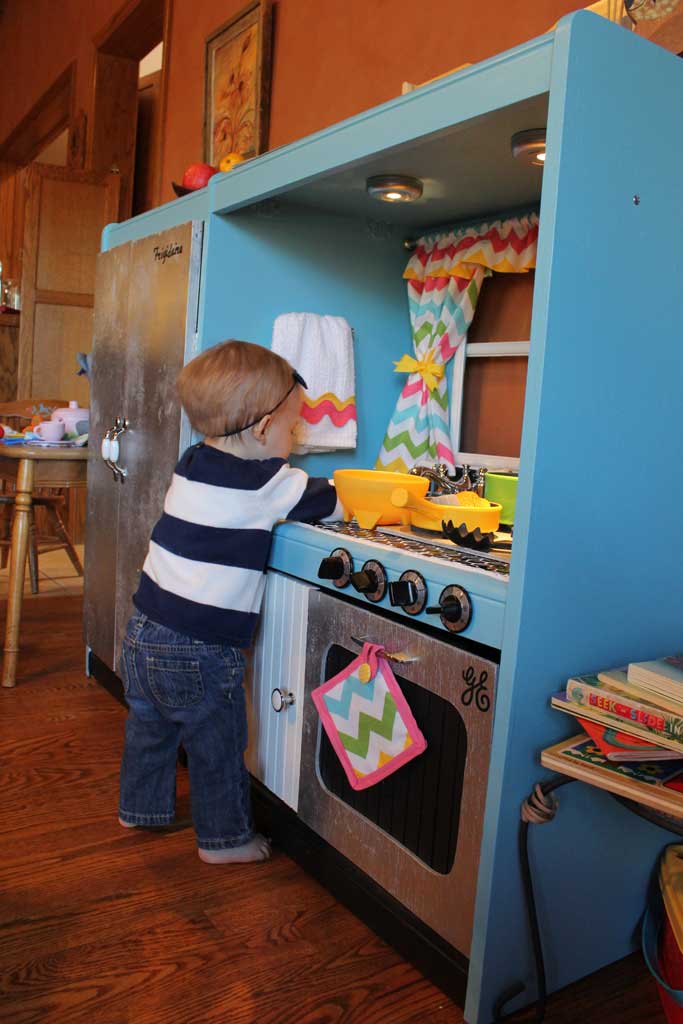
Unfortunately I don’t seem to have any good pictures of the ‘stove top’, but we used more of the 1/8″ plywood, painted in the same metallic silver, and then used 4 square dowels to create the look of the burners. You can see it a bit in the final pictures down below.
At this point, the kitchen was ready to go, it just needed some decor!


If the oven looks a little precarious in the picture above it is because it wasn’t actually secured at this point in the process, we hadn’t attached the hinges.
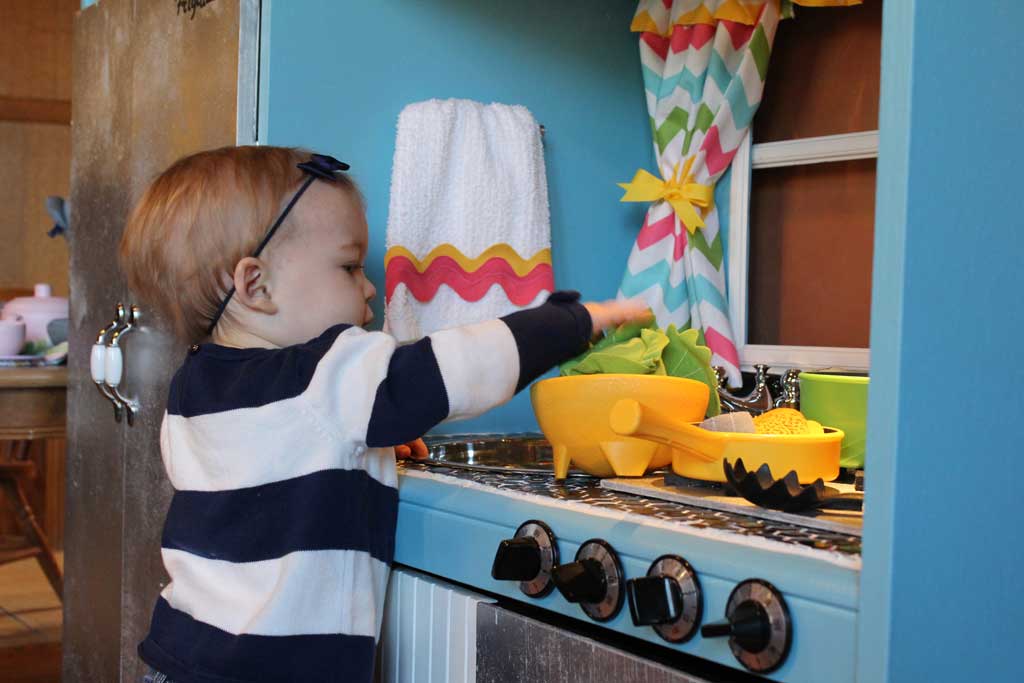
For the final product we added some knobs to the front to control the stove, curtains (hand sewn by mom), some hooks for utensils, a towel rack and towel, and LOTS and LOTS of fake food from Ikea. Ikea has an awesome selection of felt food that is perfect for a one year old.
OH! I almost forgot, we also added some logos with vinyl from my Silhouette Machine, and those lights?? 10 LED battery operated lights from Home Depot. They turn on with a push of the button and will auto shutoff if no one touches them for 30 minutes. GENIUS. They totally improve the look of the project!
And Viola! ready for Miss Juliette to play to her heart’s content.

And play she did… she loved it!!! (and so did her Nanny!!!) And yes… they have matching Aprons!

What shall I have for lunch today? Fish? Bread? Lettuce? They are all so felty!


Maybe she’ll learn to wash dishes early?

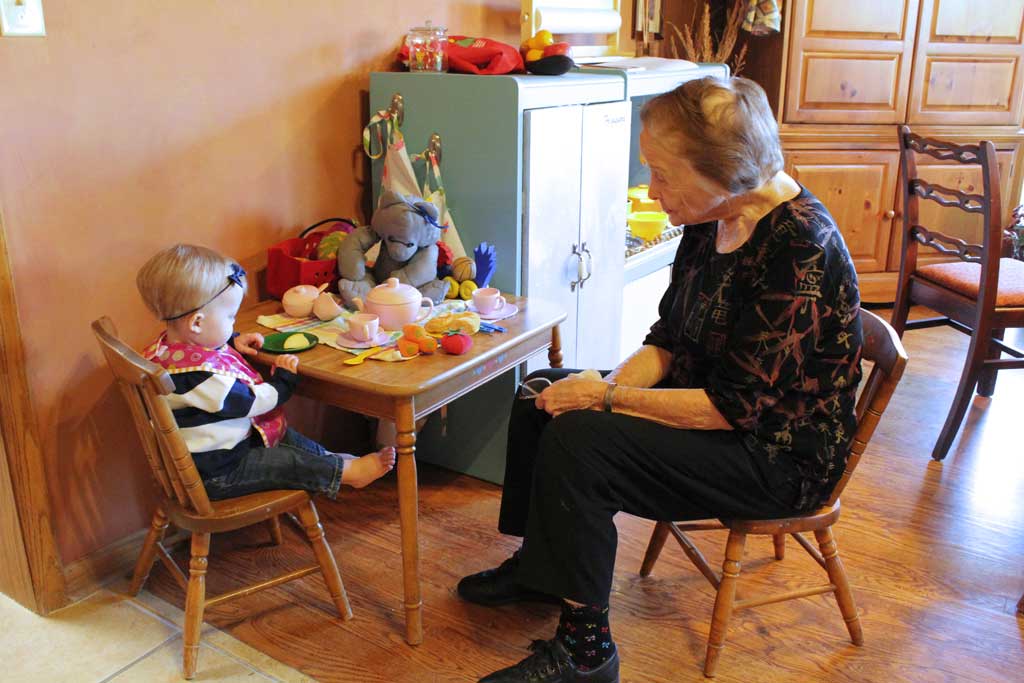
This one isn’t really related to the kitchen, but it was so cute I couldn’t help but to share… this is my 94 year old grandmother having a tea party with Juliette and my favorite bear from my childhood. There are so many things I love about this photo!


 Hi, I'm MJ! I'm a DIY kind of girl and this is where I share my projects. I'm taking you along for the ride as I learn how to do woodworking, sew, bake, and renovate!


Wowwwwwwwwwwww this turned out amazing!!!
Since I did some of the shopping, I thought I’d add a little. I bought the smallest faucet I could at Home Depot that said “hot” and “cold” on the handles. We bought “real” replacement oven knobs and bolted them in place (they turn). We bought long cabinet handles for the utensil holder and Ikea S hooks to hold the utensils. We bought the black and metal utensils from Ikea and then I found the cute colored ones at Bed, Bath & Beyond. I also bought a blue plastic berry colander from Walmart and the Stainless Steel sink bowl was a Walmart purchase. The colored pans were a set from Toys R Us. I bought that adorable fabric at The Quilting Cupboard in Valentine, Nebraska, along with the large Rickrack I put on the towel and used on the aprons.
I see my cute colored utensils aren’t shown in these pictures…but trust me they were cute!
You all amaze and inspire me every day. This is truly incredible. Being about to reuse and re-purpose something is just so cool!
Cutest. Ever. Got to make one of these!!!