Archives for October 2013

Mirror, Mirror

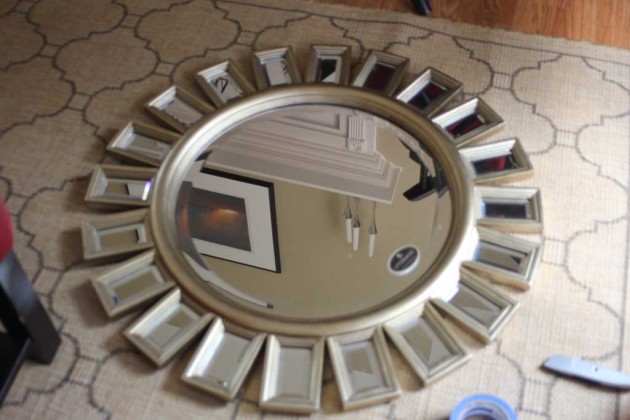
Some friends of mine had an extra mirror at their house that they weren’t going to use, so offered it to me for F-R-E-E and so I jumped on that opportunity! The gold isn’t really my style, but I loved the shape of it! And I knew that with A LOT of painters tape and some spray paint, this baby would look much more my style. (Ignore the blurry picture… apparently my camera thought I wanted a super in focus picture of my living room upside down and I didn’t notice)

mirror

In order to prep this guy for spray paint I needed to cover all of it’s mirrored surfaces with painters tape, so I put on a good TV show and started the process.

mirror1

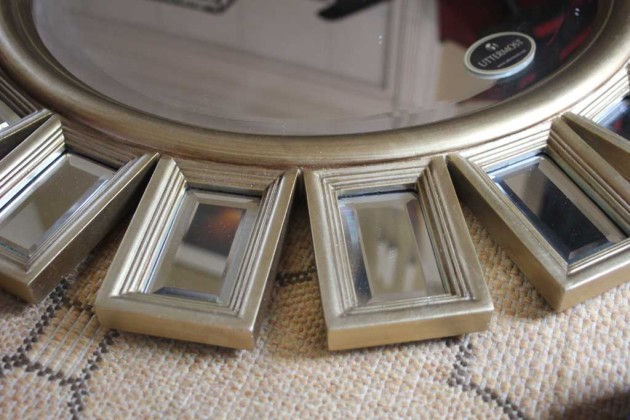
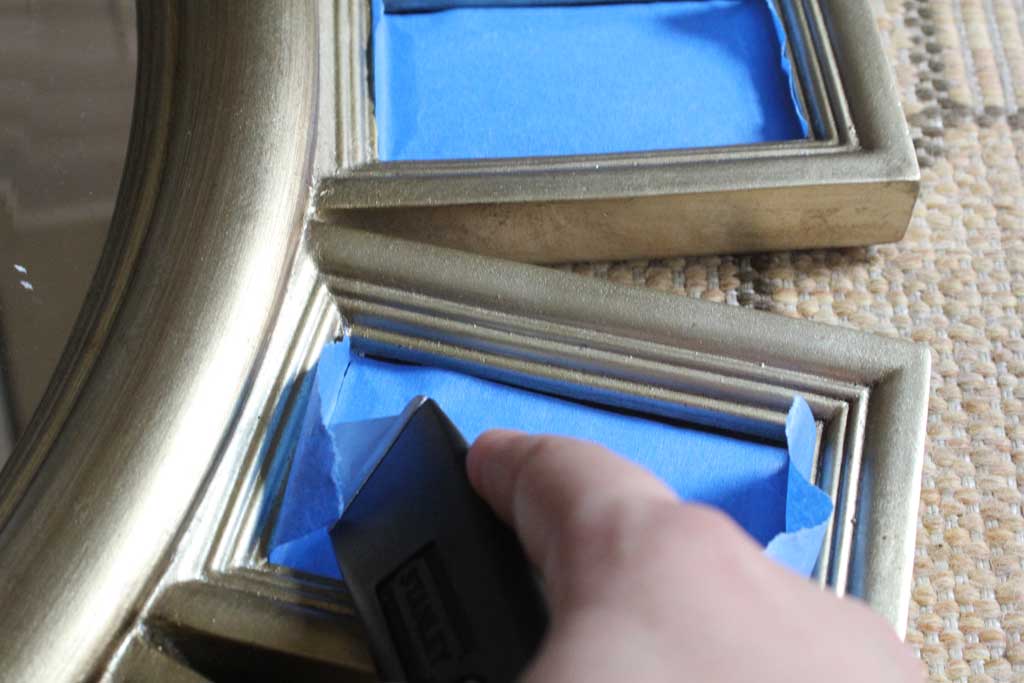
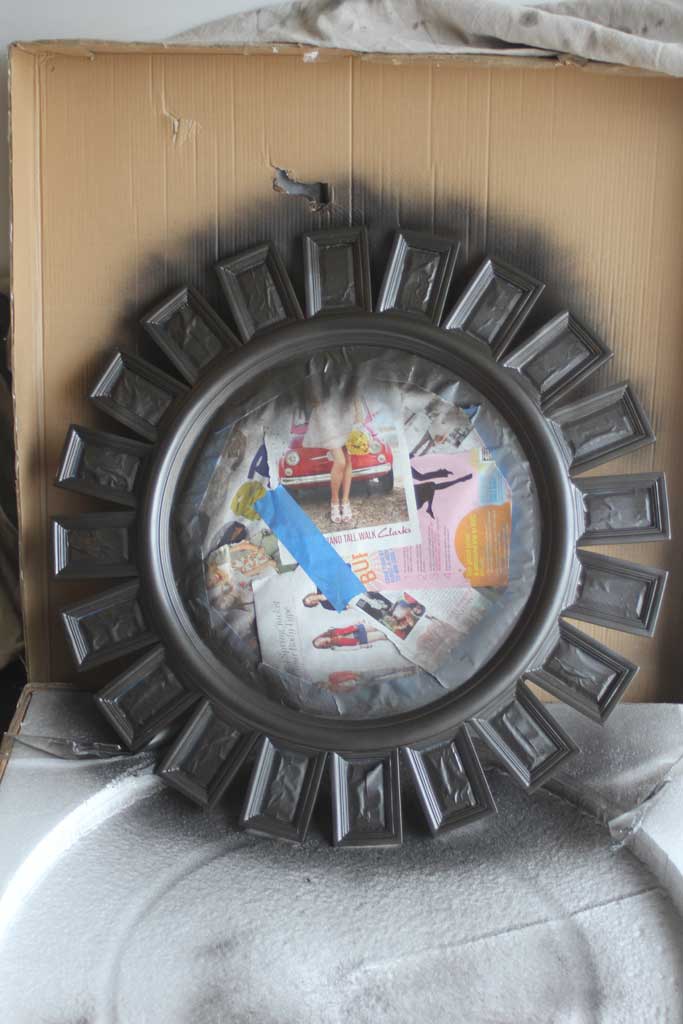
I found it most efficient to lay the tape down on 6 or seven at a time, being sure to push it into all the crevices.  Each little hole was a little wider than the wide painters tape, so I added another strip of  thinner tape overlapping.

mirror10

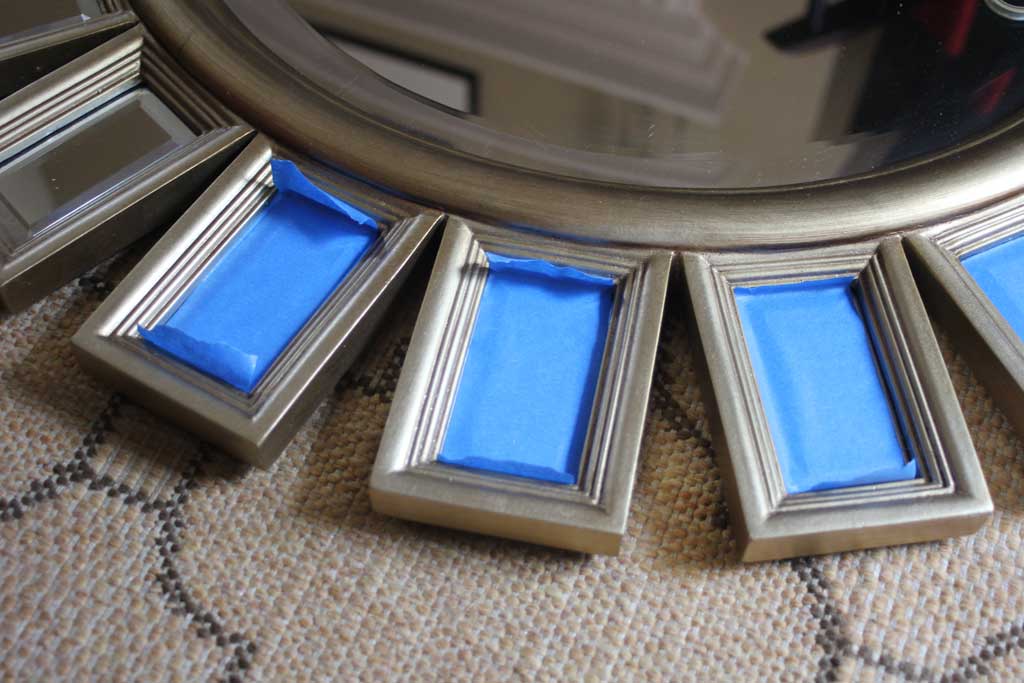
I used my thumb to make sure it was down into the crevice.

mirror3

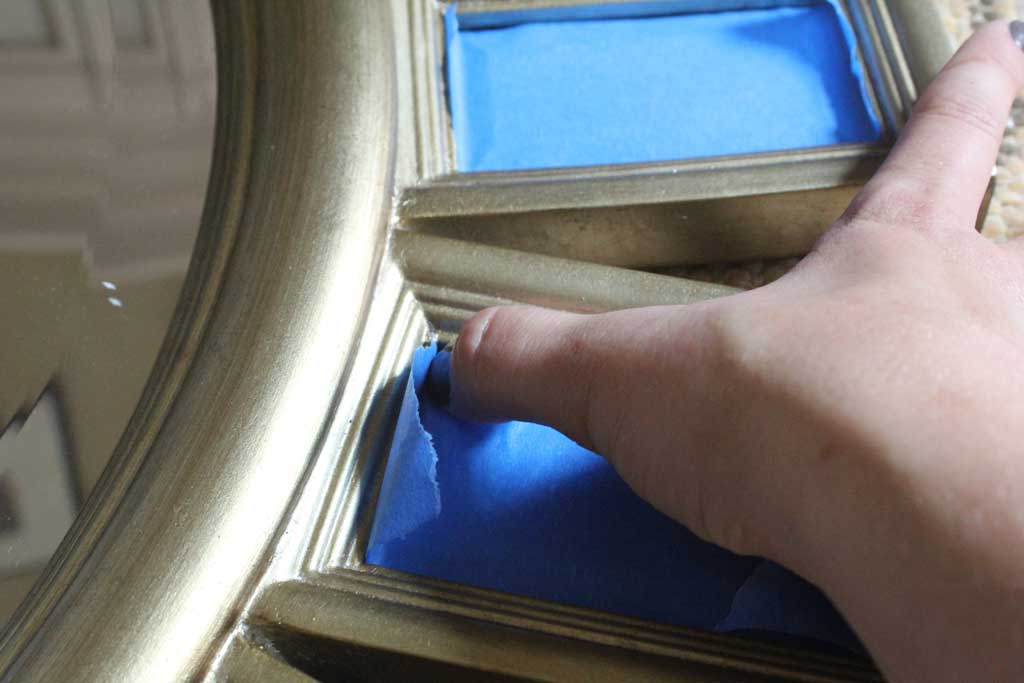
Then I took a utility knife and cut each piece at both ends to cover just the mirrored part but leave all the gold exposed for painting.

mirror9


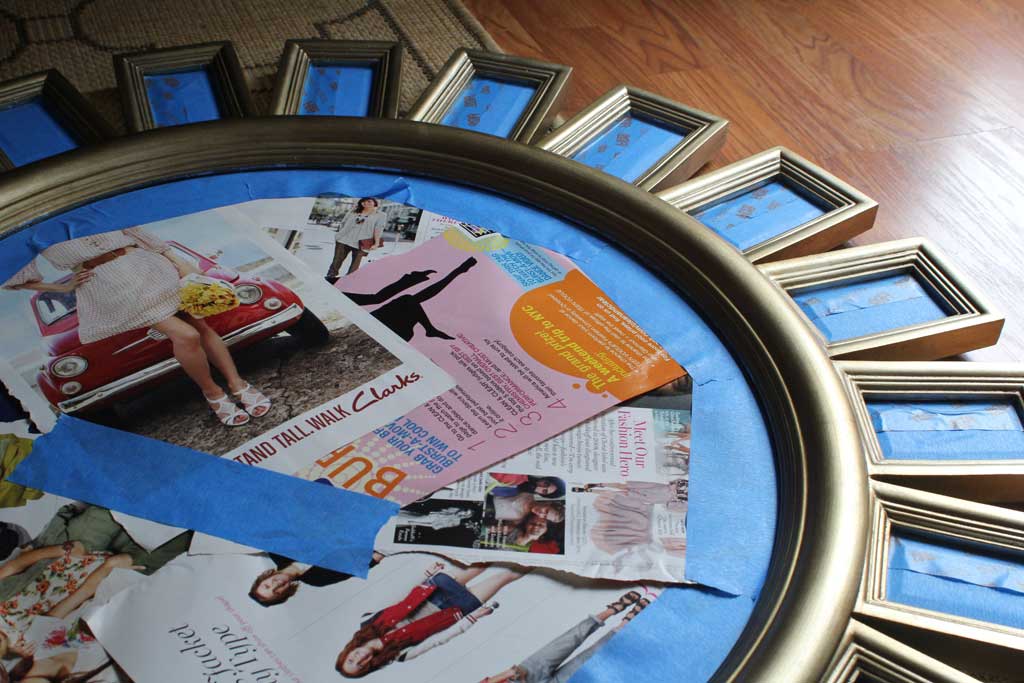
After covering the middle with magazine pages and more painter’s tape, this baby was ready for her color change.

mirror8


I took her outside and I used this spray paint in Carbon Mist. If you look really carefully in the picture below you will see that the can says oil rubbed bronze, well…. about one coat in, I realized I was pretty much out of oil rubbed bronze (and my experience with this paint is that when it gets to the end it gets MUCH splotchier).   mirror7

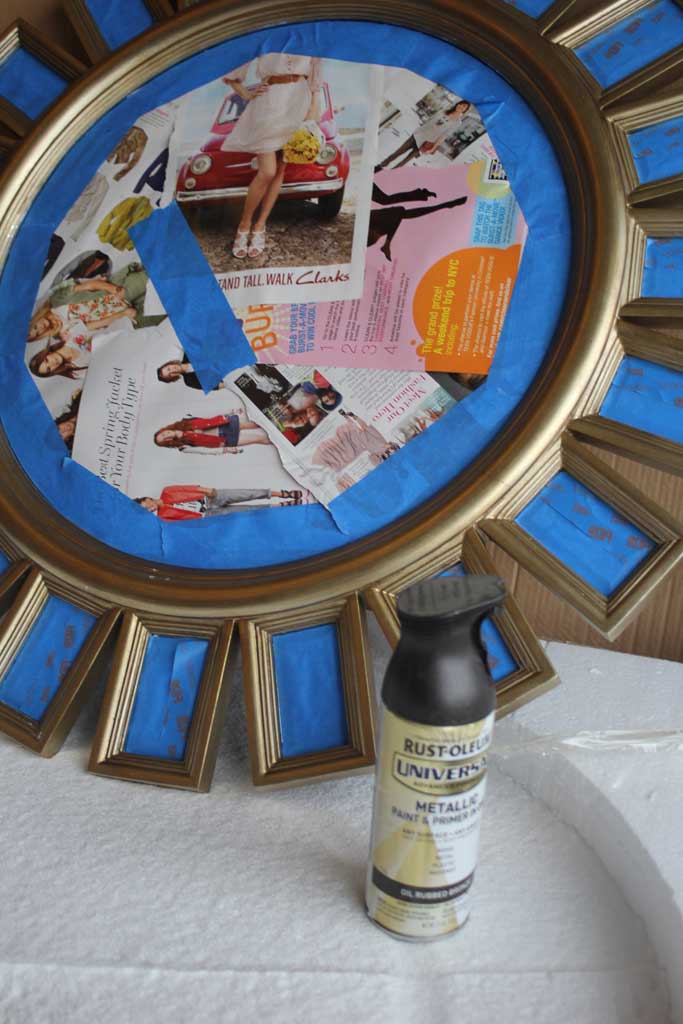
So I made a SUPER FAST trek to HD and decided I’d rather have it a more truer black, so I picked out Carbon mist for the second and third coat of spray paint.  My SUPER FAST trek is because you are supposed to apply the second coat of spray paint within an hour or wait 24. And patience is not a virtue I possess.  1 hour it is! Here is how she looks after one VERY THIN coat of Oil Rubbed Bronze:

mirror6

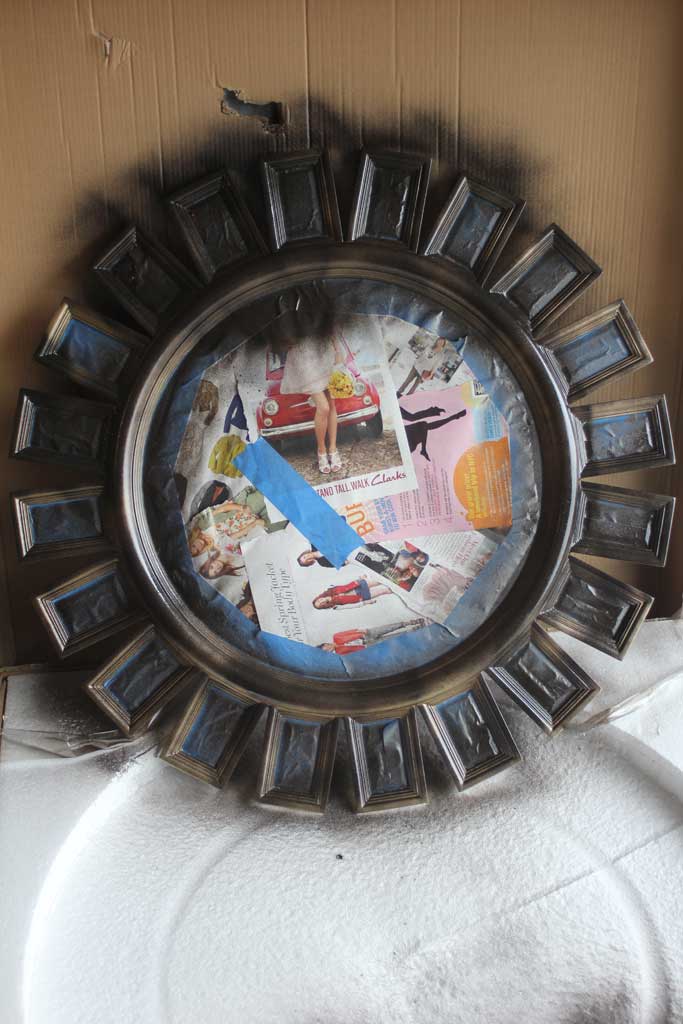
As with all spray painting, each coat should be VERY thin (the above picture shows what almost all of my first coats look like) and you should keep your spray can moving at a moderate pace. This is what it looked like after the second coat, you can see a few spots that need a little more, but for the most part it looks covered and not splotchy:

mirror4

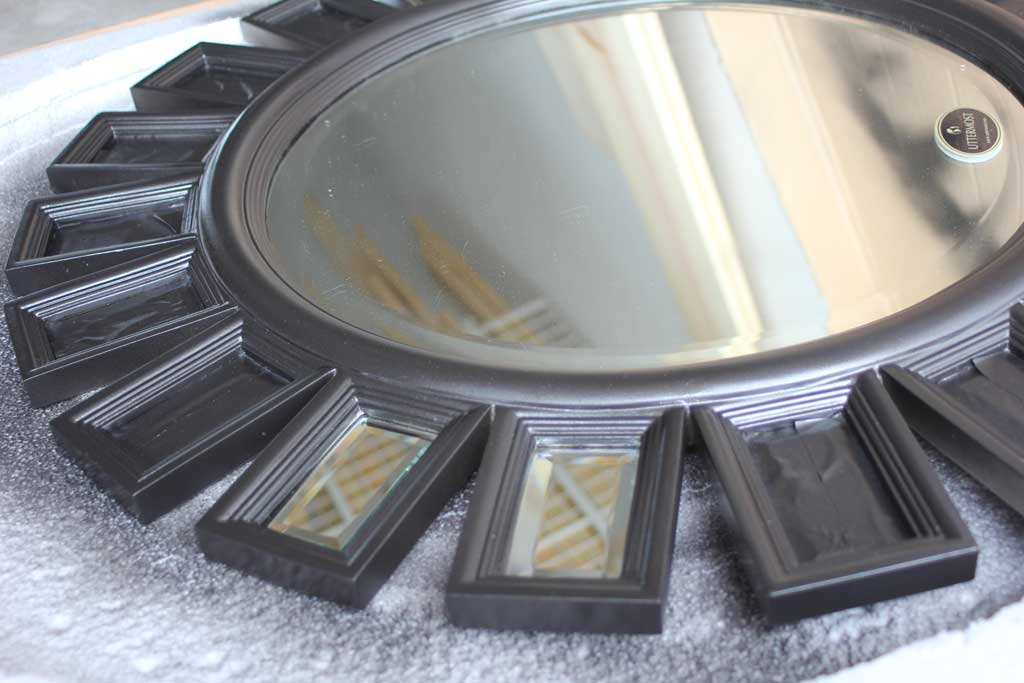
And as soon as I put the third coat on and it dried enough to barely touch, I started pulling the tape up.  I used the knife to help me scrape the tape up from each corner and pulled it the rest of the way off.  Pulling it up before it has dried hard makes it less likely that you pull up some paint with your tape.  Plus its fun to get immediate results!!

mirror5

And after I let her dry for a day in the garage, the husband and I hung the mirror above the mantle.  I hadn’t changed the mantle decor since I had moved into the house and had decided the picture that hung there before (see the perfectly in focus picture at the top of this post) would go really well in the foyer, so I thought this would look great above the mantle!

Don’t let the dainty gold from her original state fool you, this beast was HEAVY.  We had a few minor obstacles to successfully hanging it above the fireplace, (the husband hammered his thumb pretty good, and scraped my foot when I fell off the stepladder) but once it was hung it looked GREAT! And I better like it because it isn’t going anywhere for a LONG TIME.

mirror12

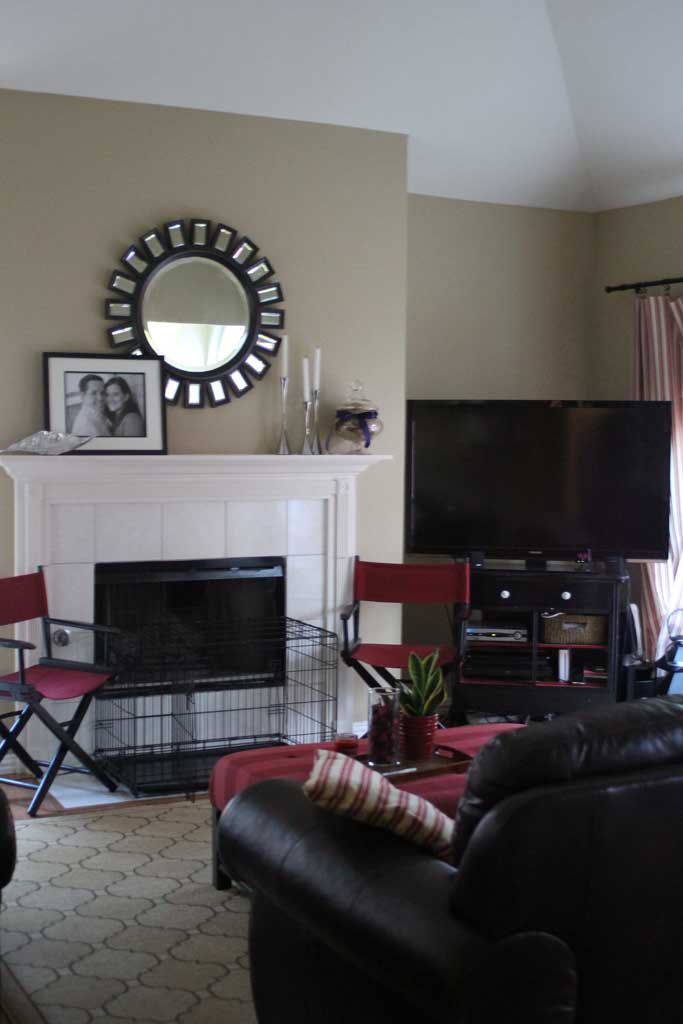
Excuse the picture with the dog crate in it… this is real life, and since my nice 70 lbs scared-y cat of a dog is afraid of the sprinklers, her crate can’t be against any windows.  Plus she loves this spot where she gets to watch all the goings on at the house, choosing to be in here 99% of the time, even when she isn’t locked in there. And before you dog lovers start thinking I’m a cruel dog mom… she will get a crate pad when she can go a week without eating it.


A Halloween Treat

Happy Friday! I love Fridays! I usually have a long list of projects and social events that I have planned for my weekend, and this weekend is no exception.  I’m busy prepping the house for my Halloween Party (see last year‘s and the year before‘s) and I’m very excited about some things in the works for this year! I’m going with a more black and white theme for my table this year and decided to extend that trend with my invitation.  I’ve been loving the chalkboard art that I see on Pinterest and around the blogosphere and decided to get in on the action! I googled around a bit to figure out how to make them and downloaded about 30 fonts (see the bottom of this post I have some listed that I used on these pieces).  I tried to make my own chalkboard background, but ended up finding a better version here for free.  From there I just played around with my newly downloaded fonts until I found something I liked.  And this is what I came up with for the invitation (address and date changed for privacy!)

Halloween-2013-fake

My mother is excellent at coming up with funny rhyming poems, its just one of her ‘things’, I’m not so great at it, but I was pretty proud of this one! If you can’t read it, it says:

While ghosts and goblins roam the streets

Come feast on some delicious treats

With friends, laughs, and costumes galore

A true Halloween bash we have in store

So don your best duds if you dare

To come and visit MJ’s Lair

The bats are the letter F from font KR Boo Lane– which has some excellent Halloween dingbats (if you aren’t familiar with dingbats, they are little drawings used as a font… kinda like the webdings font that comes standard for Microsoft).

I also have a chalkboard in my kitchen that I usually have a drawing on, and decided this year I would try to create one on the computer that I transfer (haven’t figured out exactly HOW I’m going to do that yet) to my chalkboard. Being the English major that I am, one of my favorite Halloween phrases is a Shakespearean quote: By the pricking of my thumbs, something wicked this way comes.  Its also the title of a Ray Bradbury book that I read in high school and still stands out to me as the most definitive source on light/dark imagery.  But enough of an English lesson for today… here’s my poster:

something-wicked

Most of the fonts I used in the above two pictures can be found on this list (links below) free-halloween-chalkboard-f

1. Haunted Mouse 2. Admiration Pains 3. Lemonade 4. Kings and Queens 5. Burton’s Nightmare 6. Chalkhand Lettering 7. An Unfortunate Event 8. Angelic War


I download almost all of my fonts from dafont.com or fontsquirrel.com because they are free and safe download sites.  Happy Haunting!


DIY Centerpiece Box

When I was thinking about what I wanted to put on my dining table for fall (about the only place that I decorate seasonally), I saw a table with a rustic box in the middle with candles and leaves sort of spilling out of it.  I pinned it here (speaking of… if you want to follow me on pinterest, instagram, etc just click the circles over to the right –>) but whoever originally pinned it didn’t link it to a tutorial or other projects… but you know me… I thought: I can make that! And it turns out it was super easy! The actual construction of the box took me about 15 minutes over my lunch break.

box10

Supplies:

  • 2- 1″x4″x8′ pieces of wood (I usually use pine because it is cheap and readily available)
  • Nail Gun (or if you don’t have one you can just use a good ole hammer and nails)
  • Miter Saw or Circular Saw
  • 220 grit sandpaper
  • Stain color of your choice
  • Brush to apply the stain
  • Rag to wipe it off

The first step is to cut your wood down to size, I measured my table and decided I wanted mine to be a little over 40″ long.   I decided to cut my long pieces to 40″ and then add the end pieces on, making my entire box 41.5″ long.  (Did you know that boards aren’t actually the size they are called? For instance 2x4s are actually about 1.5″ x 3.5″ If you want a quick cheatsheet I have pinned one here.)

box9


So first I measured one board to 40″.  And see how the left hand side of my marker line is at 40″? When I cut, I want to be sure that my saw blade is lined up on the left hand side of that line.  box6

When you cut wood, a saw blade will take away some of the wood when it cuts (mine takes about 1/8th of an inch). So you want to be careful to be sure that you aren’t cutting on the side of the line that you want to use so that your piece isn’t 1/8th of an inch short. So you can see in the picture above, I lined my saw blade up to the left hand side of the line and that is where I made my cut.  But I have a secret when I’m making something like this box.  When I have to cut multiple pieces where it is more important that they are equal than the right length (I’d rather all my pieces be exactly the same length than be an exact 40″ ) I measure and cut one.  Then I take the next board, line it up on my saw and put the first piece on top of it like this:

box5

And as long as I’ve made sure the ends are perfectly lined up, its an easy way to ‘mark’ my next board.  I just use the teeth of the blade to hold the board while I remove the top piece before cutting.  After the top board is removed, I can hold the board while I make my cut.  box4

Next I marked and cut my two end pieces (ignore the board on the left that is leaning… its hard to take pictures, mark and hold the board all at the same time… but I promise this was even when I marked it!).

box3

Next I took my nail gun and placed nails all along the sides and the ends until it was secure. (I put about 6 across the sides and 5 on each end) Now, its ready for sanding and stain!   box2


For sanding, I didn’t do much, I wanted this to look pretty rustic, so I just sanded down the corners so they weren’t quite as sharp and went over the wood pretty lightly with 220 grit.

We had just finished the stage project and had used several different shades of Varthane’s stain.  The darkest color we had used was the color I wanted for this box.  I was pretty sure it was Kona, but my husband SWORE it was dark walnut and that Kona went on dark, but wiped off as a gray, ashy color.  And in Minwax I had used the dark walnut before and liked it, so we thought we would give that a shot.  Well… this is how it turned out:

box1

It was WAY more orange than I wanted (although thanks to night-time staining in my garage its not actually as orange as this picture makes it look). So I decided to go back to HD and get some Kona stain to try it out.  And voila… exactly the color I was looking for:  box8

I actually think it was a good thing that I stained it first in the Dark Walnut, I think it gave the color a little more depth, so all was not wasted! I’ll try to do a more detailed staining post sometime next month (I have another big table build coming up soon!). But for now here are my quick and easy tips for staining:

  • Use foam brushes (like the ones I used here)  to apply the stain
  • Always apply and wipe stain in the direction of the wood grain
  • READ AND FOLLOW instructions.  Every stain is different on how long to leave stain on before wiping it off, and how long in between coats, etc. But it says… RIGHT THERE ON THE CAN!
  • I use old t-shirts, unmatched socks, whatever I can find to wipe it off… stain ruins everything cloth it touches, so I just use whatever I’m trying to get rid of.
  • When you are done, you will have stain on your hands… olive oil/vegetable oil will take it right off.  But then you have to use dish soap to get the vegetable oil off. I usually keep a bottle of cheap vegetable oil in the garage to use for this step since there is something gross about opening my good bottle of cooking olive oil with stain coated hands.  Not that I’ve ever done that…

If you want it to be shiny or water resistant, now is the time to add a Polyurethane coat to the top of it, but since I wanted this project to be more rough and rustic, I left it as is! I think it looks perfect on the top of my table!

falltable2