Fabric Organization

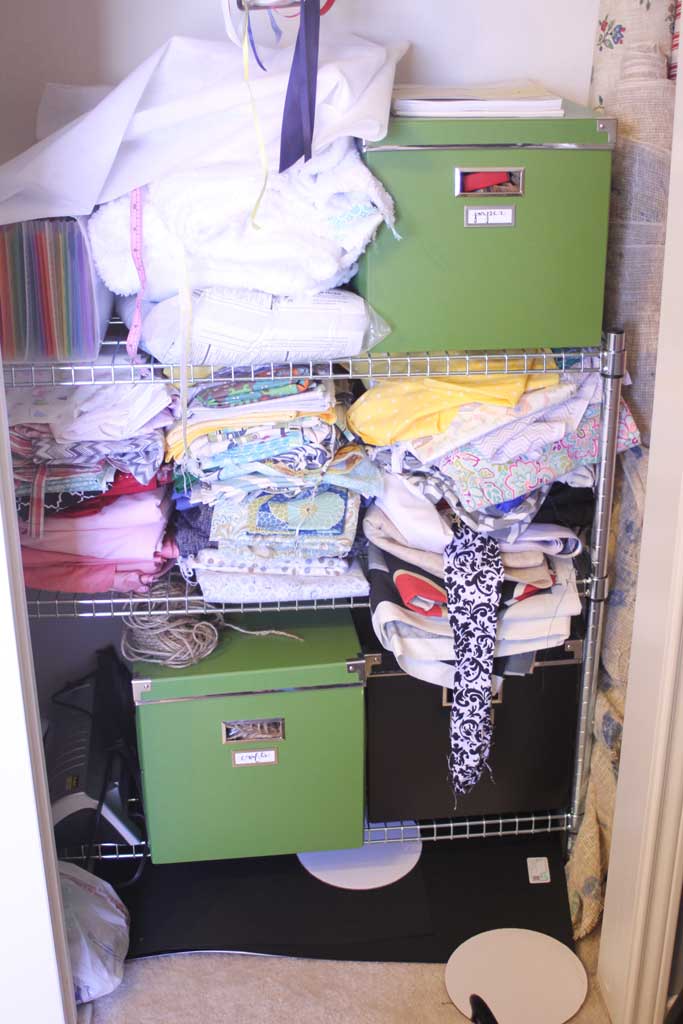
I’m a bit of a fabric hoarder.  I mean… I come by it honestly: my grandmother has the same affliction.  But really… its a good problem to have.  It means that whenever I have the itch to sew something, I don’t have to run out to the store to buy anything.  The problem becomes when it goes to storing it. In my office I have a closet where I keep my sewing machine and a few crafty things.  And while the boxes of craft supplies have suited me pretty well, the fabric was getting a BIT out of hand.

fabric1

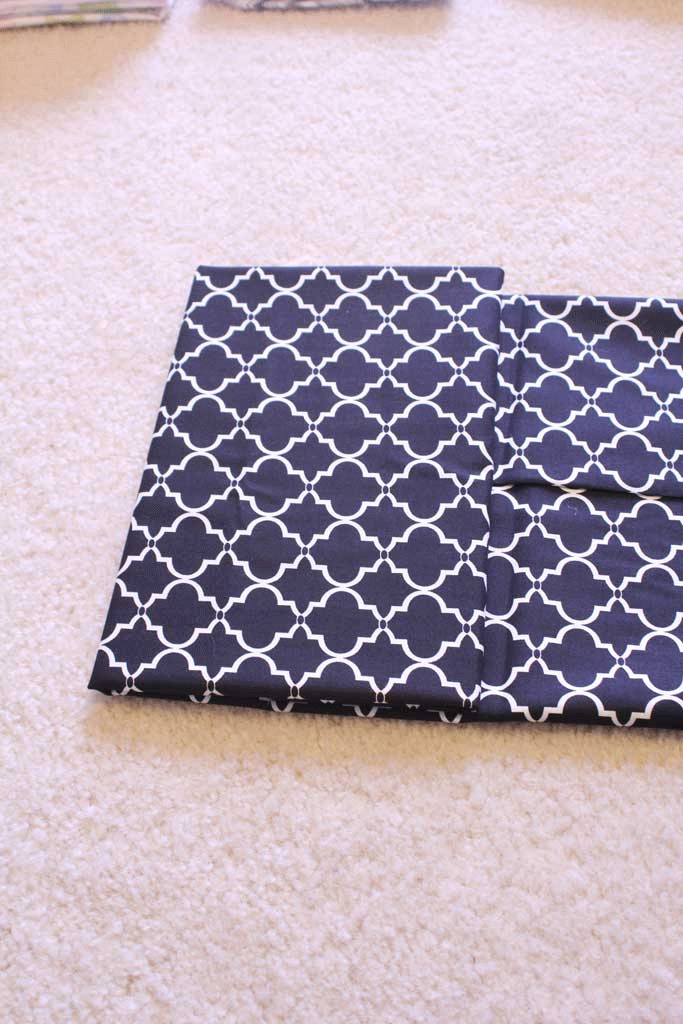
So I went to my normal source for inspiration and found that LOTS of people on Pinterest were using comic book boards to wrap their fabric around.  So I went to Amazon, found these and ordered them. (You should have seen the look on my husband’s face when he opened THAT amazon package!)

And one quick hour and I wrapped up my fabric onto their little cardboard pieces:

fabricgif


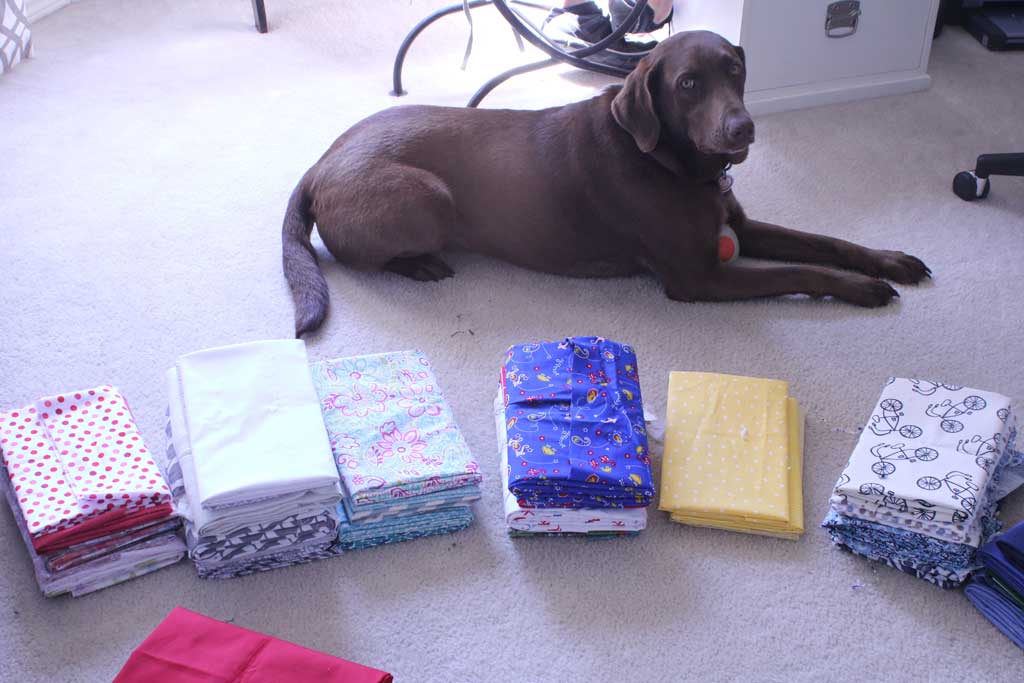
Lexie, of course, decided she needed to supervise.

fabric2


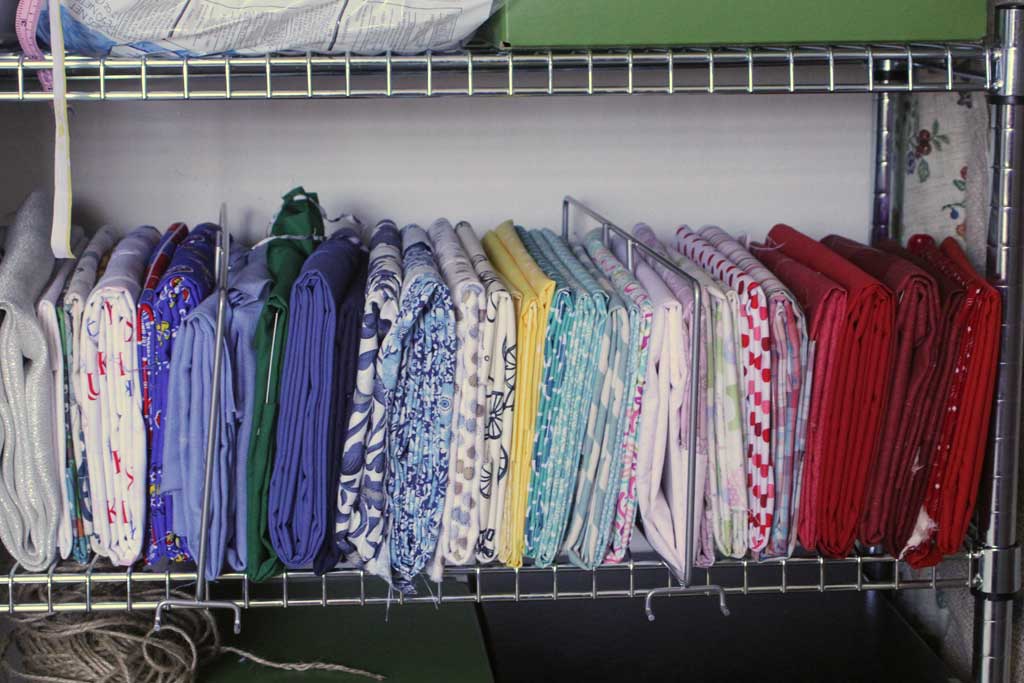
And when all was said and done it looked MUCH improved from before. I added a few Elfa dividers that I had laying around.  They don’t fit perfectly on my IKEA shelf, but they helped keep things somewhat upright and organized.

fabric


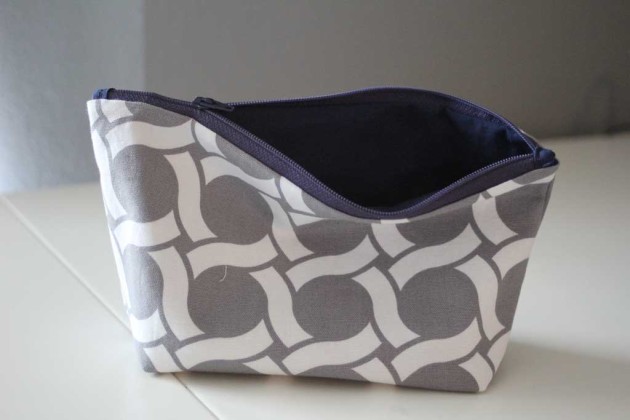
Now I’ll have to work on some more sewing projects!

Onesie Twosie

How were y’all’s weekends? Mine was UBER productive, and I can’t wait to share some of the projects that I wrapped up this weekend.  You know how I told you last week I was having major project ADD? Well this weekend was just the antidote I needed to get my bum in gear and finish a bunch of those up to share with y’all! This is one of those that I started a LOOOONG time ago, but didn’t get around to finishing until just this weekend.  7 months ago my brother and his wife had their first child and didn’t find out the gender until my niece was born.  I decided it would be fun to make onesies for him/her for each monthly birthday.

I didn’t know her gender at the time, so I tried to pick fairly gender neutral colors (btw it is very hard to find boy-ish fabrics).  I mostly used what I had on hand, but tried to match the fabrics up with the month–so I picked a black/red/green plaid for Christmas, a white/silvery one for January and a KU fabric for March (which sadly didn’t give us any luck!!).

onesie4


To make this project you’ll need fabric, wonder-under fusible web, thread, onesies for each age, and a sewing machine.

You can either freehand your numbers, or you can print them off and trace them onto the wonder under.  I’m not so good at free handing so I printed off some numbers on my computer in the size I wanted.

onesie6

Be sure to trace it backwards on the paper side of the wonder under so that when you iron it onto the wrong side of the fabric it will then be right side up.

onesie2

Iron it onto the wrong side of your fabric, then cut your shape.

onesie1

onesie5 Once you have that, iron it onto your fabric, following the instructions for your fusible web. Then using a zigzag stitch, trace around your number on the onesie. I’ll use this opportunity to explain that I am NOT an expert at applique-ing.  My onesies are anything but perfect. But I did learn a few things:

  1. GO SLOW.  It is much easier to be accurate when you are stitching very slowly.
  2. Related to the first one, but slightly different: don’t be afraid to go stitch by stitch. Using the wheel of your sewing machine, sometimes it is easiest at tricky parts to go stitch by stitch.
  3. At angles or turns, leave your needle down but pick up your presser foot to realign the onesie.
  4. Using a longer width (the Vs of the zig zag are deeper) gives you more grace at being inaccurate, if I had to start over, I would use the same stitch I used for month 10 on all of them:  onesie8 Even though I wasn’t 100% accurate, the stitch is on the fabric and the onesie for almost all of the way around, making it look more professional.
  5. Trace your number onto the paper, not the wonder under.  In the 7 months between making the first 7 and the last 4, I forgot this fact, and my #9 has a bit of blue ink bleed from when I ironed on the fabric.  So going about this again, I wouldn’t do that.  onesie7

And that’s how it is done! I didn’t do a 12 month one because I figured her mom would want to do something different for her first birthday, but I’ll probably think of some fun home-made gift to make my only niece for her first birthday… and you know me, I’ll share it here of course!

The best part of this whole project? Her mom has been sending my whole family adorable monthly photos of my niece that she has printed from inked.com Here she is sporting her 2 month and 6 month onesies:

onesie11

Isn’t she precious?? I’m kinda in love.

onesie10

And I’m mailing these last four today!

onesie9

onesie3


DIY Makeup Bag

This bag has to be one of my all time favorite sewing projects.  It was one of my first ventures into sewing other than my burp cloths.  I wanted to hand-make some of my bridesmaid gifts for my wedding, so I made 5 tote bags (I’ll have to share that later) and 10 little makeup bags.  The makeup bags were for my bridesmaids and house party and since I was making 10 of them, I didn’t make myself an extra.  Well, now its almost a year later and I wanted one, so I decided to make one for myself and share the process with y’all. Here is the bag:

DIY Makeup Bag- Super Easy Tutorial! | www.amusingmj.com

And here is a pic of them all lined up and filled with goodies for my bridal party:

DIY Makeup Bag- Super Easy Tutorial! | www.amusingmj.com

When I got started on this project I got some great help and fabulous fabric from Sarah’s Fabrics in Lawrence, KS.  If you live in Kansas City or Lawrence I highly recommend them… they are a great little shop on Mass St.  The gray and white fabric came from there.

Alright, on to the how to, here is what you need:

  • 2- 10″ x 7″ rectangles of patterned fabric
  • 2- 10″ x 7″ rectangles of solid print
  • 2- 10″ x 7″ of interfacing (I used a medium weight iron on interfacing it makes the bags stiffer so they will sit up on their own)
  • a zipper that is longer than 10″
  • 1- 1.5″ x 4″ strip of fabric the same color as your zipper. (I show two below… but you only really need one, I just like to have extra in case I goof)
  • an iron
  • a sewing machine
  • thread

DIY Makeup Bag- Super Easy Tutorial! | www.amusingmj.com


First up we will prep the zipper.  I love the way this looks on the final bag, it gives the little colored stoppers at the end of each zipper.  Take your 1.5″x4″ strip of fabric and fold it ‘hot dog style’ down the middle, and run the iron over it so you have a seam in the middle. Then fold each edge in towards the crease you just made with the iron.  Now fold it in half on that crease so that your edges are all on the inside.  This is a hard step to explain, so I have a picture (I don’t have a picture with the iron because I don’t have three hands, but picture me running an iron over the fabric between each step):

DIY Makeup Bag- Super Easy Tutorial! | www.amusingmj.com

Now take your zipper and cut off the end of it (sorry for the weird lighting on this one… i’m still mastering the whole photography thing):

DIY Makeup Bag- Super Easy Tutorial! | www.amusingmj.com

Now tuck that end of the zipper in between the two folded in sides of your small piece of fabric towards one end of that fabric and sew a line of stitching across it, then cut off the excess.  You’ll use that other half for the other end of the zipper.  Now it should look like this:

DIY Makeup Bag- Super Easy Tutorial! | www.amusingmj.com Cut your zipper off at the other end about an inch shorter than your bag (approx 9″)

DIY Makeup Bag- Super Easy Tutorial! | www.amusingmj.com And sew the other half of your small piece of fabric onto this end of the zipper, repeating the same process. You should now have a zipper that looks a lot like this:

DIY Makeup Bag- Super Easy Tutorial! | www.amusingmj.com Alright, set that to the side and grab your inside fabric pieces (solid color) and the interfacing and follow your instructions on attachment, mine you simply iron on, making sure the dotted side faces the fabric you are fusing it to.  If your fabric has a good side and a bad side, make sure you are attaching the interfacing to the ‘bad side’. It will look like this when it is finished:

DIY Makeup Bag- Super Easy Tutorial! | www.amusingmj.com Now comes what I think is the trickiest part of this project, figuring out which way which fabrics go! I’ve shown you pictures of each step so hopefully this will be easier for you guys! Place your outside fabric (the gray and white), good side up, then the zipper upside down and about 1/2 of the way zipped up and centered between the fabrics (there will be about 1/2 inch overhang on each side), then the inside piece good side down, which means the interfacing will be face up. I didn’t use a zipper foot (mostly because I’m lazy, but also because I don’t know how).  But no worries… its easy to get around.

DIY Makeup Bag- Super Easy Tutorial! | www.amusingmj.com


Put it in the machine like I have it laid out above, and stitch down the right side of that zipper until you get to the actual zipper part. Then with your needle down through the fabric so it doesn’t move, lift up your presser foot, slip your hand in between the layers of fabric and move the actual zipper up and around the presser foot (the needle part) so that you can sew through the rest of the zipper (if you don’t the presser foot will run over the zipper and move your seam off of the fabric…  trust me).

DIY Makeup Bag- Super Easy Tutorial! | www.amusingmj.com


Now your bag should have one side attached to the zipper, like this:

DIY Makeup Bag- Super Easy Tutorial! | www.amusingmj.com


Move your zipper halfway up again, and get ready to attach the other side, like before your outside fabric goes face up on the bottom, and the solid color fabric  face down on the top, but you have to make sure your zipper is face down and the other side is sandwiched in between your new fabric, like this:

DIY Makeup Bag- Super Easy Tutorial! | www.amusingmj.com Now just repeat the process from before: sew halfway down, leave your needle in the fabric, lift the presser foot and move the zipper to the other side, and sew the rest of the way.

Now your bag should look alot like this:

DIY Makeup Bag- Super Easy Tutorial! | www.amusingmj.com

I highly recommend ironing at this stage so that the seams next to the zipper are as flat as possible.  Once you’ve done that its time to seal up your bag.  IMPORTANT STEP!!! Make sure your zipper is at least partially unzipped.  You are about to seal up the other three sides of this, so if your zipper is zipped all the way up, it becomes VERY difficult to open a zipper from the inside and you will be very frustrated with yourself for forgetting this very simple step.  Just ask me how I know.

Now, fold the fabric so your outside pieces are facing each other (for mine this means my navy fabric is facing out) and sew all three remaining sides together.  Don’t forget to back stitch at the beginning and the end!

DIY Makeup Bag- Super Easy Tutorial! | www.amusingmj.com This should be one continuous line, when you get to the corners just leave your needle in the fabric, lift the presser foot and move your fabric until your next side is lined up. Once you are done, trim off any excess pieces (did I mention I’m bad at measuring and cutting so I frequently have sides that don’t line up perfectly?? Totally acceptable)

You have two choices now.  You can cut your corners off at an angle like we did for the burp cloths and then turn your piece through the zipper side… see aren’t you glad you left it partially unzipped? This will make it a rectangular pencil bag like this:

DIY Makeup Bag- Super Easy Tutorial! | www.amusingmj.com

Or you can do another step like I did to make it stand up on its own and look a little more like a makeup bag. For this step, leave it inside out and take one corner and line up the seams so they are on top of each other like this:

DIY Makeup Bag- Super Easy Tutorial! | www.amusingmj.com

Measure about an inch and a half up and stitch a line across it (again, sorry for the weird lighting on a few of these):

DIY Makeup Bag- Super Easy Tutorial! | www.amusingmj.com

Then trim off your excess:

DIY Makeup Bag- Super Easy Tutorial! | www.amusingmj.com

Rinse and repeat on your other corner, now when you turn your bag inside out, it looks like this:

DIY Makeup Bag- Super Easy Tutorial! | www.amusingmj.com


And its the perfect size for makeup, jewelry, etc!