The Ladies in Red

Back in the day, my great grandfather did a little bit of woodworking and a few of his pieces are still floating around in family member’s homes.  Two of them were small twin dressers which had been separated, but neither were being used anymore. My aunt had one she was willing to get rid of and my mother had another in her basement that wasn’t being used.  So I decided these two would be perfect side tables for my guest room (additional storage for the win!).  My aunt’s had been painted a creamy white color and my mom’s a blue one, somewhere through the years. So I decided these two needed to be spruced up in a matching spray paint before they made it into the guest room.

Here’s my super fast tutorial on how to spray paint a piece of furniture (ps… if you haven’t used spray paint in a while… that stuff is magical… I think its come a long way in the last ten years).

  1. Remove hardware and tape down/cover any parts you don’t want spray painted
  2. Lightly sand (with around 150 grit sand paper or sanding block)
  3. Prime
  4. Spray paint LIGHTLY a first coat
  5. Add second LIGHT coat
  6. If necessary, add a light 3rd coat

And so you can see the steps in action:

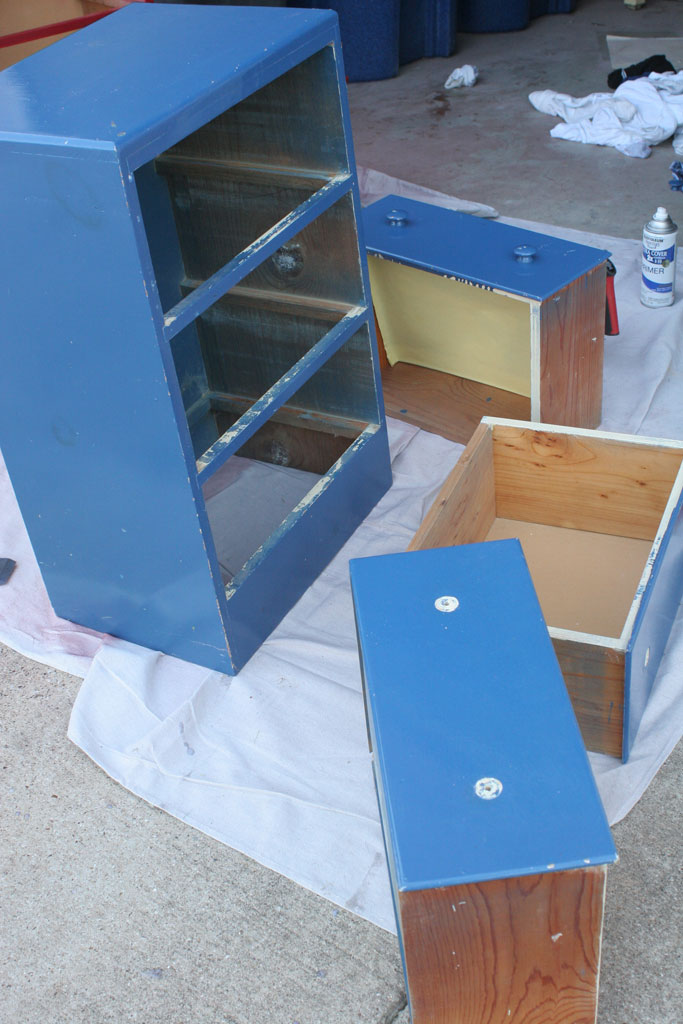
Step 1: Remove the hardware and cover any areas you don’t want painted.  The paint jobs on these before had not been all that careful about where the paint went, so I didn’t cover any parts of my drawer, I didn’t mind if the sides got some red paint on them.

side-dresser-bef1 
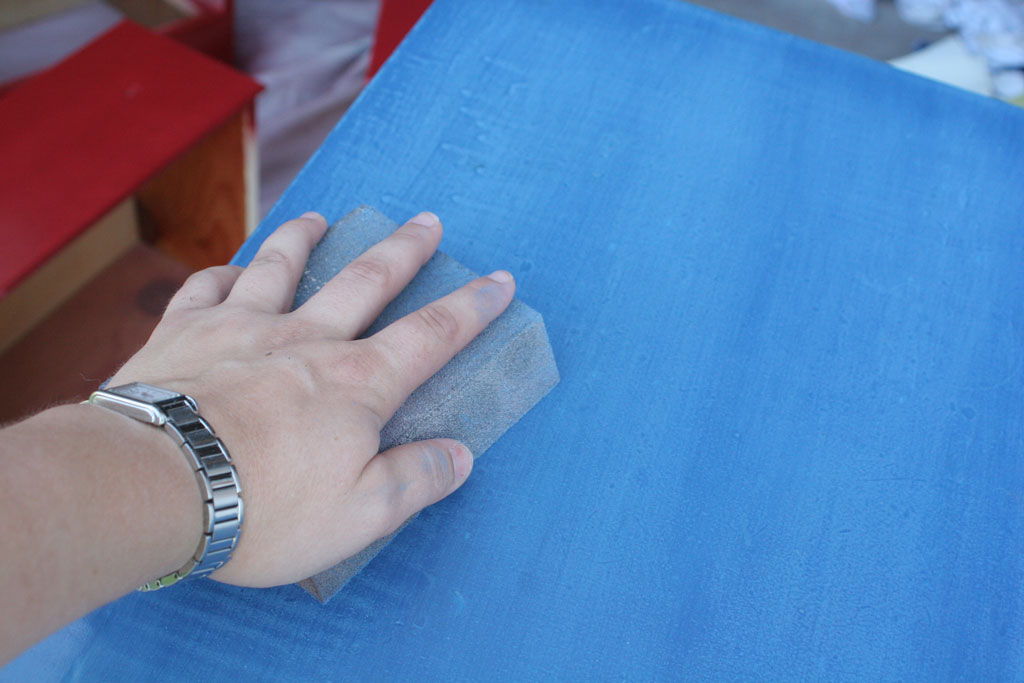
Step 2: Lightly Sand- I use whatever I have on hand, but somewhere around 150 grit sand paper or a medium grit sanding sponge.  You want to take off a little bit of the sheen, but mostly just rough it up a bit.  (WARNING: If what you are sanding was painted prior to 1978 you should check it for lead paint.  IF it has lead paint DON’T SAND IT. Sanding lead paint releases toxins that you don’t want to release.  If that is the case, just skip this step and go straight to priming.) side-dresser-sanding 
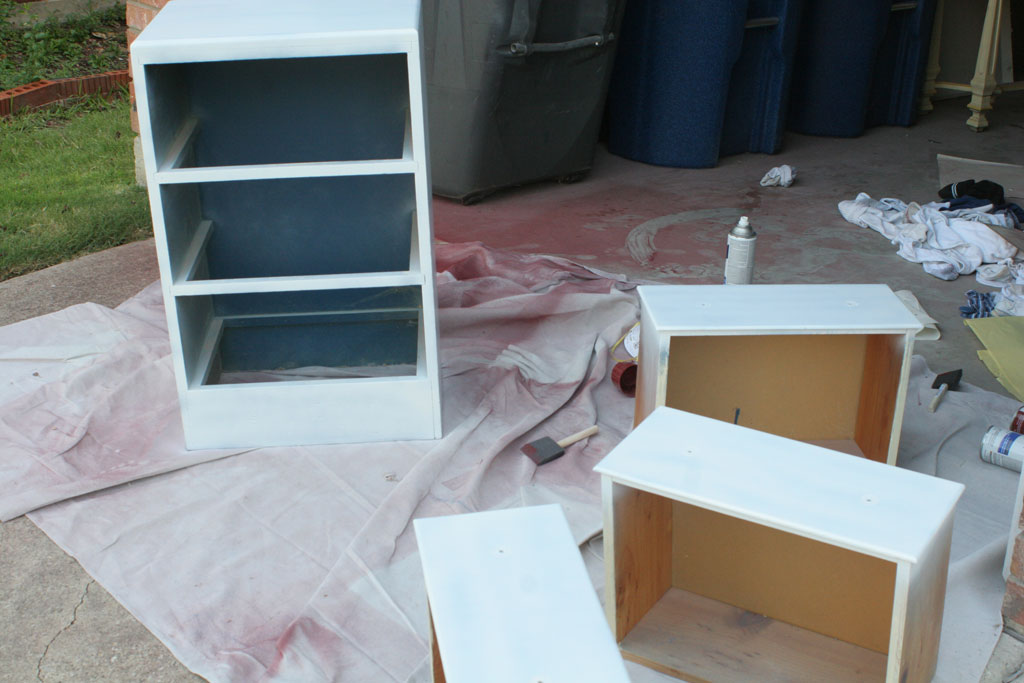
Step 3: Prime it- I usually use Rustoleum’s Spray Paint primer in white.  You can use their dark gray primer if you are painting it a dark color, but I’ve never had a problem using the white.  You’ll see below I paint these a fairly dark red it had no problem covering the white primer in 2 coats. Check out steps 4 and 5 for some generic spray painting tips that are good to know regardless of what step you are on!

side-dresser-primer

Step 4 and 5: If this is your first time painting something, here are a few of my most helpful tips: 

  • Spend 5 bucks one time on the extra spray paint trigger handle… you can use it forever and will save your finger from getting that very attractive line of spray paint on it (not to mention its way more comfortable).  You can see it on my paint can in the pictures below. WORTH. EVERY. PENNY. 
  • You should always keep the can 6 to 12 inches away from your piece when spraying
  • Start spraying just before your piece of furniture (so the first seconds go into the air) and JUST KEEP MOVING.
  • Your first coat should barely cover the piece… it’ll look splotchy and incomplete. THATS OKAY. You are going to add a second coat.
  • On the second coat, treat it the same as the first coat, keep it moving, and spray lightly to avoid drips
  • If it still isn’t covered or doesn’t look even, do a third light coat.  side-dresser-red

Since I actually did this project pre-blog I don’t have a picture between the two coats, but you get my gist. I used Rustoleum’s Colonial Red spray paint in Semi-gloss.  Its one of my favorite dark red colors.

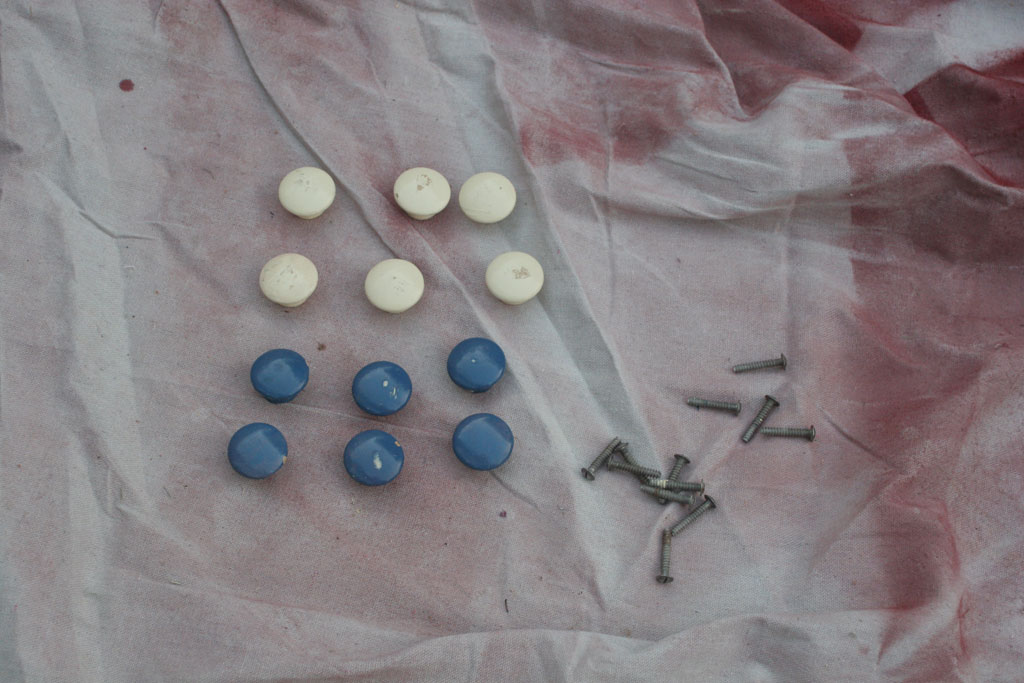
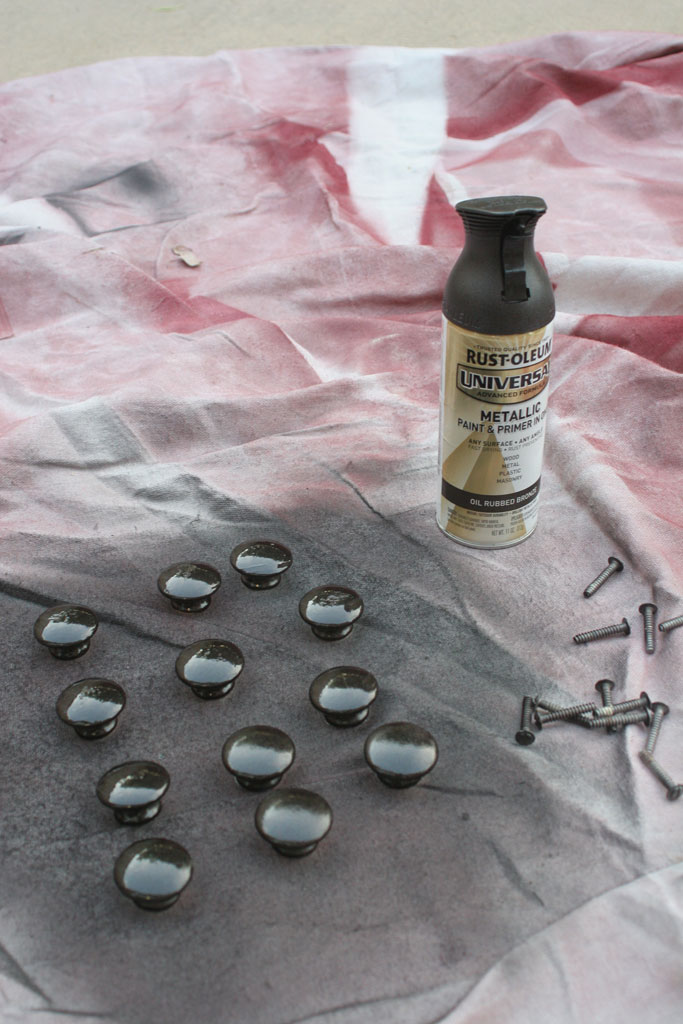
I didn’t want to go out and buy new hardware for these dressers, but I felt that the wood knobs in the same color looked a little cheesy, so I decided to paint them with a metallic spray paint Rustoleum’s Oil Rubbed Bronze.  I followed the same procedure I listed out above, just this time I didn’t prime since it is paint and primer in one.

side-dresser-knobsbef side-dresser-knobsaft

I haven’t shown this room on the blog yet, but here they are in action in the guest room!

  guest-room-dresser1 guest-room-dresser guest-room-dresser2

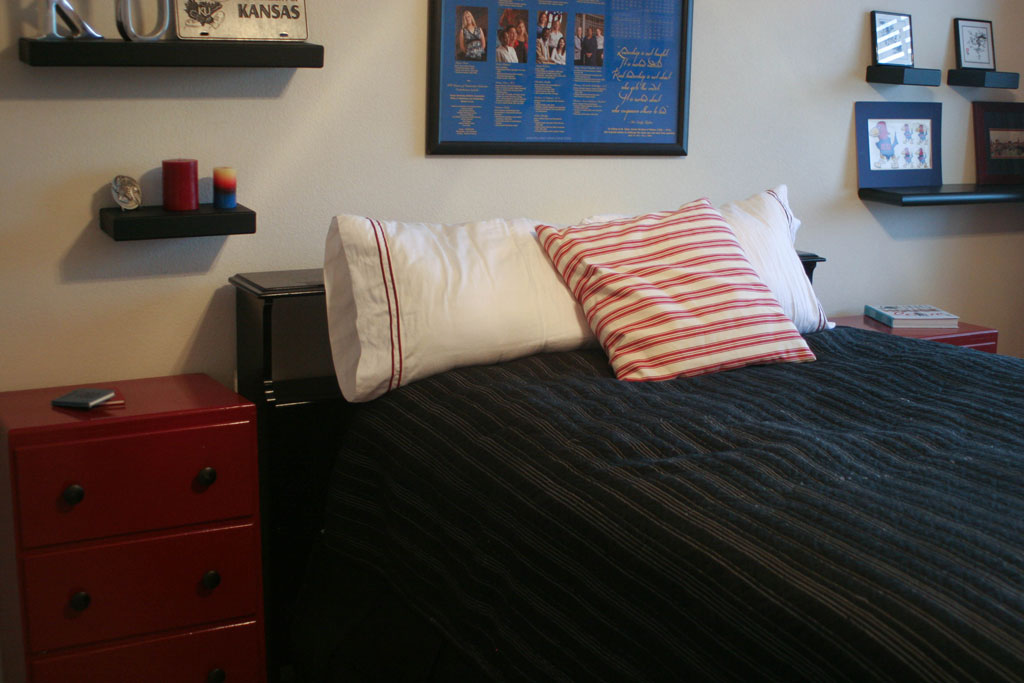
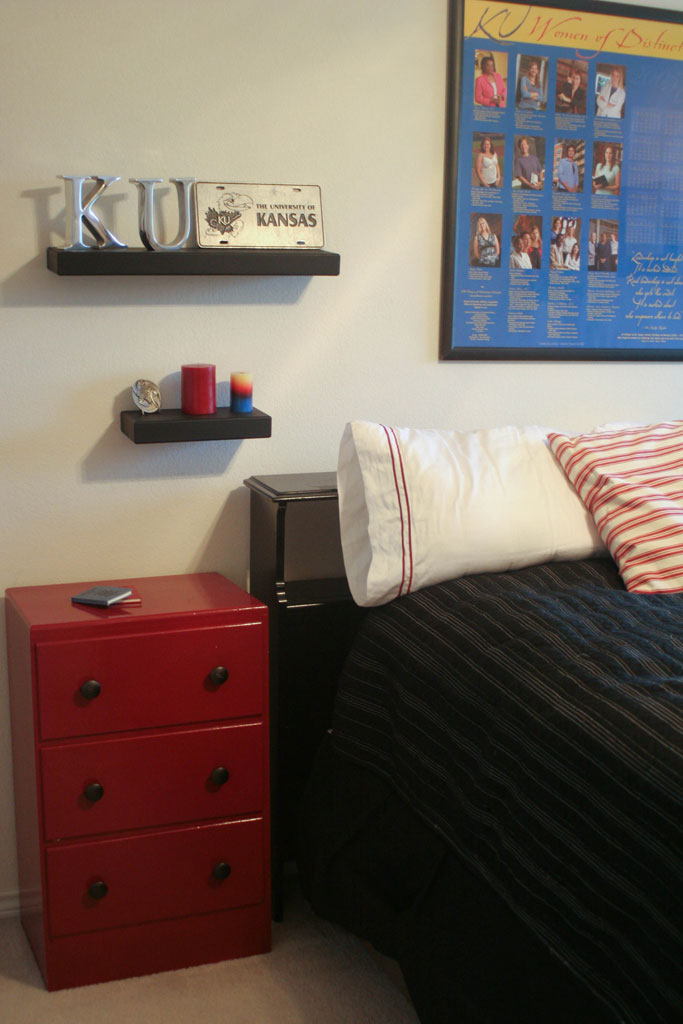
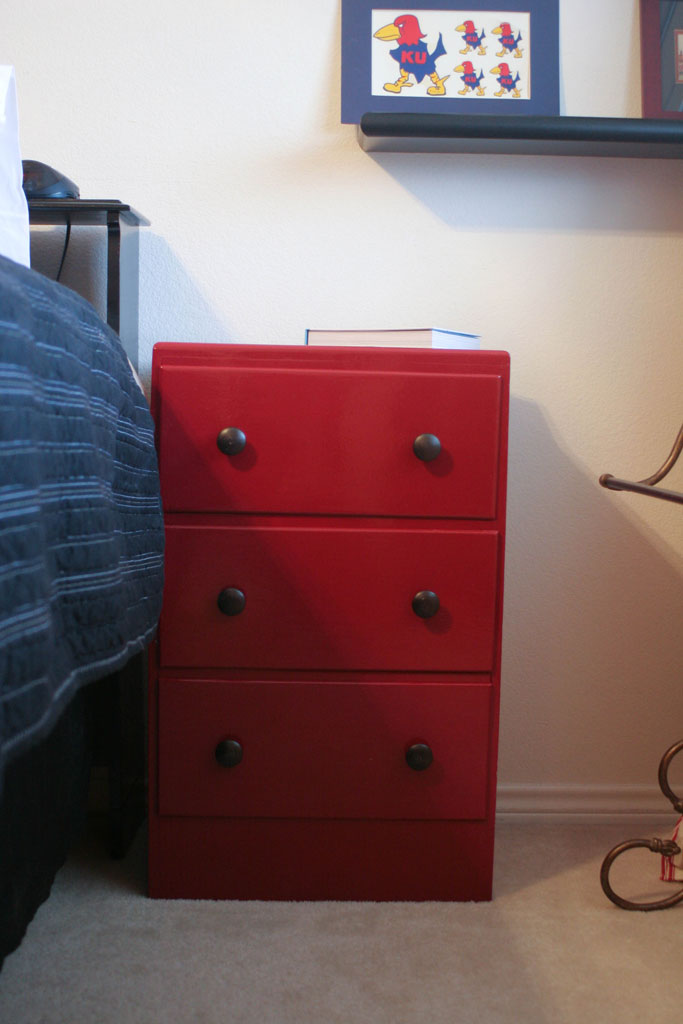
Voila! Cute little matching side dressers!

The Flowers that Lived

So I told you guys last week about my major garden fail so I thought I’d show you the part of the backyard that looks AWESOME, although to be honest, very little of it has anything to do with me.  For our wedding last May we were going to host the Bridesmaid’s Luncheon in my backyard. But my backyard left a LOT to be desired.  When I moved in there was ONE plant in my backyard. Not one flower bed- one plant.  Which you can see in the picture below.  (I added the potted plants and my dad planted the roses two years ago).  The one plant that was there at move in is the tiny little desert looking plant hiding behind the air conditioner.

backyard-at-movein

My grass still leaves a lot to be desired (although it looks pretty good in the picture above not long after move-in… so probably the problem is me!), but I wanted to add some landscaping in to add a little extra va va voom.  I found a local landscaping guy that a friend recommended and hired him to do a little work.  I sent him a few photos, he drew up a plan, and for a very reasonable amount of money he came out with all the plants, edging, and mulch to improve 2 different parts of my lawn.  I wanted him to focus on the back corner (which is under my neighbor’s tree and couldn’t grown any grass)

backyard-before backyard-before1

And the part right by the air conditioner where the lone plant in the backyard was, which I had let weeds grow over after my zinnias died last fall. backyard-before2

I wanted something a little more permanent and something I didn’t have to worry about hand watering all the time.  Fortunately the landscaping guy (for anyone who is curious it was Timberline Lawn and Landscape) who came out to do the work also rigged up my existing sprinkler system to water how it needed to be watered.  Here is what it looked like right after he left:

backyard-after backyard-after1

Check out how awesome they looked after he came and spruced them up!! And I’m happy to report that despite the interminable July in Texas heat… those areas still look pretty great! Here is what they look like today:

flowers-after flowers-after1

For the most part they look pretty great despite the heat! (I may lose the Oak Leaf Hydrangea in the top pic.  And just for a fun comparison (you’ll have to scroll back up to the very first picture) the roses I planted myself my dad planted in 100+ heat two years ago are clearly thriving! They are a little sunbleached, and I’ll have to show you what they look like in the spring, but man oh man are they beautiful.  They truly live up to their ‘knockout roses’ name.  roses


Let’s be real here…

Or probably more appropriately titled… How to kill all your plants. In one easy step.

I have a lot of things in common with my mom and grandmother but one is how we deal with being upset. If we are having a bad day, we all make it better by going to buy flowers: cut flowers for vases or pots to plant outside, it doesn’t really matter. My husband knows that if I bought flowers it was a bad day.

When I was in the process of moving into my house I had a very close friend going through a really tough time and it hit me hard as well, so when my parents came down they helped me plant a few flowers in my yard and set up a couple of planters full of annuals to cheer me up. And each spring I plant new pots full of pretty annuals that are visible out of my kitchen sliding glass door on the side patio. The shelves the plants are all on came from my grandmother’s basement and are the perfect way to spruce up this plain concrete patio on the side of my house. (I plan on painting them some fun color when it gets cool enough in Texas to spray paint again).

So here is what they look like at the beginning of the summer (I think this picture is actually from last year, but they look pretty similar every year).

flowers1

Some of the flowers I’ve had good luck with in this container garden in Texas are:

  • purple wave petunias (top two baskets)
  • Sweet Williams–usually come back every year on their own which is awesome
  • Vincas always do pretty well in the heat (white ones on the bottom)
  • Zinnias, which actually do much better in the ground, and are one of my favorite flowers to cut and bring in the house
  • Mandevilla– the pots on either side of the gate
  • Not shown but usually do well: Pentas and Impatiens

Ones that don’t fare so well:

  • Those two gerber daisy’s shown below? Never bloomed again, and wilt FAST from the Texas heat
  • Mom planted some sort of baby’s breath looking flower this year, didn’t even last through June
  • Snapdragons pretty while they bloomed, but didn’t do well in the containers flowers

And then for the part which relates to the title: I am part of a small group that meets once a week, and this week one (of the many) topic{s} we talked about was the tendency we have to ‘put our best foot forward’ or to not show weakness. And I think blogs definitely play into that. I always love reading a blog post where someone explains that not everything is a well put together home, and in fact some of the happiest are anything but clean, perfect spaces all the time. (I know mine wasn’t growing up… thanks to 3 kids and ALL our friends)

So I never want to pretend that I have it all together or that my house is clean all the time (I can just hear my college roommates/parents laughing out loud at this statement). So here’s a post to show you just how wrong things can go in my world.

Last week was a crazy week in my world… I traveled for work and my youth director husband had his big camp (which I went to as an adult sponsor). So we were both gone for the better part of a week. Normally I have someone to come into the house to take care of Lexie and water my plants, but all my normal dog-sitters were also at camp… so we boarded her. But in the rush I completely forgot to get someone to come by and water the plants and that 4 days of 104+ Texas heat and no water=dead plants.

So here is the terrible after… what your plants SHOULDN’T look like. I’m still trying to rescue a few of them, but I think for the most part I’ll wait a bit and plant some fall flowers in their places. flowers-dead1 flowers-dead But on a brighter note, this guy below got the same water deprivation treatment… and decided to bloom in a gorgeous orange bloom. I bought this one as an already planted planter, so I have no idea what kind of plant this is, but I loved the surprise bloom!

flowers-2 So let’s pretend the pictures above are just really great ‘before’ pics for how awesome they are going to look in a month or two when I get new plants planted and convince my almost black thumb to turn a little greener.