Feed N Wax

Welcome back from Christmas break! Did you get your batteries recharged? I did.  I had a blast spending time with my family last week and am always very grateful for the break from the daily grind.

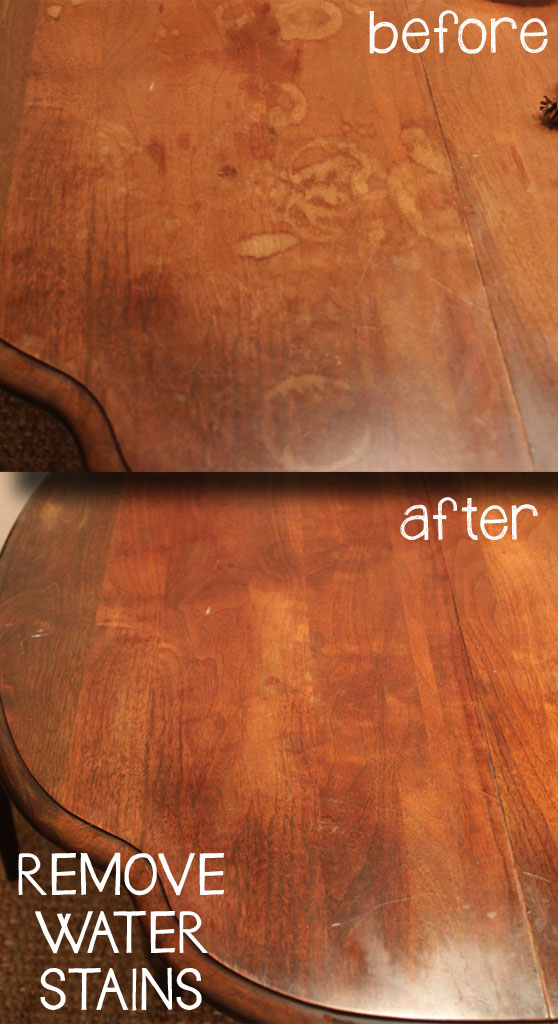
But moving on to more DIY things, this is a project I actually finished before Christmas but didn’t get around to blogging about until now.  The table I have in my dining room was in my grandfather’s office for a really long time and has seen better days.  It has water rings and unknown stains all over the top; you can see them pretty clearly here and here.  So when I took all of my fall décor off, I decided it was time to try to make it look a little bit nicer.   Check out that damage:

table1

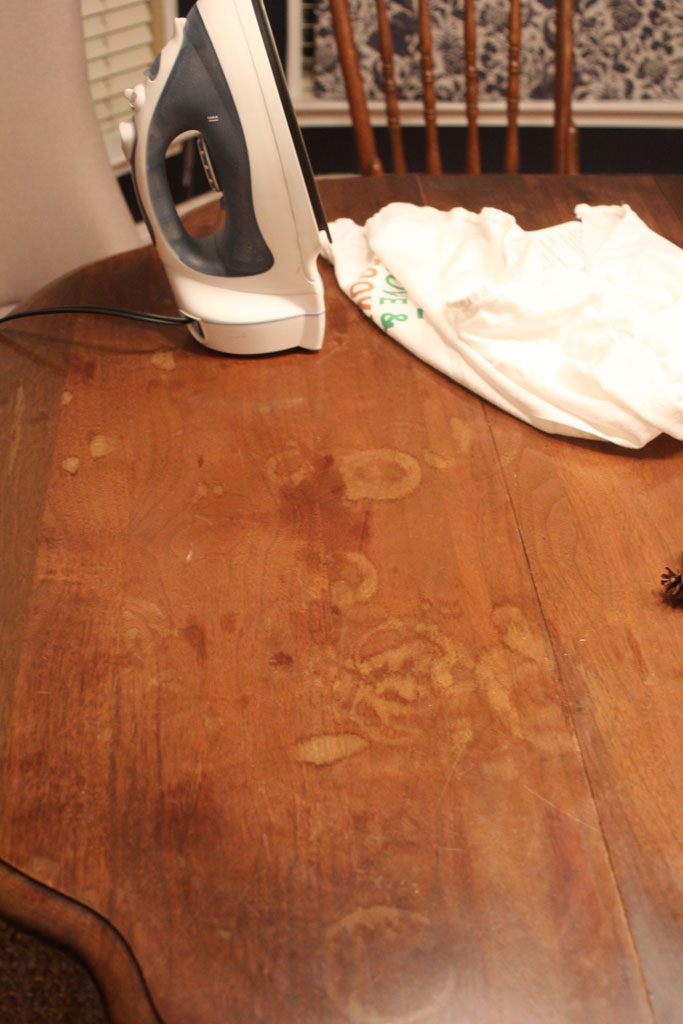
I had seen a Pinterest tip about ironing with a dry cloth to try to remove water rings, and decided I had nothing to lose. But apparently I had nothing to gain either.  That little trick did NADA to my (probably decades old) water stains.  So next I busted out my favorite wood restoration product, Howard’s Feed N Wax.  Although I have had a ton of luck using this stuff on other pieces of wood (see this link) I didn’t have high hopes for this table… it was in BAD shape.  And I wasn’t sure the Feed N Wax would be able to take care of the water rings.

table3

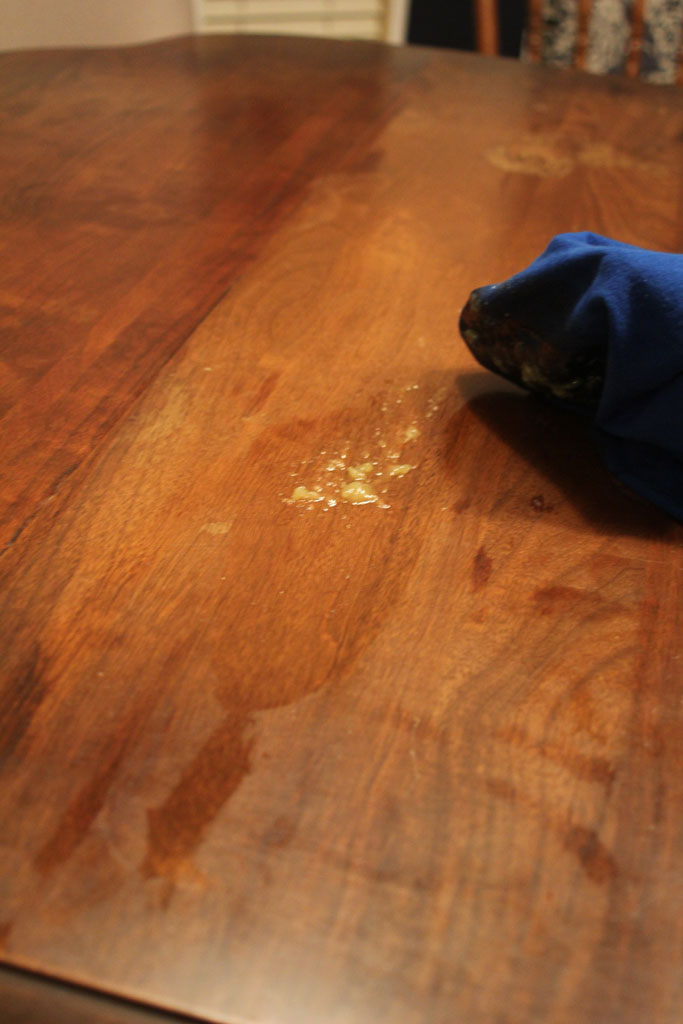
This stuff is so simple to use (and it smells deliciously citrus-y): wipe it onto the table in the direction of the wood grain, wait 20 minutes, buff out with a dry cloth and wipe off any excess.  One coat of that and a little bit of elbow grease and here’s how she was looking afterwards:

table2

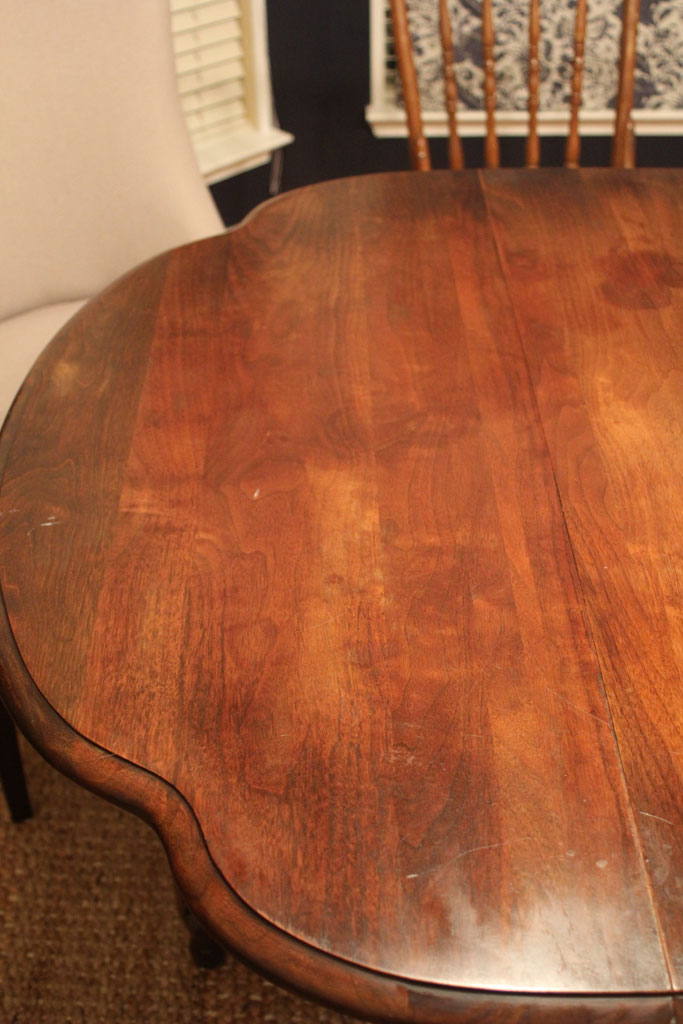
It is still far from perfect (and you can tell that the two leaves weren’t used for many of the years), but it looks SO MUCH BETTER.  I can’t even express how much of a difference it made for this table… even my twin brother noticed… and he isn’t the most observant of people!

table6 
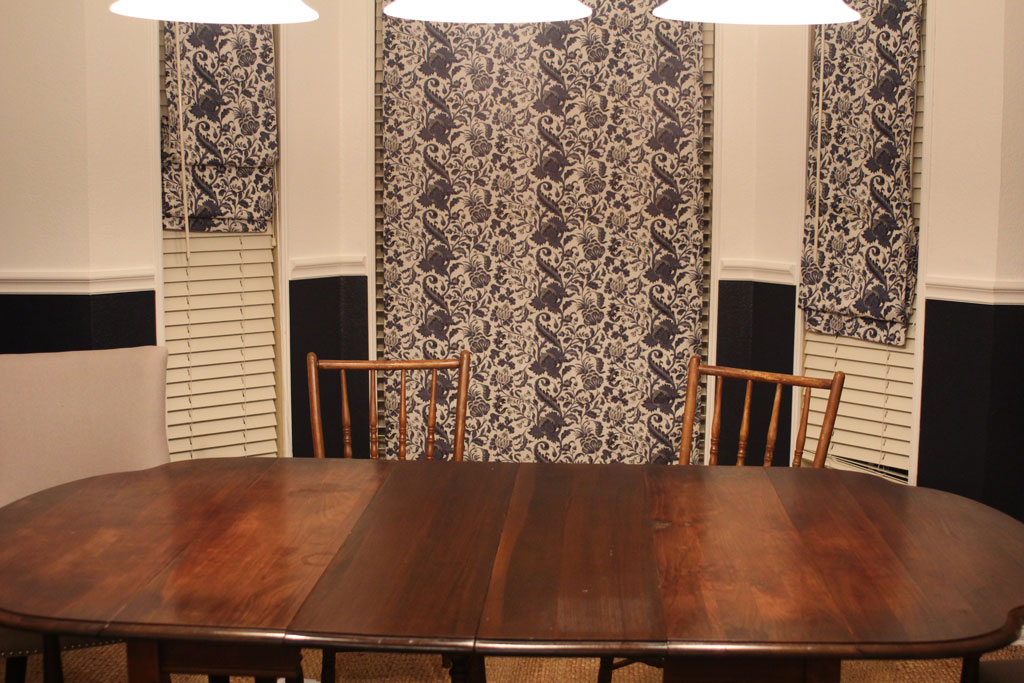
It makes me want to use this on every piece of wood furniture I own!!  I’m definitely not paid or perked to say anything about this product, but I love it so much.  I’ve had the same bottle for a couple of years and used it on some pretty substantial pieces and still have a ton leftover. You can find it by the stains/wood conditioners in any of your hardware/big box stores.  This is one of those easy fixes that every time I do I think… why didn’t I do this sooner?! It is so easy and makes a ton of difference!  And just for fun, a couple more before and afters:

Table-before-and-After

remove-water-rings

DIY Headband Station

This last weekend I flew out to Little Rock for a baby shower for one of my best friends, Lauren. You can see her here as a bridesmaid in my wedding!  She and her husband are expecting a little girl, Kate, in January.  (PS… that is going to be the most GORGEOUS child because both she and her husband are ridiculously good looking).  We’ve been friends since college and lived together for our senior year of college.  (Sidenote… she explained to her husband just how amazing my master closet is compared to how my closet was in college… they may or may not have had to shove all my crap in and close the door on multiple occasions just to keep the room presentable).

laurenshower1

Anyway,  I was so so happy to get to go spend the day with her to celebrate her and her about to be new baby girl.  And I can’t take ANY credit for the shower at all, I was just a guest, but I just couldn’t help but show you guys one of the ‘activities’ the hosts had prepared for us.  This was an awesome shower full of cute decor, great food and while I absolutely love baby showers, I am not a big fan of cheesy shower games.  Fortunately, these awesome hostesses had none of the cheesiness and all of the awesomeness. For the activity, they had a headband making station set up for all the guests to “create their own masterpiece” for baby Kate.

laurenshower2

The hosts had purchased some elastic on the internet and cut it into pieces which they hung on a string (bad blogger… I forgot to take a picture of that!  and all my pictures are iPhone pics since I wasn’t planning to blog about the shower!!).  Then on the table they had an assortment of felt, ribbon, flowers, beads, etc and a hot glue gun to apply them.  There were directions on the table that had appropriate lengths for different ages:

laurenshower10

I picked out a cute navy and white chevron pattern and decided to make a cute little Jayhawk headband for precious Kate.  I made a few felt flowers like I did for this wreath in red and blue.

laurenshower4

And what project is complete without a bit of cake??

laurenshower5

Here is the final product:

laurenshower3

And don’t worry… like any good basketball fan I made it so that it would fit baby Kate right around March Madness! When we finished them up, the hosts had a cute little dress stand to hang them on:


laurenshower9


The proud dad to be was checking out all the fun things he’ll have to dress Kate up in.

laurenshower8


Sorry for the blurry iPhone pictures, but check out all the beautiful headbands that the guests made:

laurenshower6


The great thing about this project is that you don’t have to be super crafty to make cute ones! With all the options and pre-made flowers etc, anyone who can use a hot glue gun can make a cute headband!

I don’t know where the host purchased her elastic, but a quick Google search for elastic by the yard and I found this website to buy some from online.

I thought this was a great idea for a shower that I will probably unashamedly steal for another baby shower sometime!!


laurenshower11

Bats and Mummies, Oh My!

I’m not a very naturally creative person… I can’t paint, draw or anything traditionally ‘artistic’ however, I am AWESOME at mimicking things.  If I see something, I can usually re-create it. I found these two pins on pinterest here and here and decided they would look pretty good combined! So I picked up a straw wreath form from Michael’s. In hindsight, I probably should have left the plastic wrapping on… this thing is MESSY.

hwreath7

I used a packages of 6 yards of cheesecloth and wrapped it around the wreath form (The cheesecloth comes folded into several layers and I left it folded for this part of the wreath so it would cover the straw color.

hwreath6

Once it was wrapped it completely I twisted the end and cut it off.

hwreath9

I wanted it to be a little rougher around the edges so I took the remaining cheesecloth and pulled it apart, wrapping it around the wreath very loosely and cutting the edges roughly.

hwreath5

Once I had it wrapped up the way I wanted it to be, I took it out to my patio and sprayed some scotch guard on it.  My front porch is covered, but since this would be hanging outside, I wanted it to have a little more protection.

hwreath4

Next up was adding the bats.  I don’t have the patience to cut out 15 bats for my front porch wreath, but I thought I could manage three.  I freehanded a bat on paper and then just traced the paper onto some black felt and cut it out.

hwreath3

hwreath2

Then it was simply a matter of spraying spray adhesive to the back of them and placing them on the wreath. I found some halloween (ish) ribbon to hang around it, and added it to my front door.

hwreath8

Not bad for less than an hour and $10 dollars!