Dining Room Table

Do you have those friends who just ‘get you’?  They enjoy the same things, put up with your intense craziness and are always up to help you out when you need something? For Reese and I, some of our best couple friends have been Kory and Julie. They were both in our wedding and we love spending time with them.

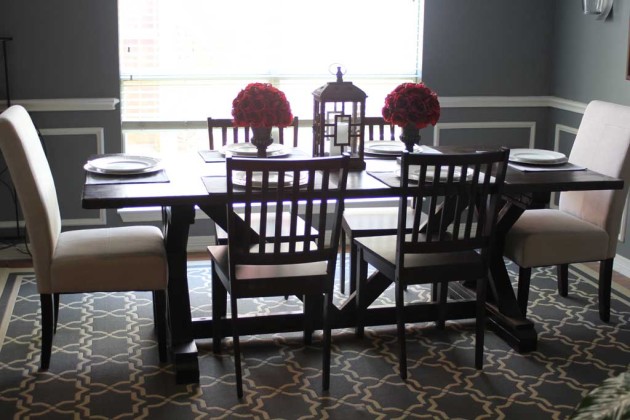
Kory and I are kindred spirits when it comes to projects. Both of our spouses love the fruits of our labors, but they tolerate more than love our project driven natures.  But when we all get together and start talking about projects, we tend to spur each other’s crazy project ideas on.  So when they moved into their house last year and needed a table, I gladly went along with their idea to build one. From scratch. Despite the fact that I had only built a small simple communion table for the church before and Kory had no experience building tables, we were confident we could give it a go (and if it ended up terribly, we were out less than $150 dollars). And unfortunately since this build was a year ago I only started taking pictures once I was sure this table would actually function and stand up on its own. But clearly, it did:

diningtable8

Julie, Kory and I emailed back and forth for about a week about designs and I found some Ana-White table plans and sent them a few different options.  We talked about what we thought we could feasibly do, and picked the X-Table that Ana-White created.  If you want to build a table like this for yourself, Ana-White’s plans are AMAZING and easy to follow. Click here if you want to see those plans. Together we came up with a materials list for them to purchase before our build day.

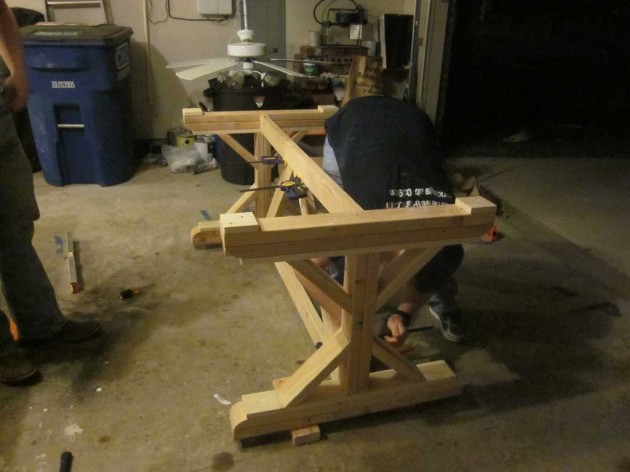
Bright and early Saturday morning Reese and I showed up at their house with all my tools in tow and we quickly set about following the plans.  The plans call for you to build the two X legs first, so we started following their direction carefully.  We secured every board with both wood glue and screws to make sure it would be extra solid.  (For the most part we built these two from the top down while they were upside down, putting screws in the bottom side so they would be less visible, so in some of these pictures these are upside down).

diningtable14

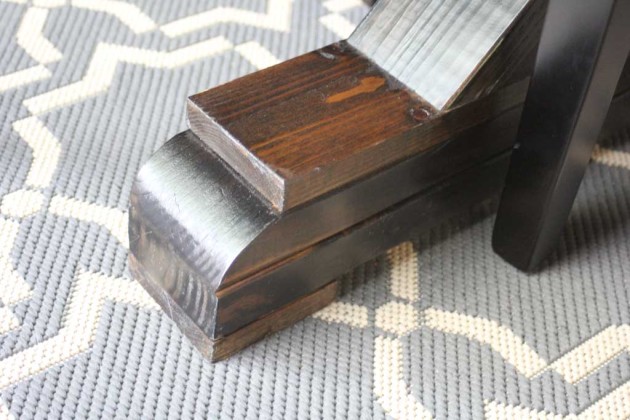
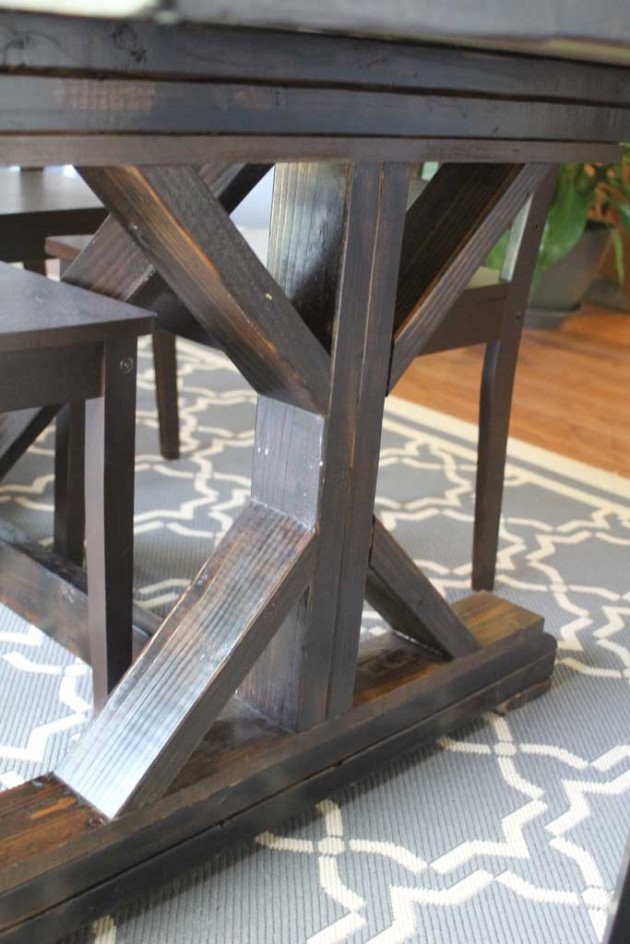
When it came down to the bottom of the legs there were two options: cut the board at a 45° angle, or cut it at multiple angles and then round it off with a belt sander.  We both liked the look of the rounded edges better than the harsher line of the 45° angle.  But since neither of us had ever tried this before (this was one of my first big projects with my baby) we found some scrap wood and decided to try it out and see if we could get it to work first.  And sure enough it was EASY.  We drew out the curve we thought we wanted and then just started changing the degree of the cut to match it.  If I remember correctly we did about 4 cuts at varying angles and then Kory took the belt sander to it to smooth out any rough parts and make it more curved.  From there we just repeated the process on the other end of that board and then made 3 more matching boards.  The most important part here is to make sure the edges of your board are still the same length as the board below (or above) for a seamless transition. The picture below shows what that curve looks like when the table is finished.

diningtable4

At this point in time we had two freestanding X legs for either end of the table.  Now it was time to build the top.  We had 4 2×8’s that were 8 feet long.  The plans after all called for an 8’ table.  But as we were starting to build the top of the table I looked at the pile of 8’ boards on the floor and said… This is going to be a MASSIVE table… are you sure it’s going to fit in your dining room? So we decided to go measure again… and sure enough… 8’ would have left little to no room for chairs at the head and foot of the table.  The good news was we didn’t have any of the long pieces cut or assembled yet, so we just took off an extra foot of the table to make it more of an appropriate size for their room.  And here is the first and most important rule of DIY-ing (besides safety of course) MEASURE TWICE! (In our table the V boards touch, while in Ana-White’s plans they have about a foot gap in between)

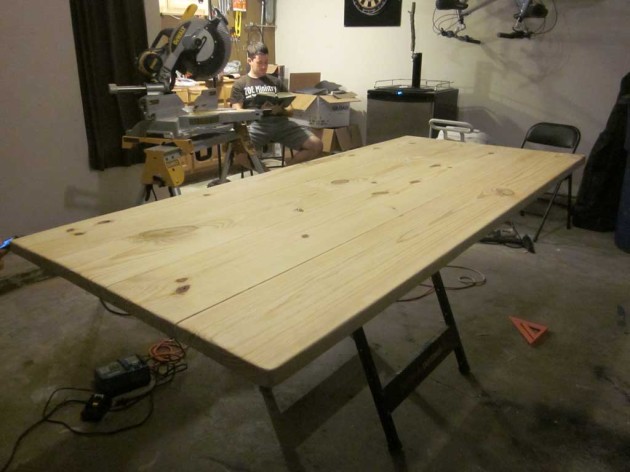
Once we had decided on that, we began the assembly of the top.  Using my Kreg Jig, we drilled pocket holes in the bottom of the 2x8s and secured them together with a small bead of glue between each board (we didn’t have clamps big enough to go across two boards, but trusted that the screws would keep them together enough to let the glue dry). This is what the top of the table looks like:

diningtable13

Next we secured the cross beam and the V boards (I’m sure they have a technical name and I’m equally sure I don’t know what it is) to the end pieces.  And this is where we left it for the evening.  Just to get a good visual we put the top on the bottom pieces to take a few pictures and see what it would look like.
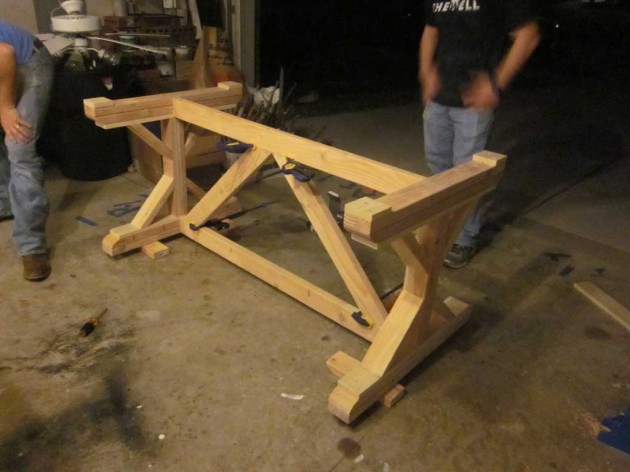
diningtable12

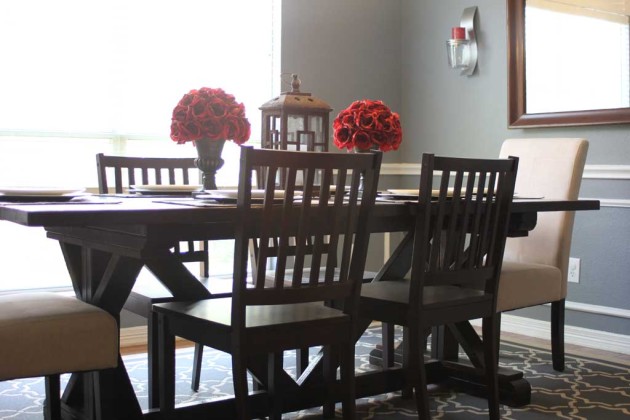
Not bad for a day’s work and about $150 worth of supplies! The whole project with stain and all was less than $200 dollars all in, which is pretty good for a 7’ long solid wood table!

The next day we came back to finish up the project, Kory had used the belt sander to sand the top smooth.  An un-evenness in the boards or flaws were sanded smooth.  It takes a lot of sanding, but this step is SO WORTH IT for a nice smooth top.  He also used it to round off the harsher edges of the top boards so that you can easily rest your forearms on the table without hurting them!

After we left, Kory and Julie did an ‘antiquing’ treatment Kory had read about online with steel wool, vinegar and tea. It is very similar to this tutorial. Then they stained the table with Minwax’s Dark Walnut and a couple coats of Polyurethane.

diningtable10

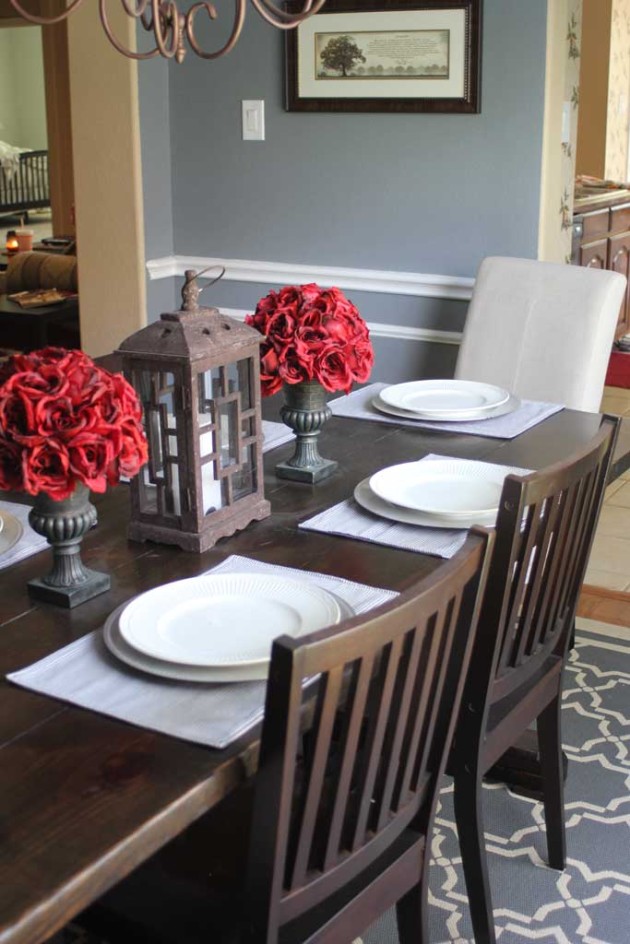
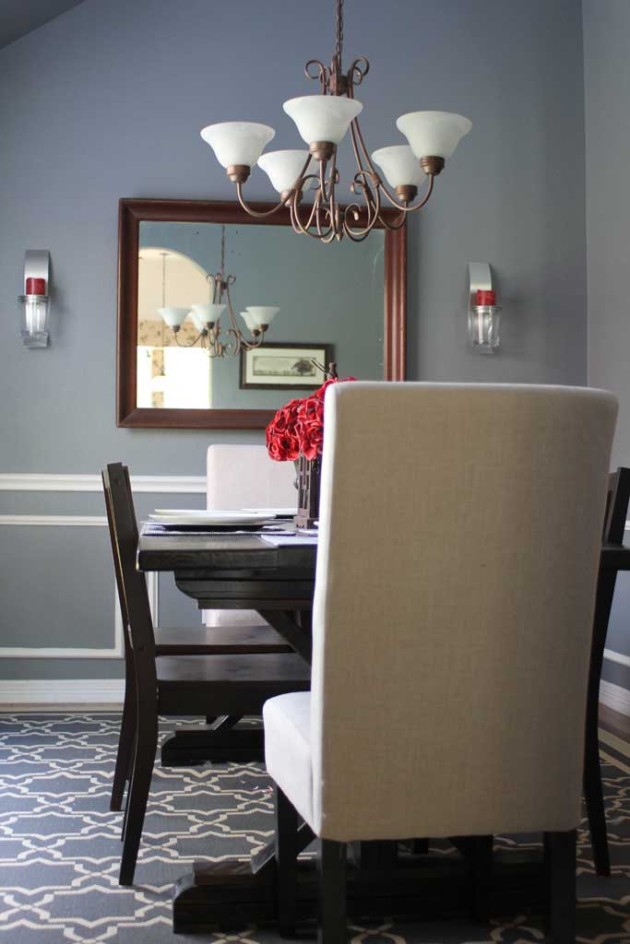
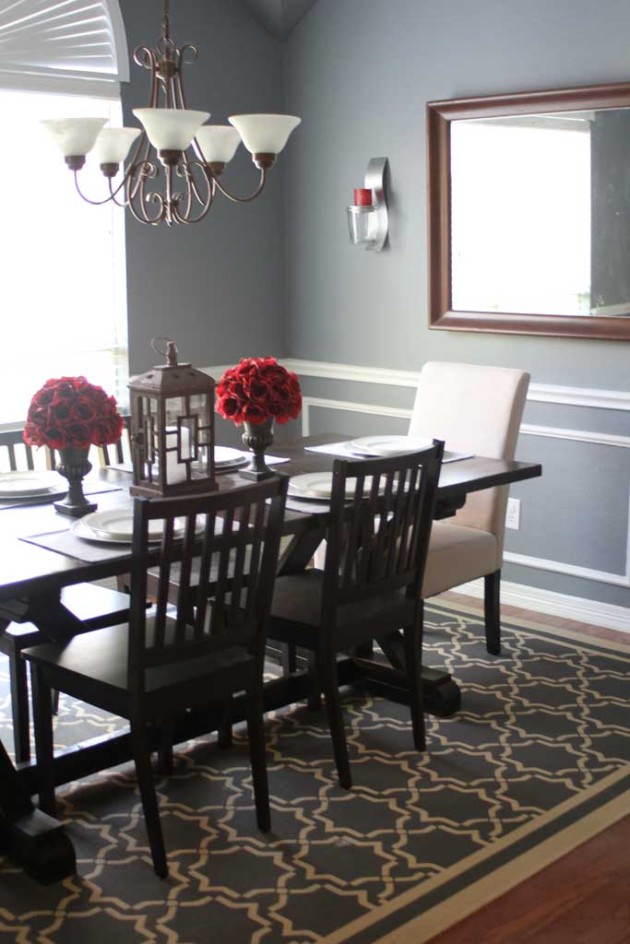
I think this table looks FANTASTIC and is a great addition to their home and we have gotten to enjoy the fruits of our labor with several good meals at this table! And didn’t she style it so well! I love this room… it is so happy and cheerful!! PS… All of these pictures were taken this past weekend, so this is what the table looks like almost 10 months after we built it!

diningtable9

An upclose of the legs:
diningtable2

diningtable5

diningtable6

Best Baby Shower Gift

I read about making these burp cloths from Ten June’s blog several years ago and they have been a staple project of mine ever since. I’m at that age where most of my friends got married 3 or 4 years ago and are starting to have kids, so I have baby showers galore to attend (but you won’t find me complaining… I have lots of little kiddos in my life to spoil). Anyway, right when I was learning to sew I had read about these and thought… well that looks easy enough. And it is!! It’s a super simple project that anyone can do… I promise! Your sewing lines don’t even have to be that straight for these to turn out really cute.  And they make great shower gifts (so all my pregnant friends avert your eyes… I’m spilling my secrets).

If you have never sewn anything before, I have a couple of easy tutorials on how to thread your machine and how to wind your bobbin, so check those out and then come back here to make your first project!

I buy the white chenille type fabric in one large bunch (that way I can use a 40% off coupon and get it much much cheaper) and then I buy the backside fabric in whatever fabrics I think are cute! My grandmother is a fabric hoarder collector who has passed down quite a bit of her unused fabric to me, but I also browse sales or grab some in cute patterns whenever I see it.  You can use just about any type of cotton fabric for the back.

burpcloths11

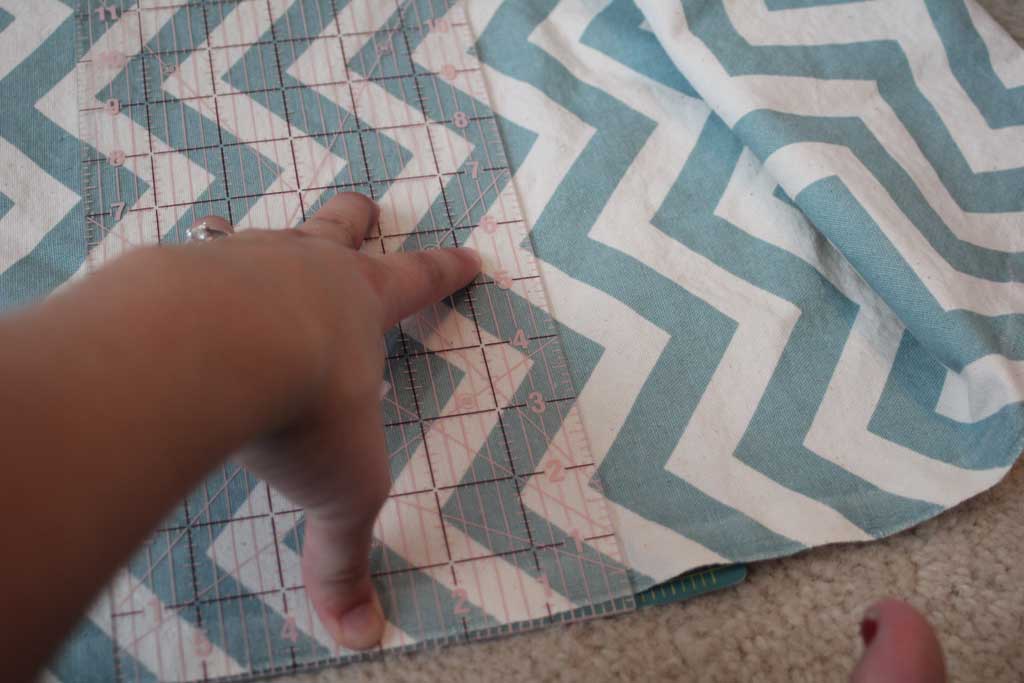
Your first step is to cut your fabric.  I make mine 18” x 12”.  The final product turns out to be 17.5”x11.5” since I use about a ¼ inch seam allowance on each side.  But if you want yours to be a different size… go for it, just make sure you have one piece of the chenille and one piece of the decorative fabric in the same size.  I use a rotary cutter and mat to cut mine, but a pair of sharp scissors will work just fine.  (if you plan on sewing some you should probably buy a good pair of sewing scissors to use just on fabric… dull scissors can tear the fabric or make it hard to cut, so I have one pair of scissors that is JUST FOR SEWING and says so in sharpie on the side so the husband won’t steal them for other purposes).

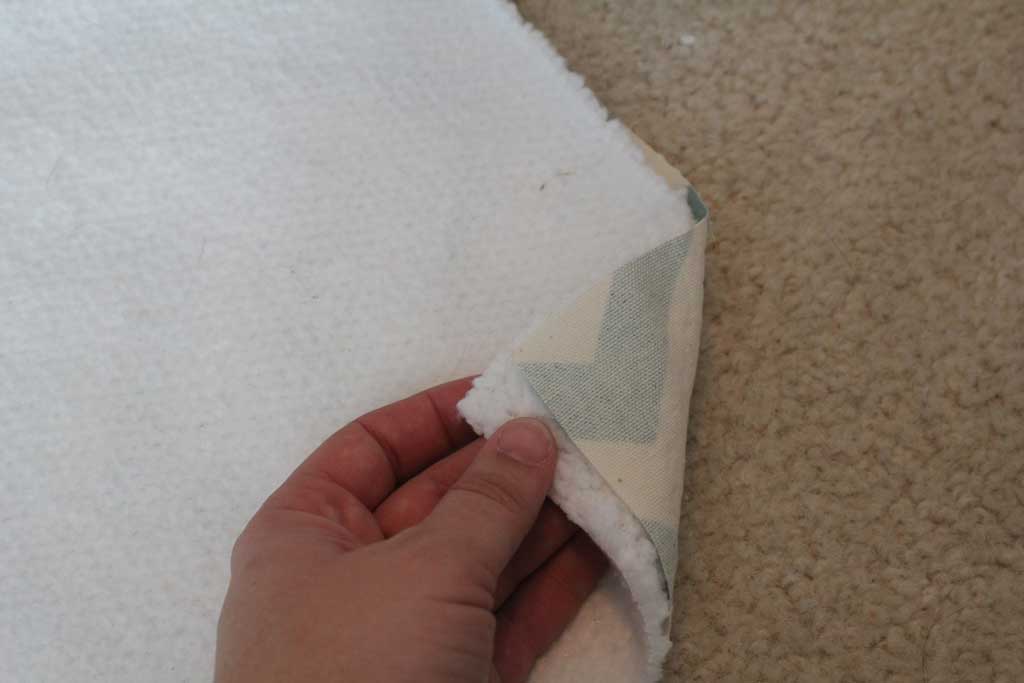
After you cut them, line them up and put the two pieces pretty sides together like this:

burpcloths10

Now if you have wound your bobbin and threaded your machine you are ready to start sewing!

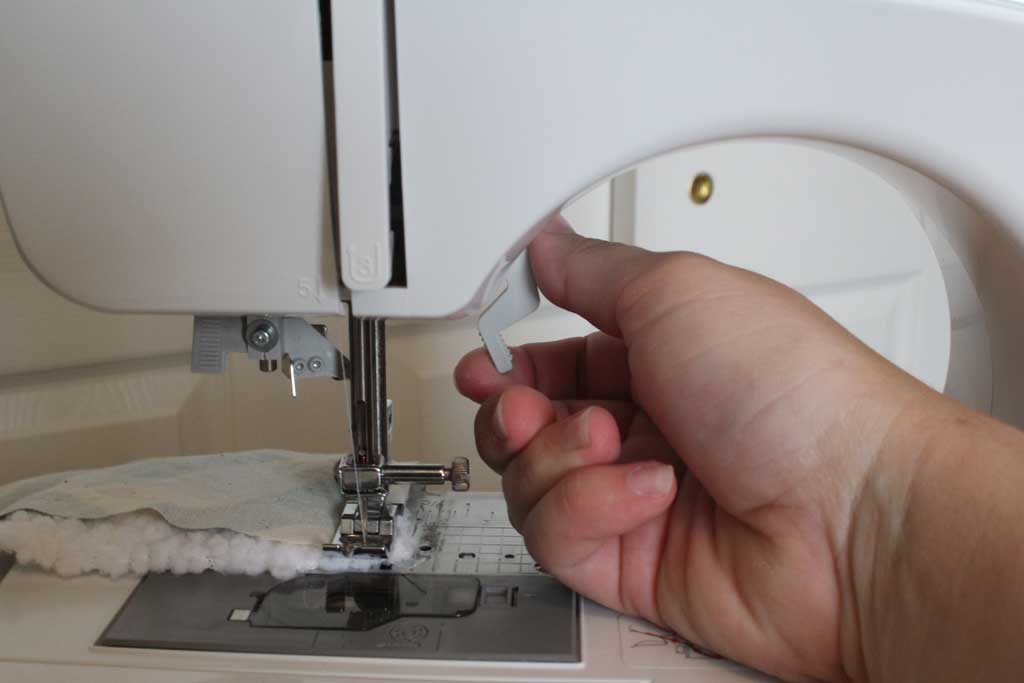
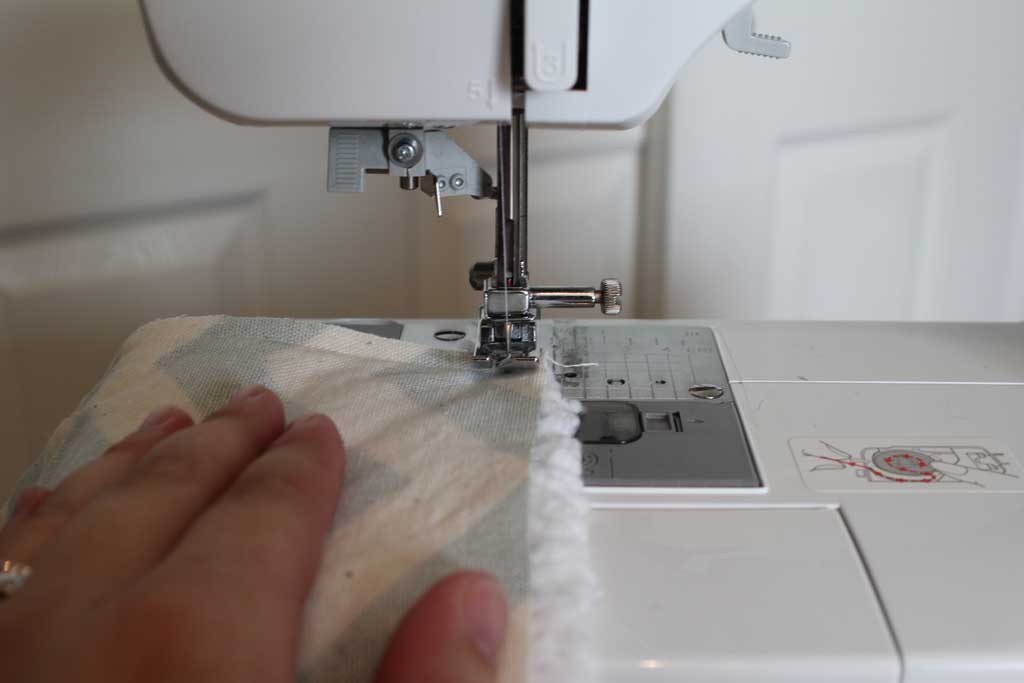
Lift up your presser foot (the flat metal thing) using the lever just to the right of it so that you can easily slide your fabric underneath it (the picture below is from a later step, so just ignore where the fabric is, but it shows you where the lever is for the presser foot).

burpcloths7

Line your fabric up under your presser foot so that the edge is aligned with the outside of your presser foot.  On my machine that gives me about a ¼ inch seam allowance. (if you are less confident in your straight line ability, you may want to line it up a little further out like the left hand line of that grid in the picture.  But line it up against something so it will help you keep your fabric straight. Now put the presser foot back down using the same lever so that it will keep your fabric in place while you sew.

burpcloths6

Now turn the circle on the right hand side of your machine towards you so that the needle goes into your fabric in the corner.  This helps you make sure that your thread doesn’t un-thread itself from your needle when you start sewing.

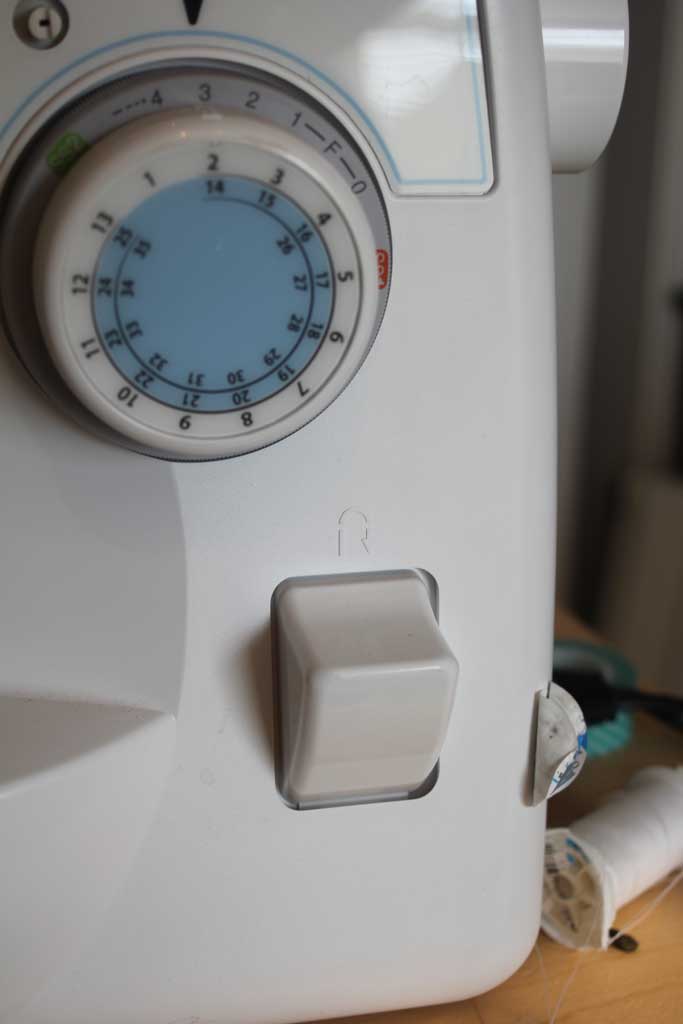
Now push down on the pedal with your foot lightly.  The first thing you want to do is three (or so) stitches.  Once you have these three, push on your backstitch button.  Mine is on the right side of my machine and looks like this (yours may be a little different, but might have a similar picture):

burpcloths9

It will automatically move your fabric backwards while you are holding it down.  So hold it down until you get back to where you started (3 stitches or so).  Once you are there, let the button go and the sewing machine will feed the fabric forwards again.  This makes the end of the stitch strong so it won’t come undone easily.

Your goal is to guide the fabric in a straight line now.  The machine will advance the fabric on its own, so you don’t need to push it in the right direction. This is where that line that you used to line up your fabric comes in handy.  Your goal on this side is to keep the edge of the fabric aligned with that line as the fabric moves ahead.  Keeping it on that line is much easier when it is going more slowly.  Your foot on the pedal is a lot like a car… the more you floor it the faster it will go, so until you get the hang of it (and if you are like me… even after that) go slow. Patience grasshopper.

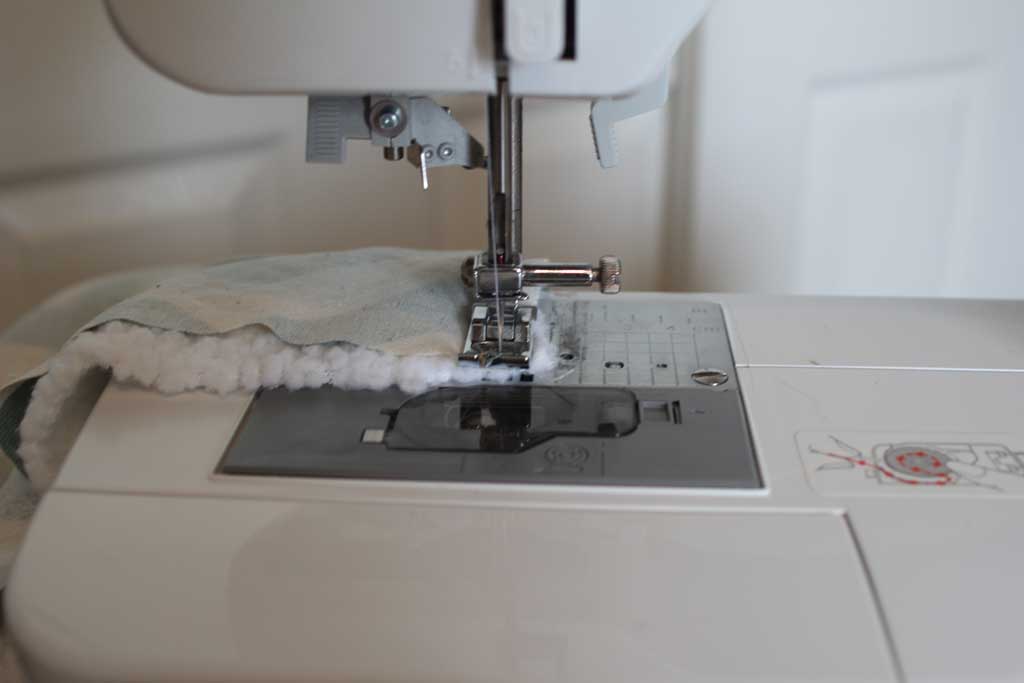
Once you get to the end of the row (stopping about a ¼ inch from the edge) there is a secret to making a sharp corner: use the wheel on the right-hand side to make your needle go down through the fabric in the corner.  Once your needle is down lift up the presser foot again, but your fabric should not be able to go anywhere because the needle is through it. Now rotate your fabric to the right so that the next edge to be sewn is lined up with the same line you used to line up your fabric before.

burpcloths8

Continue this on all four sides until you are about 3 inches from the corner where you began.  Backstitch about 3 stitches just like you did above.  Now when you are done, lift up your presser foot and use the wheel to make sure the needle is in the top position and pull your fabric out to the right of the presser foot and cut your thread.  Now trim your excess thread off so you don’t have any dangling threads.

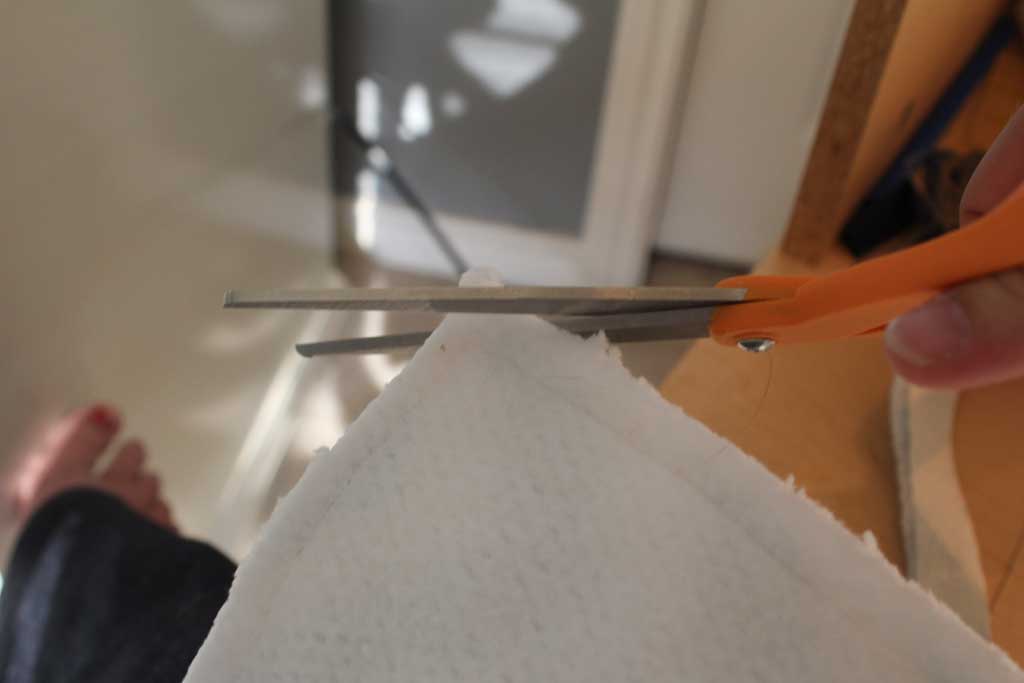
For the next step, cut the corners off of your fabric like this:

burpcloths5

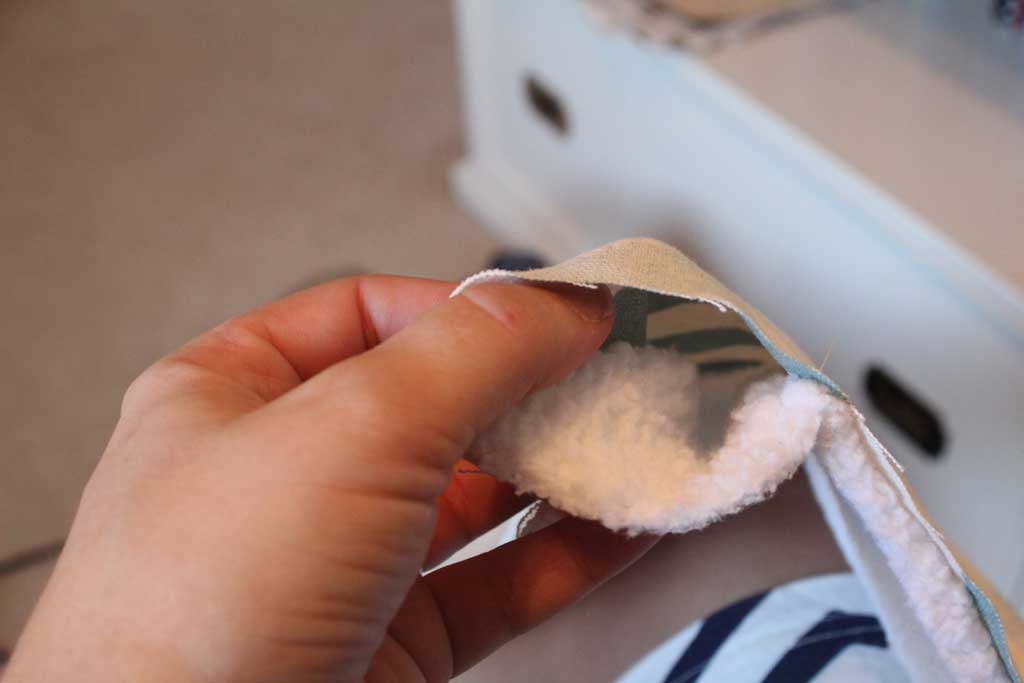
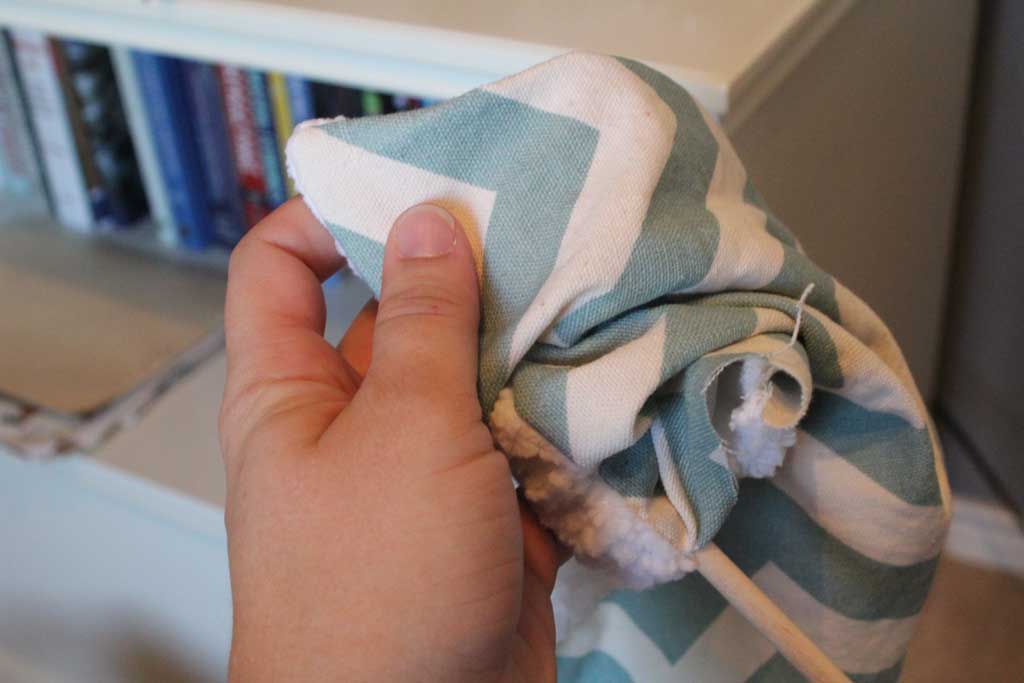
This makes it so that there is no excess fabric in the corners when you turn it right side out and you’ll get sharper corners that way.  Now it is time to turn your fabric right side out. Start with the little gap you left at the end of your project and start working the project inside out.

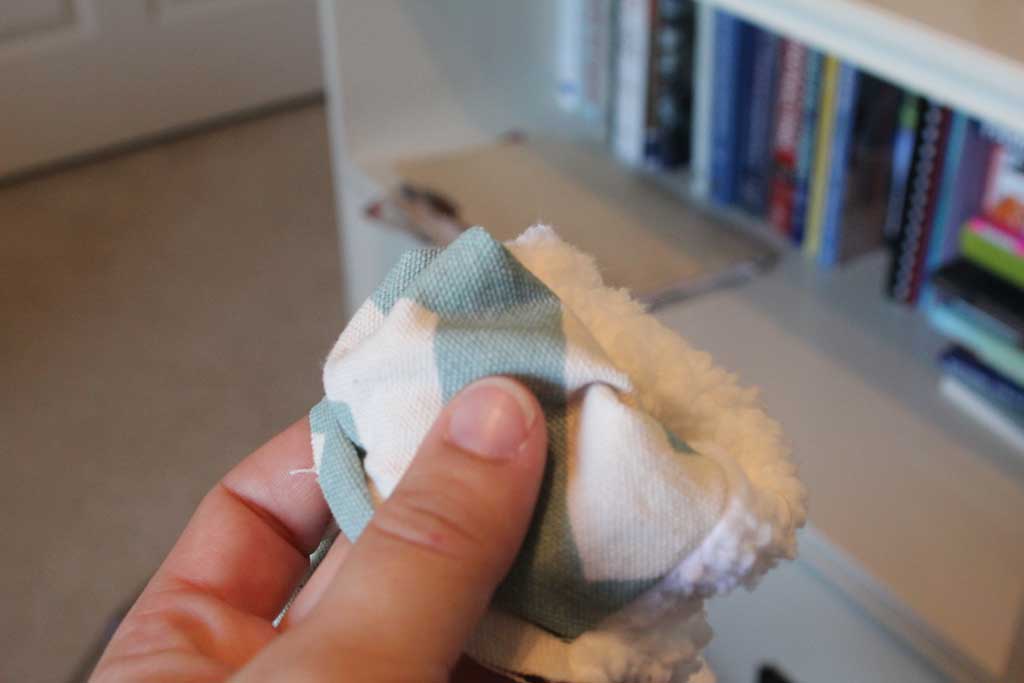
burpcloths4

burpcloths17

Once you have done this take something long like a stick and push it into the corners to make sure they are sharp.

burpcloths3

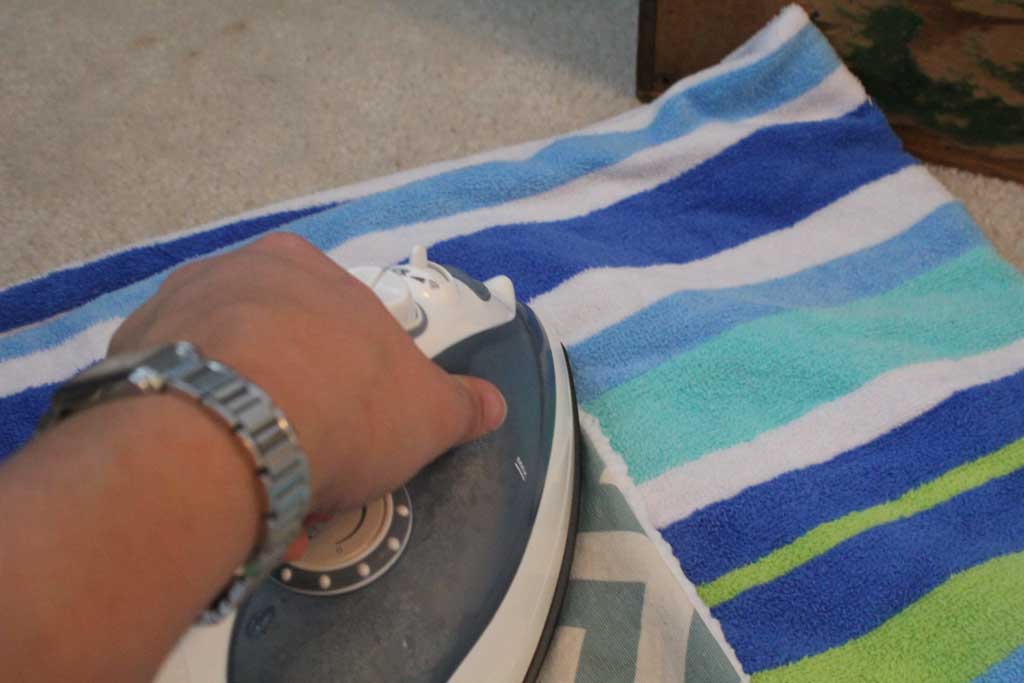
Now it is time to iron.  (I know I know… GROAN.  Trust me… I don’t even iron clothes… and for the longest time I didn’t iron my sewing projects, but trust me on this one… they look WAY better if you’ll take the 2 minutes it will take to go get your iron, plug it in and iron the project).  I just use an old beach towel on my floor instead of getting out my ironing board and it works just as well.  When you iron be sure to fold the edges in on the spot where you turned your fabric.  You are going to close it up soon by top-stitching, and it will be easier if you have ironed it down like it will look when it is done.

burpcloths2

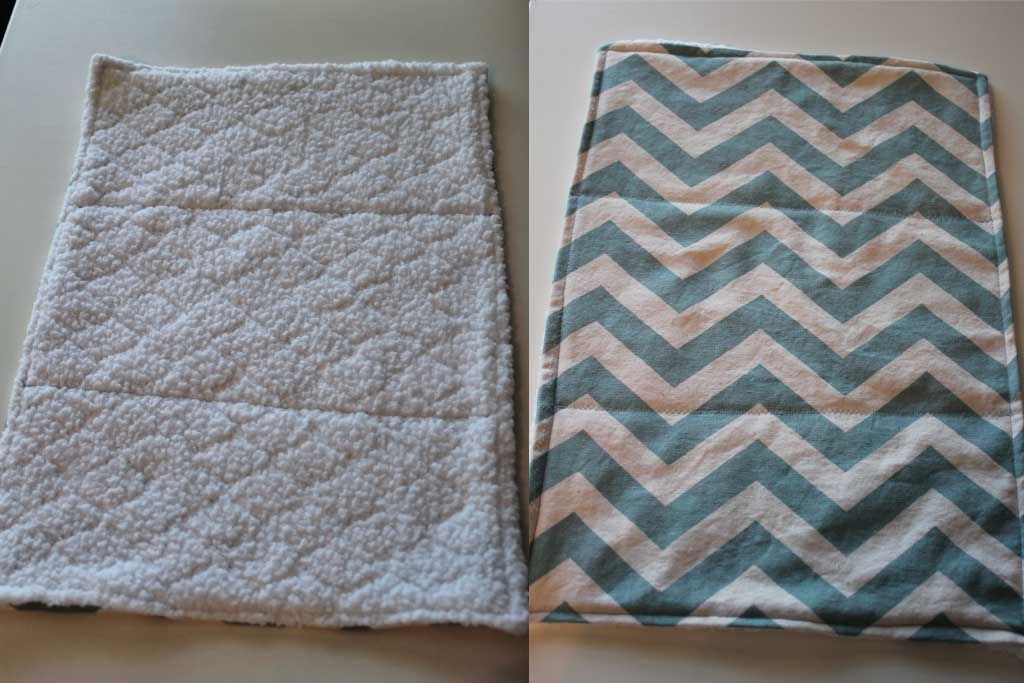
Now go back to your machine and do exactly what you did before, except this time on the right sides of the fabric.  Leave about a ¼ seam allowance and start in one corner, backstitching at the beginning and tracing the edge of your project with thread.  And again you will treat the corners like you did above, except when you get to the end of the project this time, don’t leave a gap.  (I also don’t start at the same corner that I did before so that my “gap” that I am sewing closed doesn’t end up at the edge) You are almost done; it should be looking a lot more like a burp cloth now! The last step is to sew them into thirds.  This is for two reasons 1. So they will keep their shape even through several washes and 2. So that they fold nicely into thirds and a bonus third reason… it looks cute!

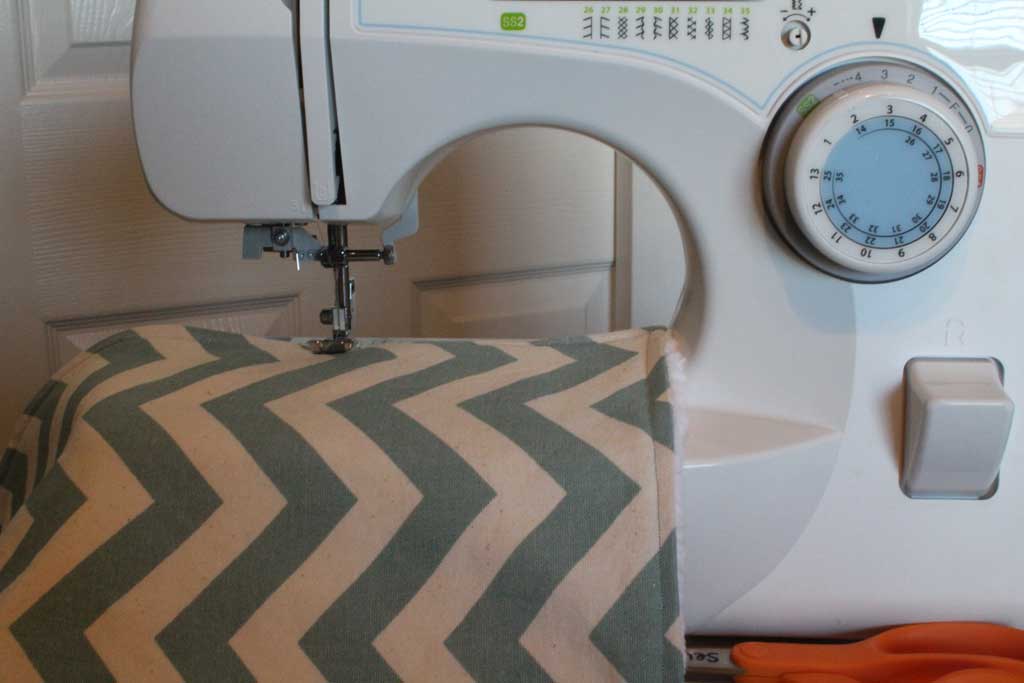
I move my sewing machine to a zigzag stitch.  On mine that means moving the dial to stitch 3 (look at your pictures on your machine, yours might be a different number).  I’m not a perfectionist, so I just guess at where 1/3 of my cloth is, and if I’ve cut them to the same size of 18”x12” one third is conveniently when I have the edge of the burp cloth against the body of my machine like so:

burpcloths1

With a zigzag stitch you can make it wider by using your stitch width dial (check your manual to see where yours is located), but I like mine about in the middle.  I back stitch at the beginning and the end of my line.  Once I’m done with that one, I flip it around and do the other side. This is what it looks like when its done (front and back):

BurpCloths19

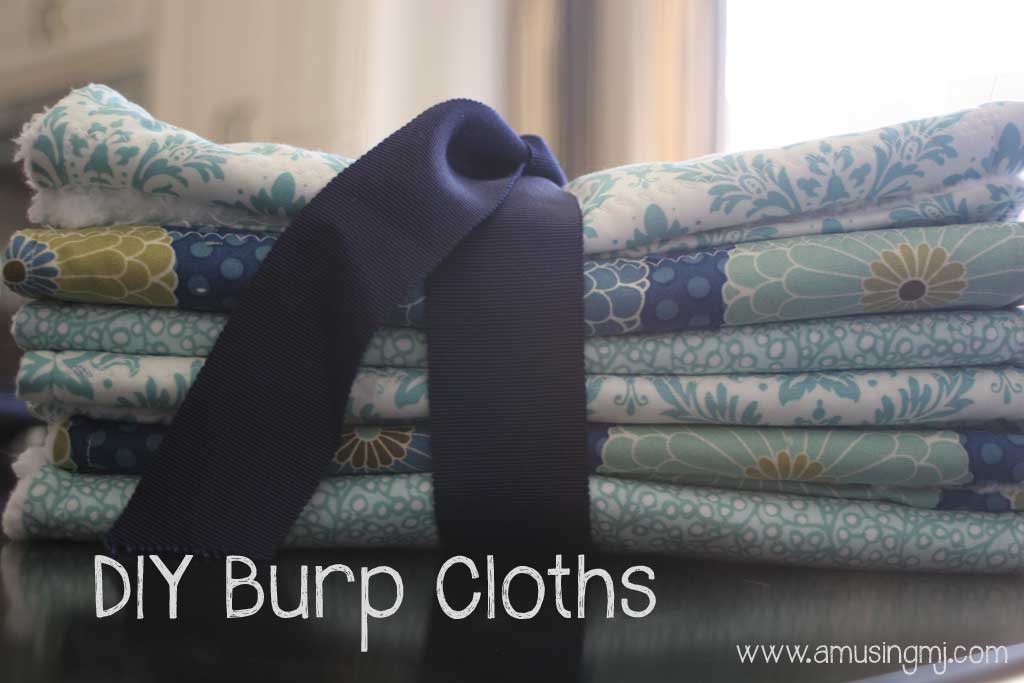
Now you are done! These have gotten rave reviews from my best friend’s son who is now a little over a year old and carries them around with him everywhere.  His Instagram pictures are like playing Where’s Waldo with his burp cloths. I think they make the perfect baby shower gift, I don’t even usually wrap them, just tie them up with a bow!

burp-cloths

The Ladies in Red

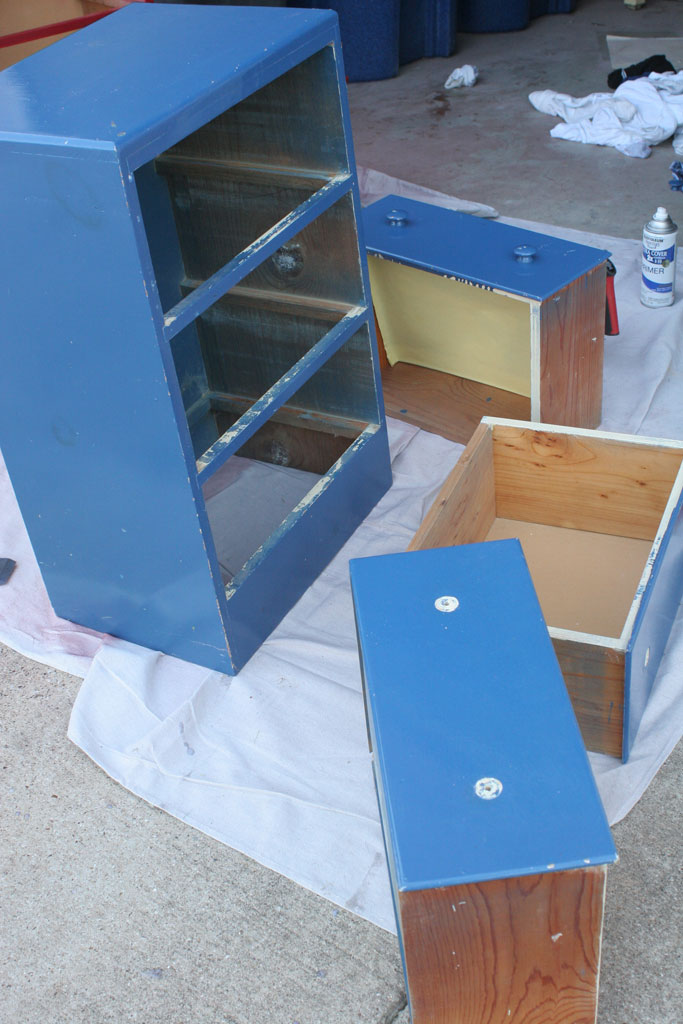
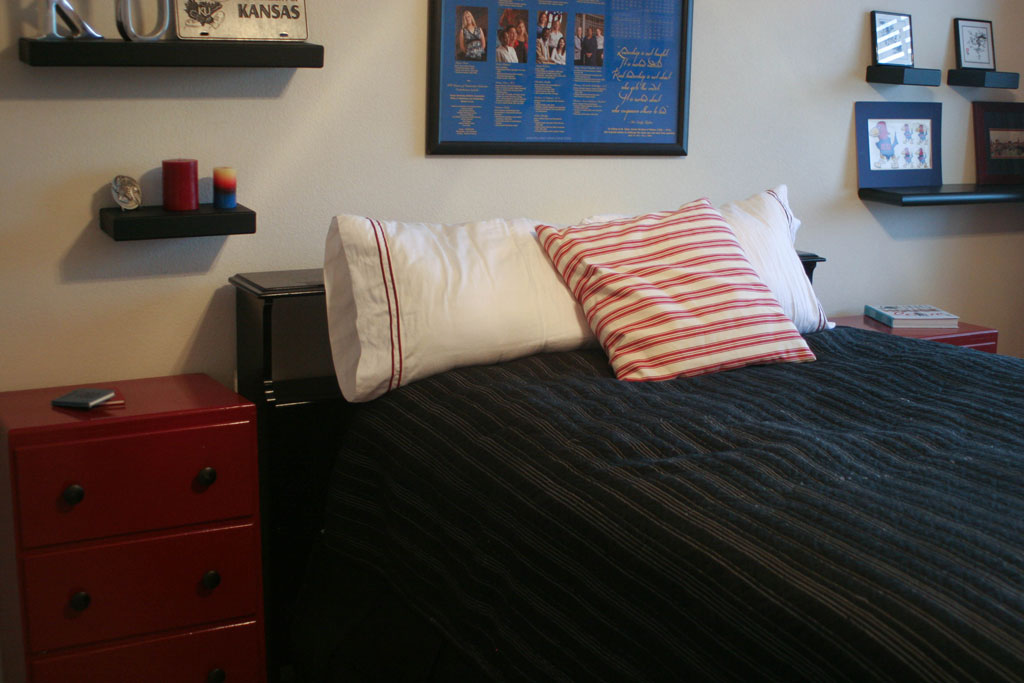
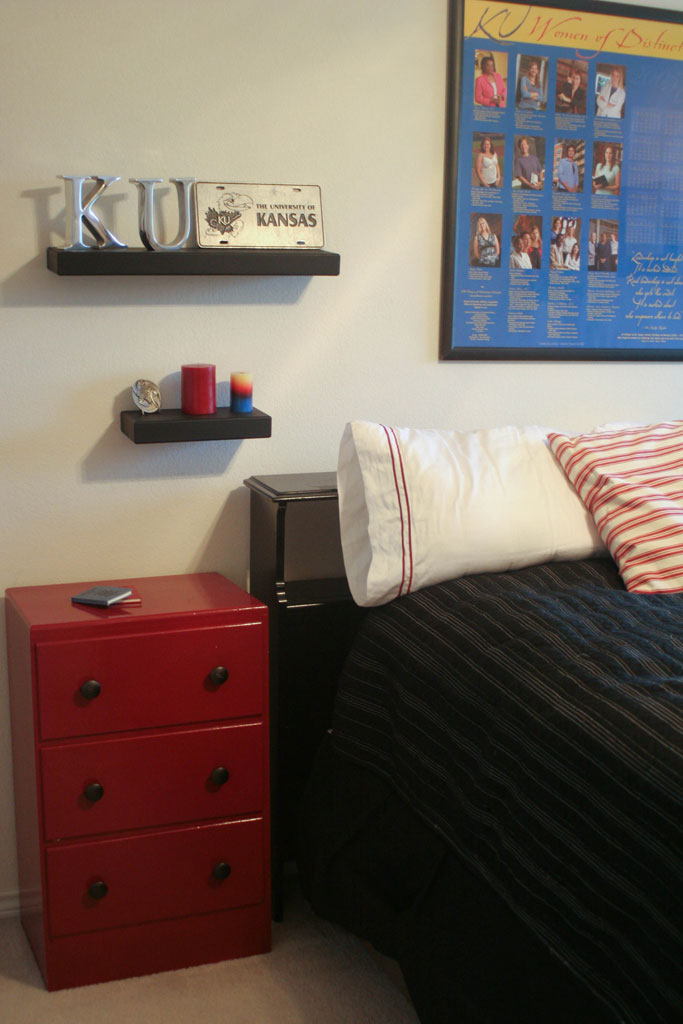
Back in the day, my great grandfather did a little bit of woodworking and a few of his pieces are still floating around in family member’s homes.  Two of them were small twin dressers which had been separated, but neither were being used anymore. My aunt had one she was willing to get rid of and my mother had another in her basement that wasn’t being used.  So I decided these two would be perfect side tables for my guest room (additional storage for the win!).  My aunt’s had been painted a creamy white color and my mom’s a blue one, somewhere through the years. So I decided these two needed to be spruced up in a matching spray paint before they made it into the guest room.

Here’s my super fast tutorial on how to spray paint a piece of furniture (ps… if you haven’t used spray paint in a while… that stuff is magical… I think its come a long way in the last ten years).

  1. Remove hardware and tape down/cover any parts you don’t want spray painted
  2. Lightly sand (with around 150 grit sand paper or sanding block)
  3. Prime
  4. Spray paint LIGHTLY a first coat
  5. Add second LIGHT coat
  6. If necessary, add a light 3rd coat

And so you can see the steps in action:

Step 1: Remove the hardware and cover any areas you don’t want painted.  The paint jobs on these before had not been all that careful about where the paint went, so I didn’t cover any parts of my drawer, I didn’t mind if the sides got some red paint on them.

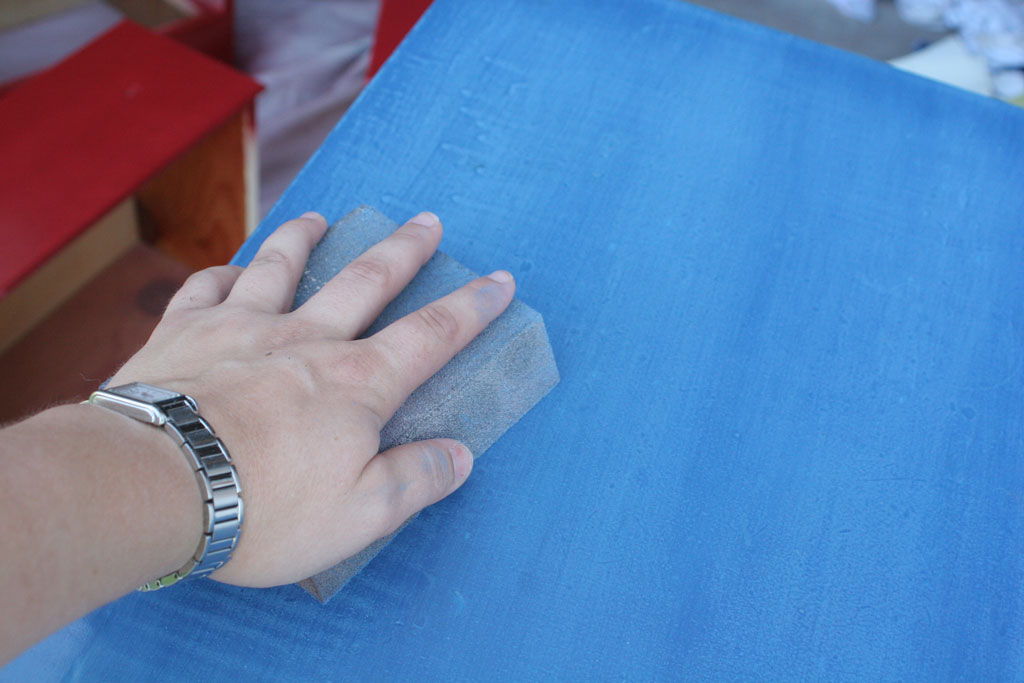
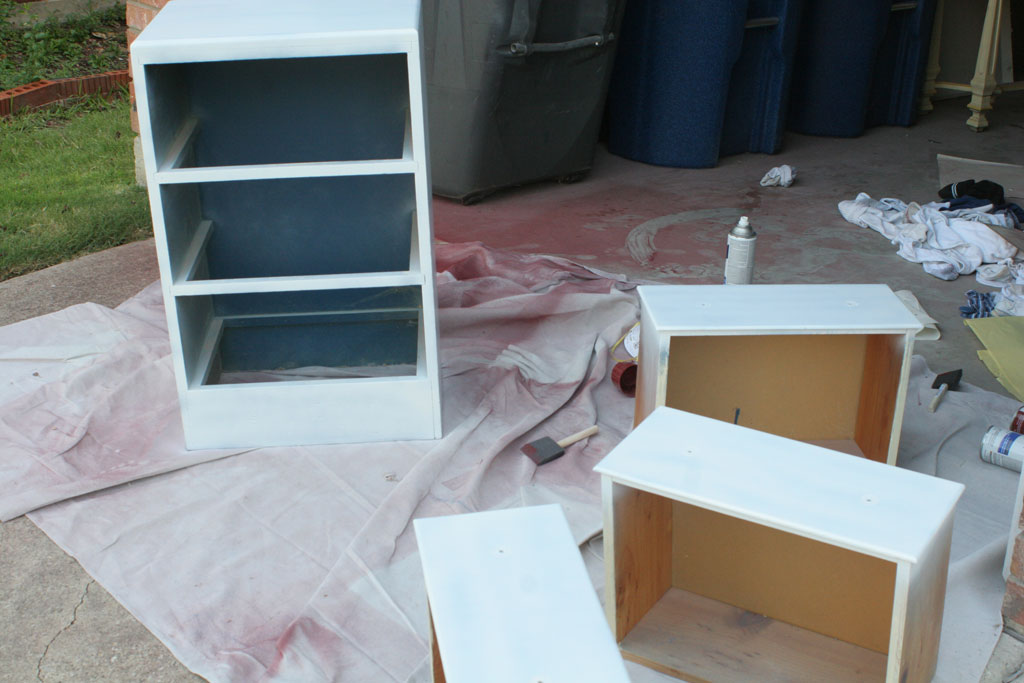
side-dresser-bef1 Step 2: Lightly Sand- I use whatever I have on hand, but somewhere around 150 grit sand paper or a medium grit sanding sponge.  You want to take off a little bit of the sheen, but mostly just rough it up a bit.  (WARNING: If what you are sanding was painted prior to 1978 you should check it for lead paint.  IF it has lead paint DON’T SAND IT. Sanding lead paint releases toxins that you don’t want to release.  If that is the case, just skip this step and go straight to priming.) side-dresser-sanding Step 3: Prime it- I usually use Rustoleum’s Spray Paint primer in white.  You can use their dark gray primer if you are painting it a dark color, but I’ve never had a problem using the white.  You’ll see below I paint these a fairly dark red it had no problem covering the white primer in 2 coats. Check out steps 4 and 5 for some generic spray painting tips that are good to know regardless of what step you are on!

side-dresser-primer

Step 4 and 5: If this is your first time painting something, here are a few of my most helpful tips: 

  • Spend 5 bucks one time on the extra spray paint trigger handle… you can use it forever and will save your finger from getting that very attractive line of spray paint on it (not to mention its way more comfortable).  You can see it on my paint can in the pictures below. WORTH. EVERY. PENNY. 
  • You should always keep the can 6 to 12 inches away from your piece when spraying
  • Start spraying just before your piece of furniture (so the first seconds go into the air) and JUST KEEP MOVING.
  • Your first coat should barely cover the piece… it’ll look splotchy and incomplete. THATS OKAY. You are going to add a second coat.
  • On the second coat, treat it the same as the first coat, keep it moving, and spray lightly to avoid drips
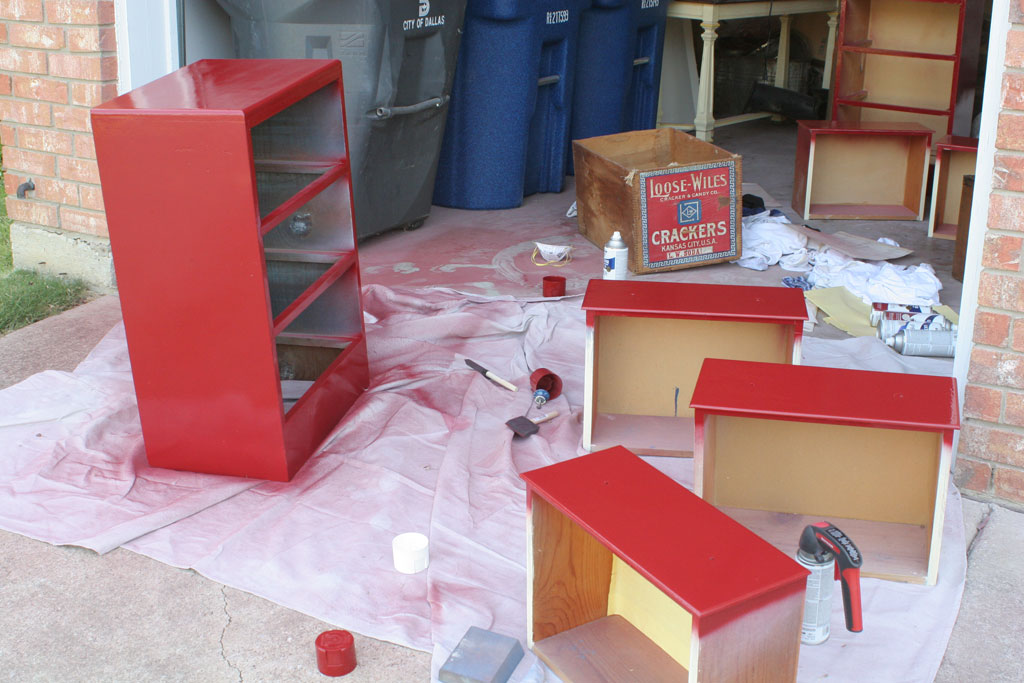
  • If it still isn’t covered or doesn’t look even, do a third light coat.  side-dresser-red

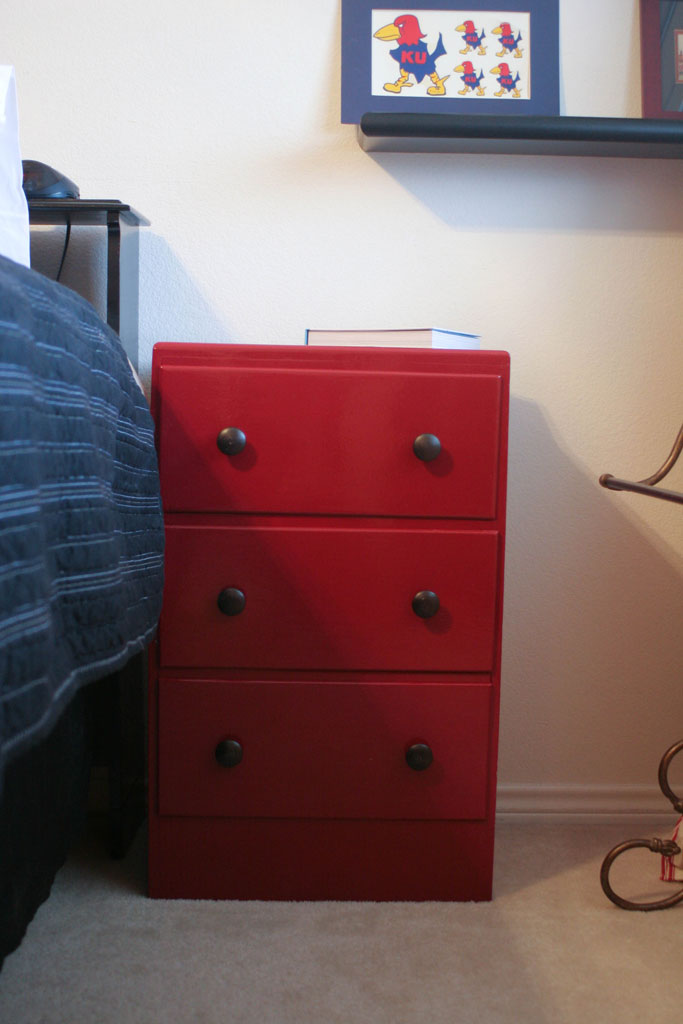
Since I actually did this project pre-blog I don’t have a picture between the two coats, but you get my gist. I used Rustoleum’s Colonial Red spray paint in Semi-gloss.  Its one of my favorite dark red colors.

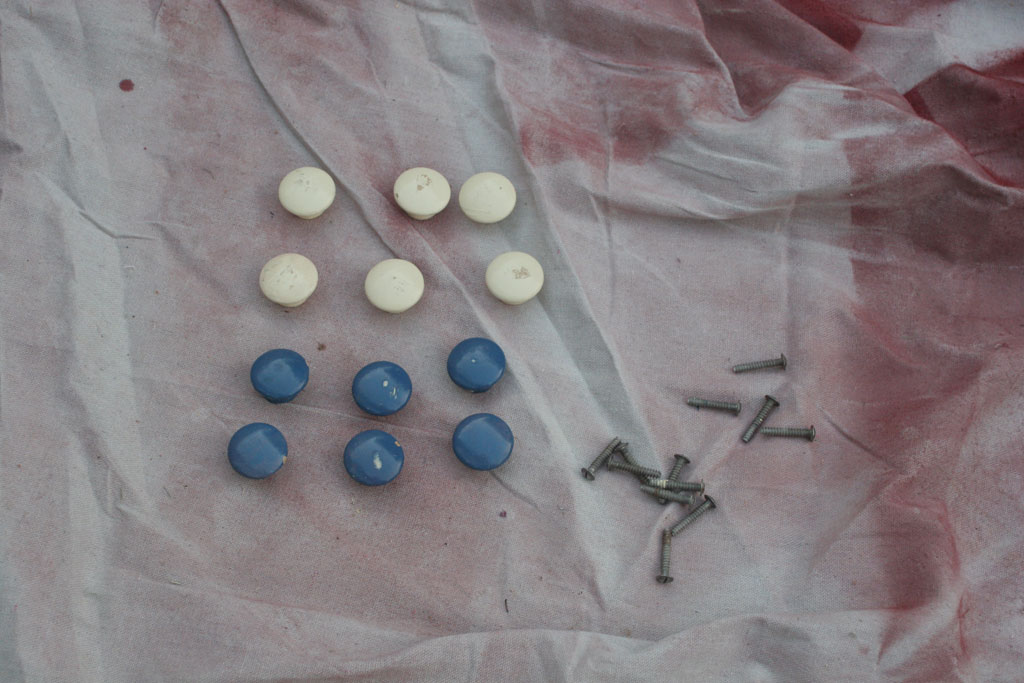
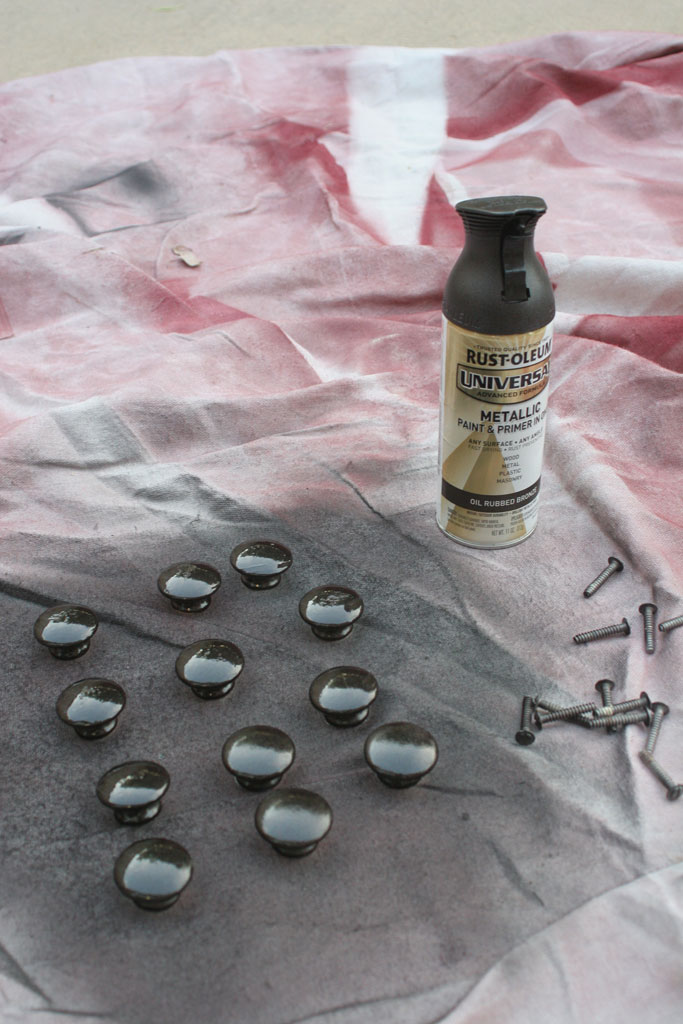
I didn’t want to go out and buy new hardware for these dressers, but I felt that the wood knobs in the same color looked a little cheesy, so I decided to paint them with a metallic spray paint Rustoleum’s Oil Rubbed Bronze.  I followed the same procedure I listed out above, just this time I didn’t prime since it is paint and primer in one.

side-dresser-knobsbef side-dresser-knobsaft

I haven’t shown this room on the blog yet, but here they are in action in the guest room!

  guest-room-dresser1 guest-room-dresser guest-room-dresser2

Voila! Cute little matching side dressers!